Showing posts with label fireplace. Show all posts

Saturday, October 17, 2015

Our House is on the Market!

So I didn’t really get to talk about this yet, so here it is.

We love our house so much. We love its location – great street, great yard, great area, close to stores, etc etc. We love the house…after all, we’ve been customizing it to our tastes for 6 years now! I love its solitude. :)

But things change, as always. My parents built a great house when I was finishing college, also in a great area, and on a piece of property that’s been in my family for 75 years. (Isn’t that cool? That doesn’t happen a lot nowadays.) My mom doesn’t want to live in that house by herself any more. At first, we thought we’d build her an in-law suite at our house, but when we looked at the costs and amount of work, we started to realize that making some changes at her house would make more sense, and we’d move in there.

It’s going to be crazy. Mom: you and I better get along! But it will be great for her to be near Porcupine. And that house has a lot of great positives, too. A different kind of great location – very kid friendly. It’s a much newer house, so is better insulated, more efficient, etc. We’ll still be doing remodeling projects to fit our new family and lots of fun redecorating! And I get to design and build a whole new sewing room…mmmmmm…I’m sooooo excited!

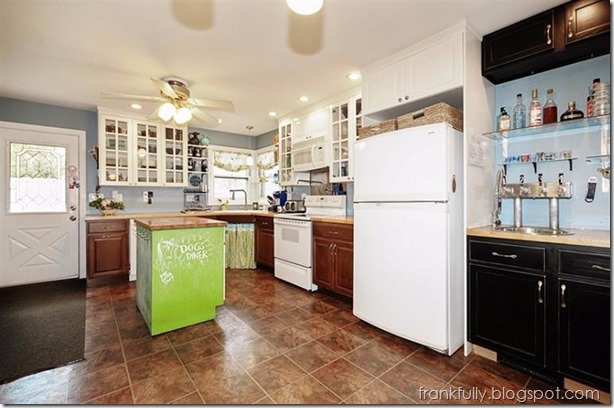
For now, here are the cool pro-photos of our house that accompany its online listing. (I will update our “house tour” with pictures I take myself!)

 front living 1 living 2 living_kit living_kit 2 kitchen bedroom bathroom 1 bathroom 2 nursery

Don’t you want to buy my house? ;)                  

Monday, February 11, 2013

What Color Should I Paint This Cat?

Yesterday, in my photos of the living room, you got a sneak peak of my current attempts at mantel styling (oh wait, there were also sneak peeks here and on Facebook).  I’m definitely still working on this one…playing with frames and accessories, thinking of staining this awesome mirror an ash brown…just normal stuff I like to think about :)

DSC_0959

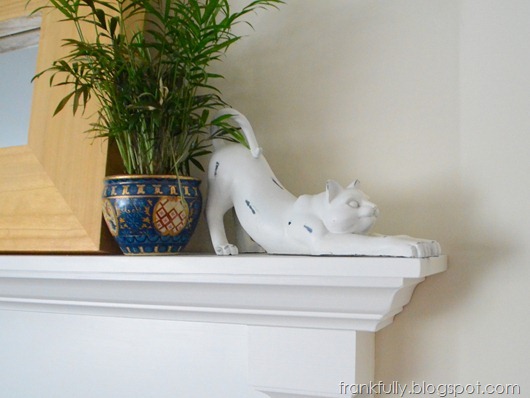
But I think the most important question right now is, what color should I paint this cat?

DSC_0963

I’ve had it for ages, and while I was always tempted to paint it, until now, white seemed to work wherever I put it. But now it’s just getting lost in all the other white/beige around it. 

I could put something behind it of course…what do you think? Tack a wall hanging up back there?

Or paint it. Opinions? A fun aqua? Some sort of blue? Gray? Oil-rubbed bronze? Some other color entirely?  Give me your thoughts!

Wednesday, January 30, 2013

Frankfully on Facebook!

Well, it seems I’ve created a Facebook page for my little ol’ blog.

I think it’ll be good for sharing projects in progress and updates that aren’t quite big enough or blog-worthy enough yet (not that I have really high standards for that!) :)

So, come on over to Facebook and “like” me to see updates!

Here are a couple of Frankfully photos/updates from Facebook/Instagram :)

I’m working on some mantel styling…and when I actually have it done/close to done, I plan on posting it here on the blog.  But in the meantime, here’s a sneak preview.

mantel_styling

I’m also obsessed with (and plan on posting about) chalkboard labels and the amazing chalk pen.

sugar_creamer_chalk

So, there! Hop on over to Facebook and like my page! :)

Thursday, December 20, 2012

Finishing Touches on the Mantel

I’ve actually been finishing some projects. What is going on here?  (I guess the holidays and upcoming New Year’s celebration are helping kick my butt into gear!)  First the Maligayang Pakso sign got done in one day, then this mantel stuff.  I’ve also been doing other little things finally, that maybe I’ll group into one post.

So last time I left you with the mantel, it was looking pretty spiffy, but I just wanted a few last additions to really make it look well-planned and neatly finished (neither of which it was! ha!).

Here’s what I came up with!

finished mantel

See my cool corbels under the shelf and tiny detail trim on the tile?

Little things, I know, but just finishing touches.

Here’s where it was last time I posted about this project:

mantel in progress

I love the look of the corbels and the detail trim just meant I didn’t have to try to do a crazy caulk job in between the tile and the fluted trim.

I actually began these finishing touches right after I finished the mantel, but some snafus (as always) came up and set me back a bit.  I started by going to Lowes and finding the trim and corbels.
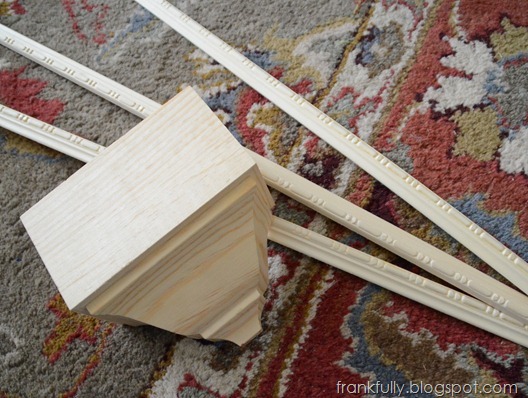
corbels and trim from Lowes

I gave them all a coat of Zinsser Smart Prime and then a couple of coats of Benjamin Moore Advance in Simply White, the same paint I used on the pantry and rest of the mantel.

But then, the grain had raised and was showing really badly on the corbels. The difference was so great, that when I sanded them down a bit, they looked like this:
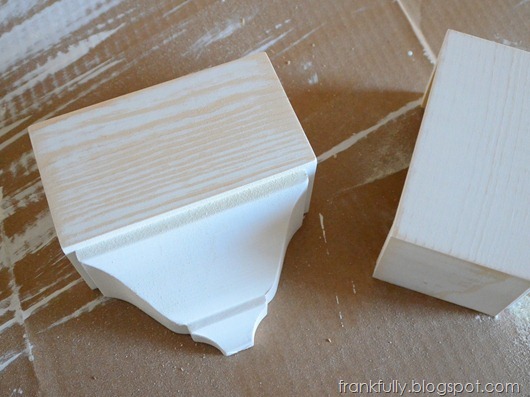
wood grain in the corbels

It’s not that I don’t like the look of wood grain under paint, but nothing else on the mantel is showing grain, so I just wanted the overall look to be consistent. So I primed, sanded (with 220 grit), and primed again, and sanded again a few times until I thought it all sort of smoothed itself out. I gave the corbels another coat of paint, (sanded a bit more), and painted on a second coat before they were ready to hang.

In the meantime, I hung the small detail trim, but my attempts to keep the nails from hitting the tile (or something hard under there!) didn’t quite work out, because I had 4-5 nails that looked like this:

DSC_0260

Yeah, that nail totally curved as it went in and came back out.  Because they’re just 18ga, I was able to cut them off with a pair of lineman pliers as close to the wood as possible, then used a nail punch set to sink them into the wood. I used wood filler to fill all the holes.

To attach the corbels, I first nailed little 1x2 scraps of wood to the top plate of the frame, then attached the corbels to the wood.
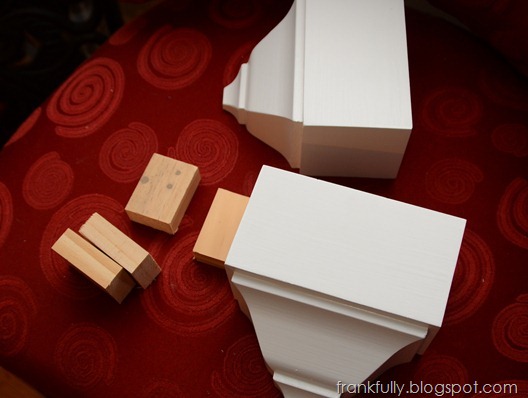
DSC_0732

I didn’t get pictures of the process because of course the 2 corbels had different measurements on the inside (the support braces inside were in different places) and I only measured 1 corbel when I cut my little blocks of wood. So I had to say some bad words as I was putting them up instead of taking photos.

But once all the nail holes were filled, and all the seams were caulked, and a little bit of touch up paint was applied, I had a totally finished mantel that I am so happy with!  We’ll just look at it again. :)

finished mantel

It’s so clean and neat.  I’m excited to see and post about the mantel post-Christmas with some other kinds of art, etc. up there!

Do the finishing touches on your projects take as long and go as wrong as they do on mine? ;)

Wednesday, December 5, 2012

Christmas Mantel

I haven’t done too much holiday decorating, but after our stint downtown Chicago, I was totally inspired to start. I even made a Christmas craft!

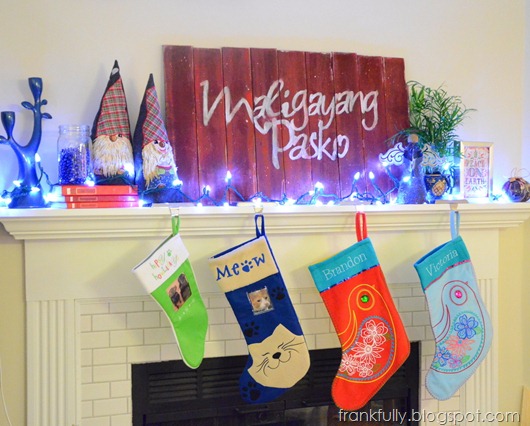
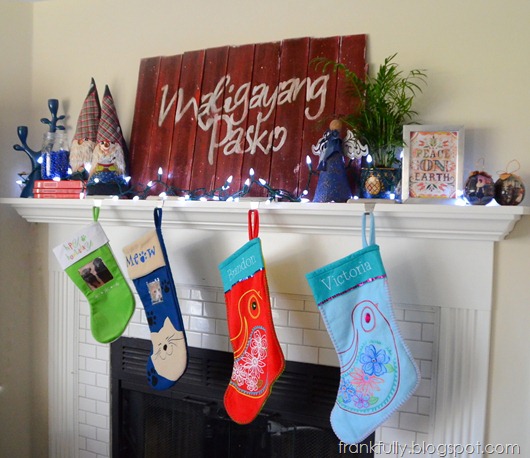
Here’s my Christmas mantel!

Christmas mantel

I made the “Maligayang Pasko” sign/décor the other night, and tomorrow I’ll show you how I did it!

Maligayang Pasko

“Maligayang Pasko” is how you say “Merry Christmas” in the Philippines!

I’ve got a very multicultural mantel (well, at least two cultures). :) Next to my Maligayang Pasko sign are two Swedish Santas that I embroidered and sewed together a few years ago.

Swedish Santas

They’re from a Husqvarna Viking embroidery disk.

I made a spot for Katie Daisy’sPeace on Earth” print (next to some Barbie ornaments).

Peace on Earth by Katie Daisy

And no mantel would be complete without stockings, in our case a hodge-podge of 99-cent clearance stockings from Old Navy, which I embroidered with our names, and some removable-picture pet stockings that will hopefully last for many pets. :)

stockings

Before all this, I had just begun playing around, styling the mantel with my Spring in the Dunes print.  I was using various empty frames (well, filled with whatever the store had in them) and objects for height and scale.

trying out some mantel styling

But I’m pretty happy to leave that project until after the new year and enjoy this for now.

Christmas mantel

Now onto cleaning and decorating the rest of the house!

Saturday, November 10, 2012

Finishing the Fireplace, Part 4: Mounting the Mantel

I am all over alliteration!

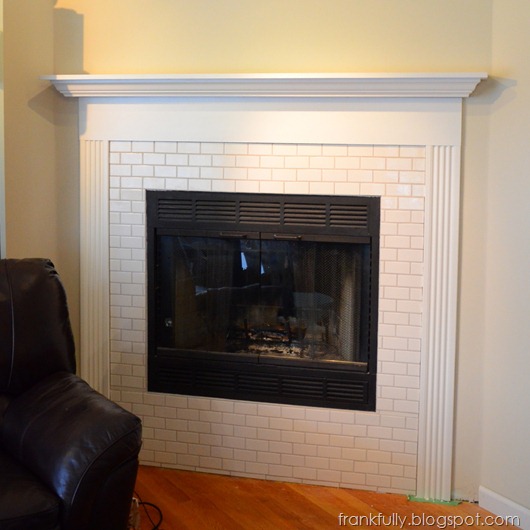
Don’t we just want to see the good stuff first?  Here is the gorgeous new fireplace and surround.

new fireplace mantel and surround

I’ve still got a few finishing touches (of course), but it is basically complete! And I am so happy.

So here’s how we mounted the mantel shelf.

My awesome cousin works for FastenMaster, so he’s totally turned us on to their products and we’re sold! They’re easier to use than lag bolts and just as strong. We use them for mounting everything from our TV to…well, our mantel!

Fastenmaster

We ended up using these 6” HeadLoks to screw a 2”x4” into the studs above the fireplace. We used some scraps of mantel to keep the 2”x4” the right distance from the surround.

mounting the 2x4

Then I found an old piece of ranch baseboard to make up the 3/8” difference. (The inside of the mantel was 1 7/8” and a 2”x4” is only 1.5”.)

mounting the 2x4
(Here’s Brandon demonstrating the ranch trim.) :)

And here’s a close up of the trim sitting on top of the 2”x4”.

mounting the 2x4

We held that in place with some wood glue and a couple of 18ga nails from our air nailer.

After testing the board’s ridiculous strength, it was time to mount the shelf!

mounting the mantel

I just slipped the mantel over the boards for a nice, snug fit!

Then I remembered that maybe I should center this shelf. So I took some measurements and slid it around accordingly.

centering the mantel

Then I secured the shelf with about 4 – 2” screws on top (they’ll pretty much never be seen, since the shelf is high and will soon have stuff on it) and some brad nails up through the bottom.

And Voila! Let’s look again.

new fireplace mantel and surround

I still need to fill the gap between the tile and the molding, either with some small trim or caulk. And I made add a little somethin’ somethin’ to the top board. But those things are really just tiny compared to this whole project! 

(Oh, and at some point, we do need something fireproof under the fireplace, instead of just the wood floor. But that’s a big decision and a potentially big project for a number of reasons, so for now, I’ll just be careful and/or find a temporary solution!)

Let’s go back to where we began:

our living room and fireplace before

This is how we lived since then:

fireplace in progress

And now:

new fireplace mantel and surround

I can’t wait to start decorating, so we can get some real “before” and “after” shots! I’ve already got a frame and ordered some artwork…  ;)

(Read the rest of the fireplace saga here.)

Friday, November 9, 2012

Finishing the Fireplace, Part 3

The next step in the great fireplace project was to bring all the mantel parts inside for priming, painting, then installation.

I primed the base of the mantel shelf and the top side of the mantle shelf with Zinsser Smart Prime.

DSC_0733

Then, I flipped it over, and filled the gaps/seams with some more Power Grab Molding Adhesive…I don’t know, I just started to get worried, and thought “better safe than sorry.”

DSC_0739

Then I glued the base to the top shelf.

DSC_0742

I let it dry for a few minutes, then crossed my fingers and flipped it over, so I could see my work!

DSC_0745

Then I piled a bunch of books on top while the glue dried.

DSC_0748

To install the shelf, I planned on mounting a 2”x4” to the wall, and letting this opening in the back of the mantel slip over it, sort of like a floating shelf. Of course, this opening is 1 7/8” tall, so I had to do some thinking, since a 2”x4” is only 1.5”.

But while I was finding something to add to my wall-mounted 2”x4”, I finished priming and putting a first coat of paint onto the unit.

DSC_0792

And here is where I’m going to leave you hanging.  :) Just like I had to wait for the paint, to dry, I’m going to make you wait till tomorrow to see the finished product! ;)

Friday, November 2, 2012

Finishing the Fireplace, Part 2

When last I chatted about the fireplace, I was all in a tizzy over having my mantel materials.

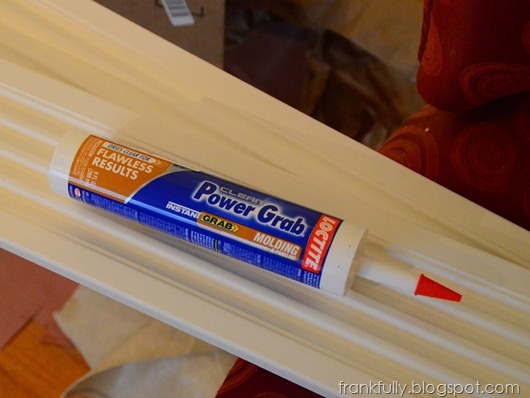
Putting together the surround was easy. I’m no woodworker, so I was careful to do one step at a time, and take measurements carefully before each new cut. First, I measured the height for the fluted MDF molding that would form the 2 sides of the surround. I cut them to length with our miter saw, then used Loctite PowerGrab Molding adhesive on each piece.

Power Grab molding adhesive

mantle surround in progress

I tried just using painters tape to hold the molding in piece, but it wasn’t quite happening. So I crossed my fingers and got out my 18 gauge pneumatic nailer and little air compressor to see if they’d penetrate the concrete backerboard that’s behind the molding, and it worked! Just a couple of nails in the top, middle, and bottom held the board in place while the glue dried.

mantle surround in progress

Then I measured the final finished width of everything before cutting my 1”x8” board for across the top.

mantle surround in progress

After rave reviews of Zinsser’s Smart Prime from Young House Love, I went to a local Benjamin Moore dealer to pick up a gallon. (It wasn’t available at Menards or Lowe’s.)

Zinsser Smart Prime

I got it because while I love the great fast-drying and stain-blocking properties of all Zinsser primers, this one is supposed to be self-leveling/smoothing, so you’ll see less brush strokes/roller marks. So far, I must say I’m extremely pleased, but I’ve been using it on raw wood. I’ll keep you updated as I use it on other projects around the house.

mantle surround in progress

After priming the top piece, I wanted to let it dry for 24 hours. Although you can topcoat the Smart Prime in a hour, the can says to let it dry longer for better stain and tannin blocking. I don’t often see tannin from pine bleed through, but I have before and wanted to take the extra precaution so I wouldn’t have to repaint this project later.

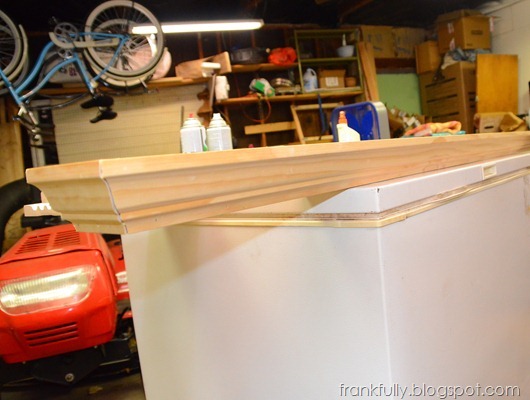
So I got to work building the mantel. My plan was to use the 1”x4” as the bottom of the mantel, cover it with the crown molding, that would then hold up the 1”x8” shelf. Simple enough, except that I have never worked with crown molding before.

To miter the outside corners of the crown molding, I Googled around and read what I could, then I kept this eHow video up, as well as this reference page from DeWalt tools to guide me along. Truthfully, though, it was  lot of trial and error. And really, I have no idea how I ended up successfully getting my corners to (pretty-much) match up, so I can’t give you tips. But it worked, and with a little bit (or a lotta bit) of caulk, they’re looking pretty good.

I didn’t really know how to photograph this, so here’s what I got. This is the 1”x4” inside the crown molding. (I used wood glue and 18 ga nails to hold it together.)

mantle shelf in progress

And here’s the outside, where you can see the 1”x4” is hidden.

mantle shelf in progress

Next, I began the tedious process of caulking up all my not-quite-matching joints. I ended up doing about 3 layers of caulk and a little wood filler. I’m normally not that worried about the details that no one will notice, but because this is the mantel and I want people to believe that it’s a fine bit of woodworking, I took the time to really cover my mistakes. :)

Stay tuned for more!

Related Posts Plugin for WordPress, Blogger...