Showing posts with label crafting. Show all posts

Monday, November 4, 2013

Thank You Cards

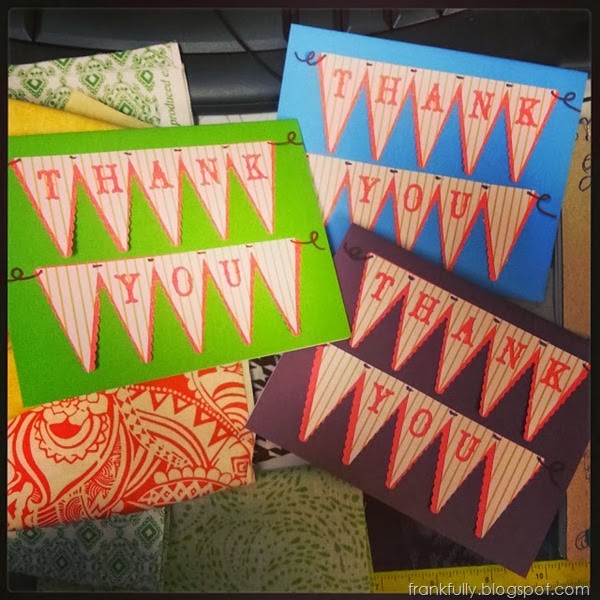
cricut country life thank you notes

Oh my goodness...so many things to post, and so long since I've posted last!

So a quick post for now: look at the cute  thank you notes I made! They were sort of a pain (aren't so many projects?) ;) but I am so happy with them!

I used Cricut's Country Life cartridge with its cute banner font and my trusty Gypsy!

What projects have you been crafting?


Wednesday, March 13, 2013

Cole’s Birthday Party!

I want to share a few pictures from Cole’s birthday party!

There was a LOT going on – and a LOT of friends and family over to celebrate, so I didn’t get as many pictures of the little guy in his various outfits as I would have liked. I’m sure his parents got plenty, and I’ll get some from them sometime. :) But here are a few good ones:

Cole got a new Radio Flyer wagon that he rode in with his cousins:

Cole in his wagon!

And he posed for me during his little meal after most people left:

Cole!

What a cutie. He looks so good in his sock monkey bib. :)

His mom, Cassie, had some great decorating details. The house was full of paper lanterns and balloons.

cute balloons and paper lanters

She painted some letters in coordinating colors to spell out his name.

awesome painted letters spelling out COLE

And my “happy birthday” bunting/banner was much larger than expected! But it hung across a big wall in their living room nicely.

the huge happy birthday bunting!

Here’s another angle, because I know you were dying for it.

Happy 1st Birthday Cole!

There you have it!

Happy 1st Birthay, Cole!

(If I get any more pictures of him in his shirts, I will share them!) :)

Friday, March 1, 2013

Happy March!

I think everyone’s naming their post today “Happy March!”

Well, it IS happy! Spring is on its way and I can’t wait. I can’t wait to see if the things I planted in the fall will grow. (I also planted a lot of daffodil and crocus bulbs, as well as more wildflower seeds!)  Never mind all the snow that’s been falling today…

In the meantime, my little nephew, Cole, just turned one!  We’re going to head to his birthday party tomorrow, and I hope to get some cute pictures of him and all the things I’ve been creating for him. :)  I’ve been sharing some previews on Facebook, so here are a few more now.  His party is going to be sock monkey themed, so I made some shirts and bibs…

sock monkey t-shirt
(letters cut out on the Cricut. Fabric from here.)

sock monkey and bananas bib
(embroidery from here! I adjusted the smile and ears a little bit.) :)

And a big ol’ paper banner/bunting that says “Happy 1st Birthday Cole!” on it!  I printed it all out on the computer (thank you, Microsoft Publisher), then my amazing friend Jessica cut it all out and strung it on some jute twine for me.  It’s too big to take a picture of until we hang it at the party, but here’s a preview:

sock monkey happy birthday banner bunting

:) :) :)

I am so excited about it!

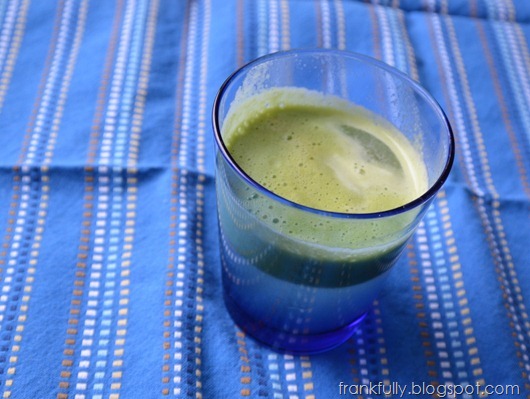
And “trying to be healthy” news, I bought a juicer on clearance at Aldi for $19.99.  I know there are nicer ones, but for the price, I couldn’t help but give this one a try…just to see how we like it.  I made my first glass of juice with a Granny Smith apple and a cucumber. It was pretty good! So, now I’m hoping to add fresh juice to our nutritional arsenal.

DSC_0174

Any juicing or baby-present making on your agenda? Are you excited for spring (even though it’s snowing?)

Friday, February 15, 2013

Paper-Covered Boxes for Fabric Storage

Last weekend, I spent a lot of time organizing and re-organizing and purging my massive stash of fabric.  And thus begins the great sewing room organization of 2013. :)

What I am doing is not nearly photo ready…I feel like I’m still getting a handle on how I want to really store all this fabric so it’s accessible…but I will share a small project that I did in the midst of this much bigger one!

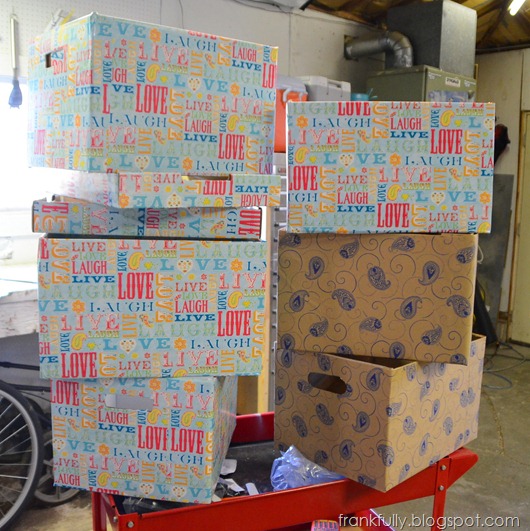
I covered Bankers Boxes with wrapping paper.

Hahaha. Not the most exciting, but the results are cute and practical.

paper covered bankers boxes with chalkboard labels

A couple of words on cardboard boxes for fabric storage: there are pros and cons of course. The cons are that cardboard isn’t as durable and waterproof as plastic bins. The pros are that these boxes are inexpensive, have nice handles, and are a really great size for being able to see and access what you have.  Bins that are too big can just become a mess.

So, that being said, I got these Bankers Boxes from Costco. They were $18.99 for 10 of them, so a pretty similar price to the ones I saw at Target, but they are much heavier duty. So much better than the other ones I’ve bought before. I am definitely going to Costco for more of these.

bankers boxes from Costco

I found this cute wrapping paper at Old Time Pottery for $1.99.  It’s a little too cutesy for my normal decorating, but I thought it’s perfect for my sewing room where I can be as girly as I want.  And the colors are fantastic.

bankers boxes from Costco and wrapping paper from Old Time Pottery

I took a few boxes out to the garage and covered a work surface with a trusty drop cloth.  I got out some spray adhesive that I got at a deep discount (at Bailey’s Discount Center!) and used a couple of spare pieces of cardboard as masking.

covering bankers boxes with paper, spray adhesive

I roughly measured my boxes overall circumference and the height that I wanted to cover with paper. I was able to cut the length of the wrapping paper in half, which meant I got to cover 2 boxes for every cut of wrapping paper I made.

covering bankers boxes with paper

I lightly sprayed the box with adhesive, carefully wrapped the paper around it, and voila!

covering bankers boxes with wrapping paper

Exciting, right?

I sprayed a little adhesive on the edges of the paper that I needed to keep down, and I used some clear packing tape to reinforce the handles and a couple of spots on the bottom.

I even papered a couple of the lids!  (I left a couple white, ‘cause it was easier and I’m telling myself they coordinate.)

covering bankers boxes with paper

I papered some old boxes, too, with patterned Kraft paper from the dollar store.

lots of bankers boxes decorated with fun paper!

As a final touch, I put some Contact paper chalkboard labels on and used my new favorite thing, my chalk pen, to label them.

paper covered bankers boxes with chalkboard labels

I wish this could be on some gorgeously organized shelves to show you…oh well, one day.

As for what’s in the boxes?  I used to have my quilting/crafting cottons sorted by color into boxes like these, but when I started to do less quilting, I threw them all together in one big plastic bin.

But it became a mess.

messy fabric in plastic bin

So I re-sorted the fabric for easier access and visibility.

fabric sorted by color into bankers boxes

I’ll have to get more boxes and keep sorting, but this is a great start.

Have you decorated any plain, ugly things lately to turn them into something easy on the eyes?

Thursday, February 14, 2013

Things I Love Thursday: Chalk Pens

So I’m a little late to the chalk pen game. 

Now that I think about it, I must have seen the results of this amazing product everywhere, but just wasn’t thinking about it, or realizing just how glorious it must be. 

Chalk Ink from Amazon

I love chalkboard stuff: paint, labels, you name it, but the chalk, of course, is messy. (There used to be a nice layer of yellow dust under my island where the dogs eat.)  Then I saw this post on Evolution of Style, and when I asked Jenny what she was using to write on her chalkboard labels, she said “chalk pen”!  I was excited.

She got hers at Hobby Lobby, I got mine on Amazon.  And ever since, I have been one happy gal. The chalk pen is inky and wet-erase, so it goes on like a paint marker and doesn’t wipe off as easily as chalk. And your writing is much neater and cleaner.

I shared a little sneak peek of the cute jars my friend Janis got me from Anthropologie: they are much cuter and more practical when written on with a chalk pen.

jars from Anthropologie written in chalk pen

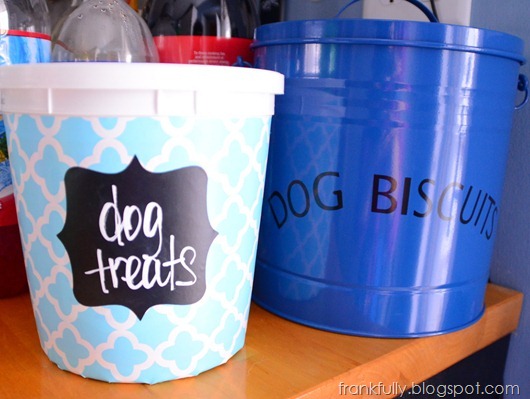
I covered an old Nestle Toll House container (the big one from Costco) with some Contact paper (from Marshalls), cut a Contact paper chalkboard label out on my Cricut, and labeled it with the chalk pen.  Voila, dog treat container!

dog treat containers! one with chalkboard label, one from HomeGoods

You know I love dry erase things, and for some things I still do love dry erase, but in the instance of these jars I have, my labels were just getting erased. The one on the right used to say “raw sugar” and the on the left used to say “hot chocolate” (that label was completely gone!).

jars with erased dry-erase labels

But now, with chalkboard Contact paper and chalk pen, I’ve got this!

blue kitchen jars with chalkboard labels

(The dark blue canisters above still have dry erase labels that have remained in tact!)

And my island! I still have regular old chalk around for when kids (or adults!) come over because it is totally fun to write on the island and erase and start over…but in the meantime, I’ve semi-immortalized (what would that really be? just “extended the life of”?) this cool horse drawing that a friend’s daughter drew and neatened up my “dog’s diner” with the chalk pen! Doesn’t it look nice?

chalkboard island written with chalk pen

I don’t know how those dogs are so messy when they eat/drink, but chalk on that side never lasted! But chalk pen is so far holding up great!

So tell me the truth, am I really the last person to have heard about chalk pens? Are you as excited as I was when I found out? Are you going to go buy one right now? :)

Friday, January 11, 2013

DIY Pretty Thermostat Cover

So, after all that work putting in a programmable thermostat, here’s how I covered it up. :)

"six impossible things" thermostat cover

It’s on hinges, so you can open it up and get to the thermostat!
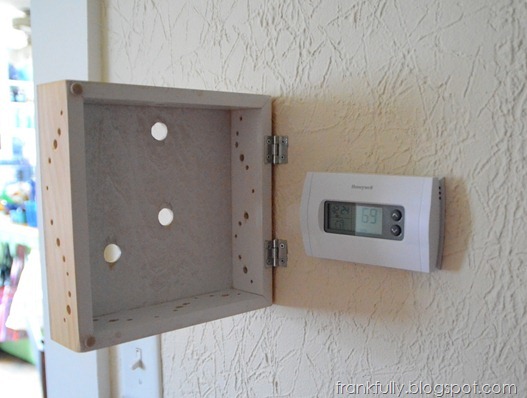
the inside of the cover, hinged to access the thermostat cover

I got the idea from this pin that was for an alarm cover.  I plan on making the hallway where this thermostat is into a gallery of artwork, and this new artistic cover will be the starting point. :) The pin used a canvas to cover an alarm panel, but I knew that the thermostat needed to be able to gauge the room’s air temperature, so I worked on something that I could drill holes into.

I’ve had it installed for about a month now, and so far so good with the thermostat and the furnace trucking along happily.

I was inspired by this paper cut from Etsy that I saw ages and ages ago. “Why, sometimes I’ve believed as many as six impossible things before breakfast,” says the White Queen to Alice, in Through the Looking Glass.

I started by finding this 8”x8” wooden “canvas” at Michael’s.

8x8 wooden "canvas" from Michael's

I printed out the quote several times in several sizes before deciding what I thought would look best size-wise, then taped the paper to the board and used the technique I found from this pin to “trace” the letters on to the board.

"tracing" the letters on to the wood

The pen leaves a light indentation in the wood which you can then follow with paint.

But first, I drilled holes where the ‘o’s would be to allow for airflow to get to the thermostat. I found that a 3/8” drill bit about matched the size of my ‘o’s.
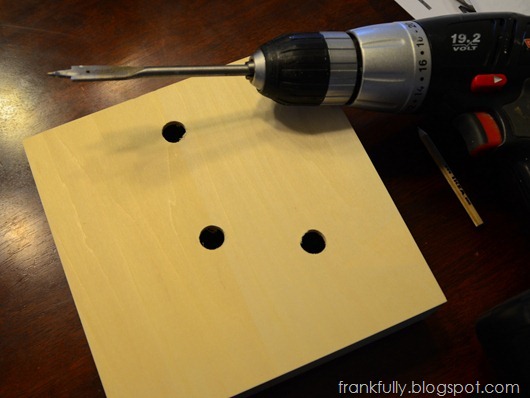
I drilled holes for the 'o's. I used about a 3/8" drill bit

Then I painted the letters.

painting the letters

I started out with white paint because I was so in love with the idea of the inspiration photo. I knew that the holes would be darker, but I just kept thinking how much I like the light look.

I wrapped some sandpaper around a pen to smooth the insides of the holes.
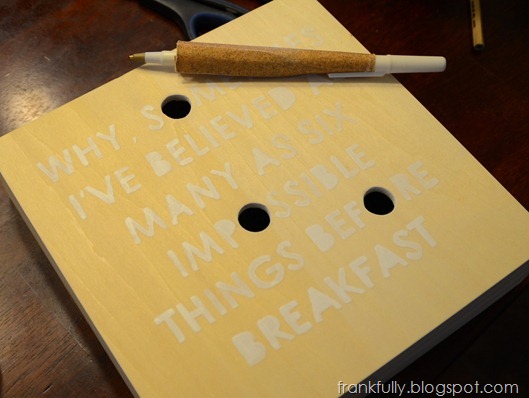
sandpaper wrapped around a pen to sand the inside of the holes

To increase the amount of air that would reach the thermostat, I drilled holes into the sides of the wood canvas. I lightly drew them out with pencil in a wavy pattern and used different sized drill bits to make the whole thing look designed and purposeful, not just that I’m trying to keep the thermostat working. :)

many holes in the side, in a wavy pattern

After sanding the sides, after a few coats of white paint on the lettering, I put about 3 coats of water-based satin clear coat over it for protection.

satin clear coat

I did a very light sanding (with 22o grit paper) in between coats and the results were phenomenal.  The whole piece is super smooth and well-protected, but the satin clear coat is so matte, you can barely tell it’s there. It didn’t change the color of the wood at all.

white lettering and holes

Doesn’t it look so cool?

I wanted to spray pain the inside of the box white, for protection and just in case it helped visibility of the thermostat in any way (white reflects light, right?). So I taped off all the holes (so the spray wouldn’t mist through onto the front) and went to town.

taping up the holes before spray painting the inside

tiny hinges from lowes

I bought these tiny hinges at Lowe’s.  They’re just 1” tall and I made sure they weren’t really wider than the thickness of the wood.

I placed them and pre-drilled holes. If I was fancy, I could have/should have notched the wood out for the hinges so they’d be flush, but I really didn’t want to take time for that step. :)

pre-drilled the holes for the hinges

It took me a minute and some trouble to really mount it level on the wall, and I just sort of trucked along and maybe said some bad words, so I don’t have pictures of that step. I will say I tried to make marks, level it, place one screw, level it, place another and so on. It turned out pretty good. 

the inside of the cover, hinged to access the thermostat cover

My one important tip:  since the screws for the hinges were so so tiny, much too tiny for any kind of wall anchor, I actually put wood glue all over the threads before I screwed them into the drywall, because I didn’t want them to just pull right out. I know we’ll be opening and closing this cover a lot. As we use this guy, I will tell you how the glue in the drywall holds up.

Anyway, after installation, I had this!

I loved the white lettering with the wood and the walls, but the holes didn't look quite how I'd hoped.

I loved the white letters on the light wood with the light wall. But I sort of hated how obvious the holes looked. I totally wanted to set up some tiny LED behind there so that the light would shine through (like above!) but let’s be real, Victoria. That’s ridiculous.

So I just had to re-think it. I decided to repaint the letters in a really dark blue or black. I ended up deciding on a sort of navy color, and the way the lighting is in the hallway, it really does look cool: it’s very dark, you can hardly tell it’s blue, and the holes blend much better.

"six impossible things" thermostat cover

So I actually unscrewed the hinges from the wood side, took it down and repainted it. My painting definitely got a little messier since I was painting 2-3 more coats over the white I already had, but it’s okay to be imperfect. And in the hall where you’re really not staring at it, it looks great.

And I’m really happy to have a new cornerstone for my future gallery wall/hall! Now I just need to start hanging the rest of the pictures!

What do you think? Are you willing to embark on this tedious process to cover up your thermostat? :)

Sunday, December 23, 2012

“Lincoln” Name Art

Thank you, Cricut, for helping me out with this project! It’s theoretically a simple one if you need a quick gift. (I say “theoretically” because you know these things never go as planned! But this one actually went pretty smoothly because I’ve been trying to learn my lesson and plan ahead.) :)
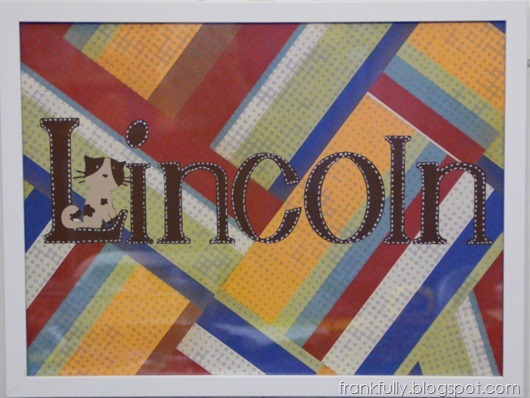
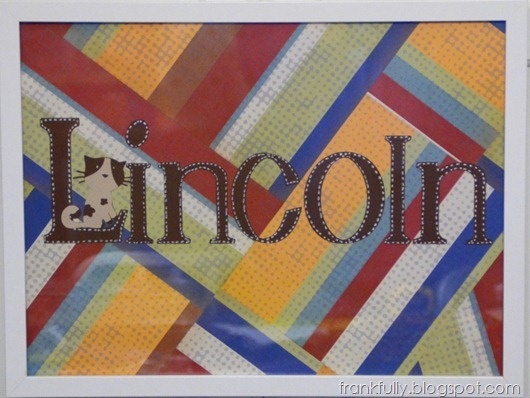
I used my Cricut to cut Lincoln’s name, placed it on some primary-colored background paper, and framed the whole thing! Cute name art for Lincoln’s nursery.

DSC_0129

When I make name art like this, the frame is almost always bigger than the paper I have to use as a background. In this case, the frame was roughly 11”x16” (or whatever size Ikea makes their frames) and the biggest paper I had was 12”x12”.  To make the background look purposeful and designed, I sort of cut up and pieced the paper back together in a new pattern (like quilting!).

piecing together background paper

I cut the letters out with my Gypsy and Cricut.

gypsy and cricut

I used the font on A Child’s Year. I love that it’s got an old school-book feel to it.  I also added a kitten from ZooBalloo. :)

a child's year font

One of the things I struggle with most when doing fun projects like this is making sure there’s enough contrast between the background and foreground, so I definitely try to test as much as I can (with dry-runs) before I start gluing things down!

I ended up using a white paint marker to draw on some “stitching” lines on the letters, just for fun.

white "stitching" lines

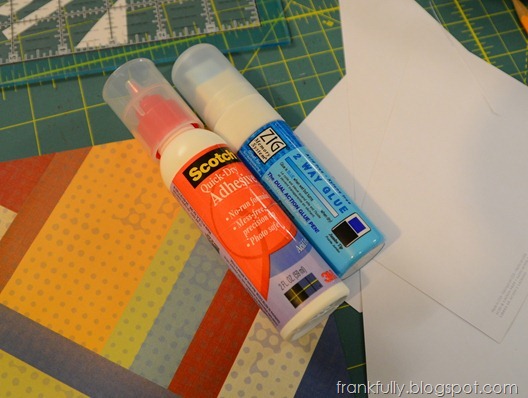
Speaking of glue, these are the two I use the most, and I’m pretty happy with them. Scotch Quick Dry Adhesive and Zig 2-Way Glue.

scotch quick dry adhesive and zig 2 way glue

Then I just added the kitten, popped the artwork in an Ikea Ribba frame, and voila!

DSC_0129

A couple of tips when using your Cricut(…that I did not follow when I made Lincoln’s alphabet bunting, leading to a less than stellar crafting experience.)

1.) Use a new mat and a new blade.  I know you don’t want to change these things out, and that they cost money, but trust me, it’s so worth doing. Cuts come out so much cleaner when the mat is nice and sticky and the blade is nice and sharp. (This is especially true for fabric, thick paper, and delicate paper.)

2.) Make notes as you use different materials.  There are a several different “cheat sheets” out there for cutting settings on your Cricut (I like this one and this one), but everyone is different, so it’s so helpful to make notes for yourself. I have a sticky note/label on my Cricut with settings for cardstock, fabric, regular paper, etc. (This is especially helpful when cutting different kinds of fabric! And something I didn’t do/wasn’t doing when I was making the bunting!)

3.) Size matters! The Cricut can cut just about anything, but shapes with more intricate details definitely cut out better at larger sizes. When I was doing the bunting, part of my problem was that I was trying to cut out some relatively complicated shapes in a small size and in fabric and without a new blade/mat combo. Just disaster! :) With this project, I knew I wanted to keep everything simple and large and it went very smoothly. :)

If you decide to try a cute gift-project like this, have fun! Share the details with me!

Related Posts Plugin for WordPress, Blogger...