Showing posts with label cooking. Show all posts

Thursday, October 22, 2015

How to Make Your Own Decaf Iced Coffee & Vanilla Syrup


keurig

Brian and I have tried various methods of making our own delicious iced coffee at home (to save a few dollars each morning!) and we've liked several, but here's what we're doing now.

In an effort to get some better sleep, we're using a lot more decaf. We still get that yummy coffee flavor and smell in the morning, but without the (for us) disastrous caffeine side effects. The Keurig is amazing, but when regular hot coffee hits all that ice, it just gets too watered down. But then I found these extra-bold dark-roast decaf K-cups on Amazon! Woohoo! Now we make fresh, delicious, perfect decaf iced coffee at home.

The other secret to our yummy iced coffee is my DIY vanilla syrup. After being too lazy to run out to GFS to buy another bottle of vanilla coffee syrup, I started Googling for a homemade alternative and found this post. I have tweaked the recipe to make a bottle-filling, countertop-friendly, no-refrigeration-needed version that has been serving us well for months now.

DIY Vanilla Syrup:


Ingredients -
-3 cups white sugar
-1.5 cups water
-1 teaspoon vanilla extract

Combine water and sugar in a 4-cup Pyrex measuring cup or some other microwave safe container. Microwave on high for 2-3 minutes. Remove and stir thoroughly. Add vanilla. Mixture may be cloudy, but as long as the sugar granules have dissolved, it will clear up as it cools.

I have been reusing my old vanilla syrup bottle, but I’ve reused a 750mL liquor bottle as well (for a simple syrup – the above minus the vanilla…great for sweet tea!) I’ve gotten this pump and this pump off of Amazon.

Perfect DIY Iced Coffee:


-1 extra bold, dark roast K-cup (regular or decaf) brewed with 8-10 oz water
-approx. 1/2 cup half and half or coffee creamer, to taste
-approx, 6 pumps vanilla syrup, to taste

Fill large (28 oz.) cup with ice. Add half and half and syrup. Pour in hot coffee and stir vigorously (with reusable straw!) till the whole thing is cool. Enjoy a little bit of morning heaven. :)

 
This isn’t the cheapest way we’ve found to make our own iced coffee, but lately it’s proven to be the easiest and tastiest! Is coffee a part of your morning ritual? Brian drinks his iced, even in the dead of winter!

Friday, April 19, 2013

Basil Cilantro Pesto

cilantro basil pesto

I want to eat this every night.

The recipe is from my new Veganomicon cookbook! (I have to find out about posting recipes from books. Are you allowed to do that for real?)
In the cookbook, it’s served with spinach linguine, which I didn’t have. I didn’t even have linguine, so I used penne and cooked some spinach with the pasta.  They also call for artichokes, which I didn’t have on hand, but it was so amazing as is!

The pesto is made with basil, cilantro, and almonds in a food processor or blender. The pasta is sautéed with thinly sliced red onions and garlic.  I added the spinach, too, and you sauté it all with the pesto.  It was so so delicious!  (Of course, I made it un-vegan by added some parmesan cheese on top!)

Are you cooking anything good this weekend?

Wednesday, April 3, 2013

Butternut Squash Bisque

Oh, no. More soup.

I know that’s what you’re thinking.

I’m thinking, what’s the difference between a regular old creamy soup and a bisque? I should Google that.

For now, here’s a picture of the butternut squash soup I just made, following this Martha Stewart recipe.

butternut squash bisque

I did about a half batch since my squash didn’t quite total 2lbs and it’s pretty delicious seasoned in the bowl with some salt and pepper.

Hopefully, I’ll be able to report on the dresser soon. Waiting for paint to dry is pretty boring.

I also realize that all my soup pictures look the same. I should really start watching/doing the camera classes I bought from Shoot Fly Shoot.

I’ll get on that.

Tuesday, April 2, 2013

Mushroom Zucchini Soup

It seems spring might actually be here finally, but the long winter kept me pretty excited about soup.  Well, I’m always excited about soup. :) So, here’s another recipe.

This soup is diary-free and pretty tasty.  I love my potato soup, and my roasted red pepper soup, but this one was good for a change. It’s pretty simple, and so nice and warm to eat. :)

mushroom zucchini soup

I tried making this recipe a while ago…and it turned out great, until I added the tablespoon of red pepper flakes.  Then it was just too hot for both Brian and me! So I tried it again, a little differently.

I got out mushrooms, onions, and zucchini.

yum! veggies for mushroom zucchini soup

Chopped them up and cooked them.

mushroom zucchini soup in progress

With a  LOT of minced garlic.

lotsa garlic

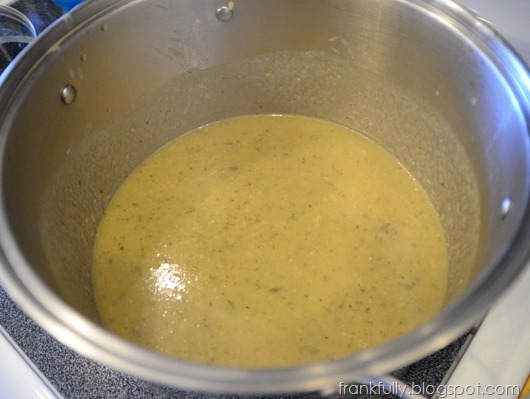
I added broth, let it simmer, then pureed the whole thing, to make a delicious soup.

mushroom zucchini soup, pureed

Here’s the recipe.

You need:

  • 1 Tbsp olive oil
  • 1 Tbsp butter (I was just being fun and using both. You could use one or the other)
  • 1 large onion (about 3” in diameter), chopped
  • 2-3 cloves of garlic (or in my case about 2 Tbsp of minced)
  • about 8oz (or more!) sliced mushrooms
  • 2 – 8” zucchinis, sliced
  • 1+ quarts of low sodium chicken stock (I did 1 qt. + 1 cup, because that’s what I had on hand!)
  • dash of seasoned salt (I use Lawry’s) and some salt
  • 2 Tbsp flour (mixed with hot water) to thicken, optional
  • dash of cayenne pepper
  • some fresh basil

mushrooms and zucchini

(Here’s the order I cooked it in, but you could do it differently. That’s what’s fun about soup! It’s hard to mess up…(unless you add too much hot pepper!))  :)

Heat the oil and butter over medium heat, then add the onions. Cook for about 5 minutes while you continue chopping. Add the garlic and mushrooms and cook for about 4 minutes while you keep chopping. Add the zucchini and cook for about 8 minutes. (Keep stirring!)

Add the chicken stock (you could use vegetable stock, too!), and add some seasoned salt and regular salt.  Bring to a boil (over higher heat) and then reduce to low heat (2 or 3 on my electric stove) and simmer for 20-30 minutes.

Once everything is soft, use an immersion blender to puree the whole soup.  To thicken it up a little bit, mix 2 Tbsp of flour into some hot water (so there are no lumps!), add to the soup, and let it simmer a little longer.  Add a dash of cayenne pepper for fun, and some chopped fresh basil for deliciousness!

mushroom zucchini soup

I love soup year-round, but in the winter it’s especially good! :)  Are you getting sick of soup or do you still love it like I do?

Wednesday, March 27, 2013

Super Delicious Veggie Fajitas!

These all-veggie fajitas are one of the most delicious things I have made lately. They’re healthy and they’re so good, that you really don’t miss the meat!  I  haven’t made anything too terrible in my healthy-cooking escapades lately, but this is the first meatless meal that Brian and I have both found 100% satisfying – something that we would eat even if we weren’t trying to be healthy!

best veggie fajitas!

I was inspired by my friend’s delicious smelling tacos last week, so I decided to try some home-made fajitas…and hopefully make them kind of healthy by using just veggies.  I browsed the web (of course) and found this recipe for fajita spice mix and this recipe for some ingredients and cooking tips and then I adapted it all for myself. 

Here’s what I did:

Veggies:

  • 1 large onion, sliced into big slices
  • 1 green bell pepper, cut in to 1/2” strips
  • 1 red bell pepper, cut in to 1/2” strips
  • 1 orange bell pepper, cut in to 1/2” strips
  • 1 medium zucchini (about 8” long) cut in half, then into strips
  • 10-12 mushrooms, sliced (I used a mix of crimini and button)

Fajita Seasoning Mix:

  • 2 tsp garlic salt
  • 2 tsp chili powder
  • 1 tsp paprika
  • 1/2 tsp onion powder
  • 1/4 tsp (or a dash in my case) cayenne pepper

I tossed all that stuff in a gallon Ziploc bag with some olive oil so all the veggies were nice and coated.

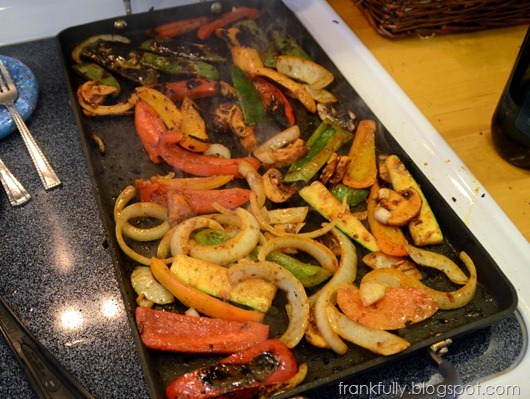
I heated up my griddle pan to just under high (8 or 9 on my electric stove) with some olive oil.  Then I proceeded to cook (and nicely char…nicely nicely charred) all the veggies.

veggies cooking on the griddle

All those veggies made a LOT of fajitas.  Brian and I totally overate and there were still plenty of leftovers…but that was good for us: easy lunches the next day!

Here’s the veggie pile beginning…like I said, they were very charred…and super delicious! (I was eating them right off the plate as I was cooking!)

yummmm...super charred veggies

To serve, we heated up some white corn tortillas in the microwave (and I fried a couple, too, in the pan…which of course were delicious), added some chopped fresh cilantro, some thinly sliced chopped raw onions, and a sprinkle of Mexican cheese. 

best veggie fajitas!

This amazing veggie fajitas are currently one of our favorite meals! I’ve made them twice in a week, and we’ve been eating all the leftovers in between!

Are you into trying a meatless meal…if it tastes this delicious??? :) Have you been doing as much cooking as I have lately?

Tuesday, March 26, 2013

Roasted Red Pepper Soup

I posted a while ago about making some roasted red pepper soup (whose recipe I found on Joyful Abode), and it was so good, that I have since made it again…so I thought I’d share some pictures. :)

(I’m not going to re-post the recipe, I will just send you to Joyful Abode where you can see how to roast the peppers and make the soup.  I just want to inspire you to go there and actually do it!)

Here are peppers (orange and red) I roasted a day or two before and put in the fridge in some olive oil:

roasted peppers in oil

Here’s the soup beginnings…butter, onions, garlic, and roasted red (and orange in my case) peppers:

red pepper soup begins

After everything’s been added (there’s some broth and basil) and simmered, I blend it with an immersion blender:

immersion blender in red pepper soup

Then add some cream (which could really be optional, I’ll bet), and soup’s done!

roasted red pepper soup

I couldn’t get a good picture of the soup in a bowl (and I should have garnished it…isn’t that what all the pros do?) so I hope this picture makes you want to make and eat it:

roasted red pepper soup

(I did put some cheese on top and it was already starting to melt in…)

Since this winter seems never-ending, a good bowl of soup is in order, right? :)

Thursday, March 21, 2013

Healthy Deep Dish Cookie Pie

Lately, work and life has kept me pretty busy, so some DIY projects (like this and this) are just temporarily on hold.  But, in the spirit of trying to become healthier, I have been cooking up a storm…making your own healthy meals is just another form of DIY, right?

As I was exploring the internet for new recipes, I came across this gem of a blog: Chocolate Covered Katie.

It is full of healthy, delicious desserts. That’s right. I said desserts.

So far I’ve tried her cookie dough dip (sooo delicious) and her deep dish cookie pie.

Chocolate Covered Katie
Photos from Chocolate Covered Katie

So far, those desserts were both so easy! Combine everything in a food processor and go!

DSC_0987
Yes, those are chickpeas! Don’t tell anyone what’s in the dessert and they will never guess! These desserts really are so good!

Here’s my deep dish cookie pie:

DSC_1001

I forgot to get pictures of it all sliced up and styled because we ate it too fast! I brought some to work and nobody believed it was chickpeas or “healthy”!

And a lot of her recipes are vegan (or mostly vegan!) – even if you’re not vegan or have no interest in becoming one, it means no raw eggs in the cookie dough dip! Which means you can finally eat all the cookie dough you want without feeling guilty. :)

Have you found any good new blogs lately? Any new food adventures? I’ve got a few more to share, too!

Monday, March 11, 2013

Oh yes, Potato Soup

So I did get around to making Pioneer Woman’s Perfect Potato Soup.

It was delicious.

And easy.

And wonderful.


(Image via Pioneer Woman: Perfect Potato Soup)

I’ve been experimenting with healthy recipes and/or recipes from scratch – you know, where I know what every ingredient is because I put them in myself. No monosodium poisonate here!

So I made this soup and it was delicious, and I don’t think it was actually that bad for us! There was some milk and a little bit of half and half, but mostly it was vegetables and potatoes and yum.

And because she’s the Pioneer Woman, and referenced hobbits in her post, I made Brian watch some hobbits with me (in the form of Lord of the Rings: The Two Towers, which will probably result in our watching the other two Lord of the Rings movies) (which have nothing on the books, of course).

                         Thanks Pinterest for always having a picture of what I need.

Any hobbits, potatoes, or soups in your life lately?

Friday, March 1, 2013

Happy March!

I think everyone’s naming their post today “Happy March!”

Well, it IS happy! Spring is on its way and I can’t wait. I can’t wait to see if the things I planted in the fall will grow. (I also planted a lot of daffodil and crocus bulbs, as well as more wildflower seeds!)  Never mind all the snow that’s been falling today…

In the meantime, my little nephew, Cole, just turned one!  We’re going to head to his birthday party tomorrow, and I hope to get some cute pictures of him and all the things I’ve been creating for him. :)  I’ve been sharing some previews on Facebook, so here are a few more now.  His party is going to be sock monkey themed, so I made some shirts and bibs…

sock monkey t-shirt
(letters cut out on the Cricut. Fabric from here.)

sock monkey and bananas bib
(embroidery from here! I adjusted the smile and ears a little bit.) :)

And a big ol’ paper banner/bunting that says “Happy 1st Birthday Cole!” on it!  I printed it all out on the computer (thank you, Microsoft Publisher), then my amazing friend Jessica cut it all out and strung it on some jute twine for me.  It’s too big to take a picture of until we hang it at the party, but here’s a preview:

sock monkey happy birthday banner bunting

:) :) :)

I am so excited about it!

And “trying to be healthy” news, I bought a juicer on clearance at Aldi for $19.99.  I know there are nicer ones, but for the price, I couldn’t help but give this one a try…just to see how we like it.  I made my first glass of juice with a Granny Smith apple and a cucumber. It was pretty good! So, now I’m hoping to add fresh juice to our nutritional arsenal.

DSC_0174

Any juicing or baby-present making on your agenda? Are you excited for spring (even though it’s snowing?)

Friday, February 22, 2013

A Little Food Love for Friday

Happy Friday!

It’s almost dinner time and I’m finally posting! Whoops!

Brian and I are trying to get a little healthier here in 2013. We aren’t following an actual diet plan yet, but we’ve been absorbing all kinds of interesting information about nutrition, diets, weight loss, and overall health, and we’re taking steps to eat better.

So my kitchen currently looks like this:

lots of fruits and veggies!

Full of vegetables and fruits! (Well, this picture is mostly fruits. But there are tons of veggies in the fridge, which is a real change from what my fridge is normally full of!)

The other night, we had some delicious pseudo-caprese salad for dinner.  I halved grape tomatoes and threw them in a container with some chopped fresh basil, chopped flat-leaf spinach, and minced garlic, then drizzled everything with olive oil and let it sit over night. The next day we ate it with fresh mozzarella.  Doesn’t it look good?

tomatoes, basil, garlic, and fresh mozzarella

It really tasted as good as it looks.  And I was very happy that Brian, who’s usually a meat-eater, found it satisfying as well as yummy for dinner.

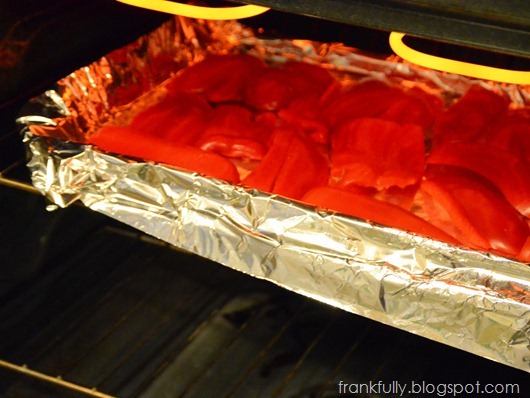
Tonight, I’m roasting some red peppers in an attempt to make roasted red pepper soup – with a recipe that I found over at Joyful Abode.

roasting red peppers

Over the weekend, I’m also hoping to try the creamy tomato soup recipe in my America’s Test Kitchen Cookbook.

America's Test Kitchen Family Cookbook

(I also found a recipe for a creamless creamy version by ATC!)

And sometime soon I want to try Pioneer Woman’s perfect potato soup.  Sounds so yummy!

These recipes aren’t exactly fat free :) but they’re loaded with veggies and are made with fresh (or at least not overly processed) ingredients, which is what we’re going for, at least for now.

What are you cooking up this weekend?

Update: The roasted red pepper soup is fantastic!! Definitely check it out!
(And for those of you who don’t do dairy, once it was all blended up, it was totally great without the cream!)

Friday, December 7, 2012

Mozzarella and Basil Stuffed Chicken

Thanks to my amazing Aerogarden, I’m always looking for delicious things to cook with all my basil. Well, this dish was very delicious! Chicken tenderloins stuffed with garlic, mozzarella, and basil in a creamy mushroom sauce or garlicky red sauce. Yum.

mozzarella and basil stuffed chicken with mushroom sauce

mozzarella and basil stuffed chicken with red sauce

Oh my gosh, my mouth is watering writing this post.  This was the kind of dish where the chicken was good on its own and the sauce was good on its own, but together, oh man. Oh man.  Together, it was just so good.

I basically followed this recipe from SouthernFood.About.com but I changed it up a tiny bit, using chicken tenderloins for little roll-ups instead of full chicken breasts, just because that’s what I had on hand, because I like cooking with chicken tenderloins for some reason.

So here’s what I did.  (I’m not going to re-write the recipe for you, but I’ll show you what I did and what I changed!)

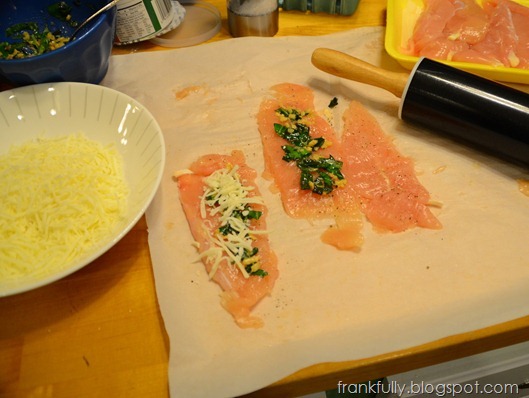
I set the oven to preheat at 375 degrees, and I got to work pounding the chicken. A meat mallet would have worked better than my rolling pin, but either I don’t have one or I don’t know where mine is.

pound (roll) out the chicken

Chop up some basil and sauté some minced garlic in butter, then put that deliciousness together.

basil and garlic

Then I got my little stuffing station together: the basil/garlic mix, some shredded mozzarella, and some bread crumbs. (I skipped the egg wash part. Eh, it just seemed like an extra step that I didn’t need to take.)

breadcrumbs, mozzarella, basil/garlic, and chicken ready to go

I spread on some of the basil/garlic, sprinkled the mozz on, added some salt and pepper, then rolled/folded the chicken tenderloin into thirds. Then I dipped the little roll into the bread crumbs (and made sure to coat it all over!) and…

spread the basil/garlic then sprinkle with mozzarella

…placed them on a parchment paper-lined baking sheet.

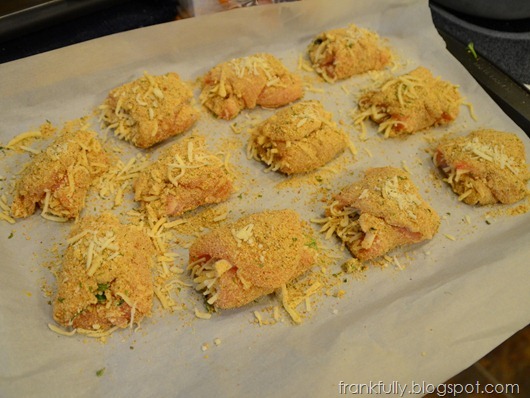
roll them up and dip the chicken in bread crumbs

I sprinkled some extra mozz and breadcrumbs on top. :)  Then they went in the oven to bake for about 30 minutes (but definitely check your time. I was not scientific about it, so I can’t remember how long they really were in there.)

While they were baking, I worked on making two different sauces! A creamy mushroom sauce for me (from the recipe) and a red sauce for Brandon.

two sauces at once

I followed the mushroom sauce recipe pretty closely, but I left out the green onions (just because I didn’t have any), I used half and half instead of cream (again, just what’s in the house), and a bullion cube to make my own “broth.” Let me tell you, that mushroom sauce was ah.may.zing.  Seriously so good. I could just eat it on its own. Really, what’s the difference between creamy mushroom sauce and creamy mushroom soup? Not much, I think.

The red sauce I make is pretty easy and delicious. I put about 2-3 tablespoons of olive oil in a pan and let it warm up, then I add a teaspoon or so of minced garlic.  I let that warm up a bit, then add a can of tomatoes, diced or crushed, or sauce or whatever you’ve got. And I let it cook/simmer for a while to take out the acidic tomato taste and let it taste like garlic. While it’s cooking (probably about halfway through), I add the chopped fresh basil. Along the way, I’ll add salt, pepper, and a little sugar to taste.  Oh. My. Yum.  I’ll try to take some better measurements as I’m cooking it next time, but it’s one of those things I eyeball as I go. But it is so simple and delicious!  And since Brandon prefers red sauce to cream sauce, I’m glad to have an easy, go-to recipe for it.

Let’s just look at the mushroom-sauce picture one more time to make us hungry.

mozzarella and basil stuffed chicken with mushroom sauce

Yum!!!  Again, here’s the recipe I followed.

Are you cooking tonight? :)

Friday, November 16, 2012

Peanut Butter and Pumpkin Dog Treats

I had pretty good luck with the dog treats I was making yesterday.

They were Grounder approved.

Grounder the dog

Here’s what I did.

Ingredients:

about 1.5 cups pumpkin puree
about 1 cup peanut butter
4 cups rolled oats
1/2 cup flour
1 egg

Preheat oven to 350 degrees.  Mix all the ingredients really well.

pumpkin peanut butter dog treat mix

Then I took handfuls of dough and flattened them out by with my palms.

pumpkin peanut butter dog treats

A lot of people do cute things like make dog-bone shaped treats, but I just wanted something simple and bite-sized, since I mostly use the treats for reinforcement training (like making the dogs sit on the dirt-catching mat when they come in with muddy paws), so I sort of just ripped pieces apart and put them on a parchment paper lined baking sheet. 

I baked them for about 30 minutes.

bite sized pumpkin peanut butter dog treats

Let them cool for a while, then feed them to your dogs!

DSC_0107

The dogs don’t look really enthused, but I swear they were wagging their tails.

dogs

Grounder, the brown dog, loved the treats, but to be fair, he’ll eat anything.  Shadow, the black one, didn’t eat them up as quickly as meaty treats (think, Pupperoni), but he still really liked them. 

(I think I’ll keep experimenting with treats that will make Shadow sit on the mud-catching mat for as long as possible, like the meaty ones do…when I do, I’ll keep you informed! I just found another recipe that uses bacon drippings…sounds interesting, right?)

(I was inspired to make my own treats by my friend Jessica, who made them last Christmas. I roughly followed this recipe.)

Thursday, November 15, 2012

Aerogarden and Pumpkin Roasting

I’ve got a few fun little projects going on right now, but of course nothing that’s finished enough to share! So here’s a picture of my Aerogarden.

Aerogarden with big basil

Isn’t everything so nice and huge? I actually put the top of the big basil plant outside of the light so I wouldn’t have to keep raising it. I wanted to keep the light as low as possible as the littler plants grew. And now they’re getting so big! I did a lot of basil pruning after this photo. Tomorrow I’m hoping to make basil and mozzarella stuffed chicken! I’ll tell you how it turns out!

And, as I was waiting for paint on various other projects to dry, I finally cut up 2 remaining Halloween pumpkins we had, and roasted them! I mostly wanted to roast the seeds, but felt bad wasting the rest of the pumpkin, so I Googled around and decided to puree them, following these directions (complete with great photos).

I cut the tops off the pumpkins and cut them in half.  (I scooped out the seeds for cleaning and roasting.)

pumpkins for roasting

Then I placed them cut side down on foil lined baking sheets and covered them up with foil. I baked them in a 350-degree oven for about an hour and a half.

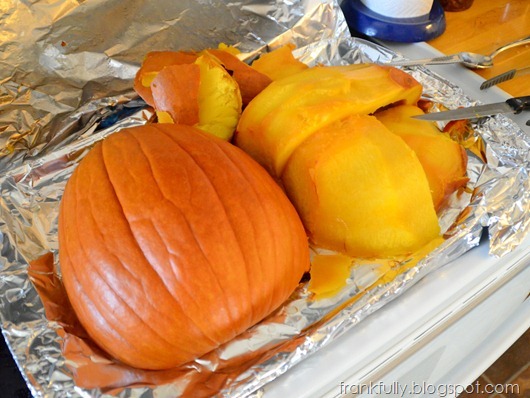
When I took them out, I let them cool for a while, then started cutting and peeling the skins off.

taking the skin off the roasted pumpkins

I cut the roasted pumpkins into chunks and pureed it in the food processor.

pumpkin puree

I scooped the puree 2-cups at a time into baggies.

pumpkin puree

(And labeled the baggies of course!)

Some of the pumpkin puree is currently being used to make dog treats. (They’re still in the oven. Hopefully tomorrow, I can report how well they turned out!)  You can freeze the puree, but I plan on using it soon to make smoothies, butter, and soup. If they’re successful, I will let you know!

Have you been doing any seasonal cooking lately? Do you cook while waiting for paint to dry? :)

Related Posts Plugin for WordPress, Blogger...