Showing posts with label living room. Show all posts

Saturday, October 17, 2015

Our House is on the Market!

So I didn’t really get to talk about this yet, so here it is.

We love our house so much. We love its location – great street, great yard, great area, close to stores, etc etc. We love the house…after all, we’ve been customizing it to our tastes for 6 years now! I love its solitude. :)

But things change, as always. My parents built a great house when I was finishing college, also in a great area, and on a piece of property that’s been in my family for 75 years. (Isn’t that cool? That doesn’t happen a lot nowadays.) My mom doesn’t want to live in that house by herself any more. At first, we thought we’d build her an in-law suite at our house, but when we looked at the costs and amount of work, we started to realize that making some changes at her house would make more sense, and we’d move in there.

It’s going to be crazy. Mom: you and I better get along! But it will be great for her to be near Porcupine. And that house has a lot of great positives, too. A different kind of great location – very kid friendly. It’s a much newer house, so is better insulated, more efficient, etc. We’ll still be doing remodeling projects to fit our new family and lots of fun redecorating! And I get to design and build a whole new sewing room…mmmmmm…I’m sooooo excited!

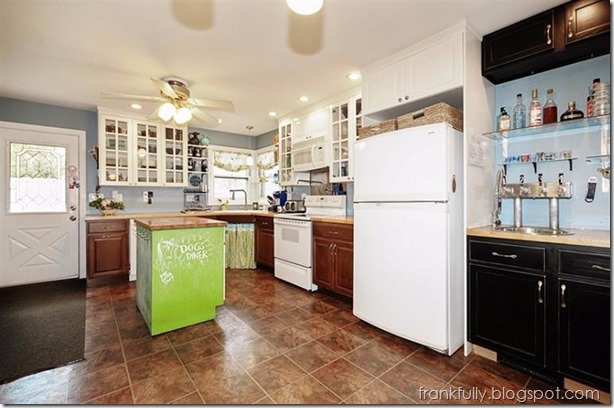
For now, here are the cool pro-photos of our house that accompany its online listing. (I will update our “house tour” with pictures I take myself!)

 front living 1 living 2 living_kit living_kit 2 kitchen bedroom bathroom 1 bathroom 2 nursery

Don’t you want to buy my house? ;)                  

Friday, August 15, 2014

Chair Ideas

As if I need another project to remain unfinished (ahem, sewing room dresser, bathroom, nursery, etc), I’ve been thinking about what I can do to update this chair.

20140814_214616 Forgive the cell phone pic!

With new baby in the house, this chair from my mom’s has been a godsend. It’s in great shape (my mom had gotten a new cushion for it a while ago, so it feels new), it’s comfy, and it’s easy to get in and out of while carrying a heavy baby. :)

I think a getting it totally reupholstered in a silver-gray, keeping the tufts, would be gorgeous.  Something like this:

gray tufted chair image via

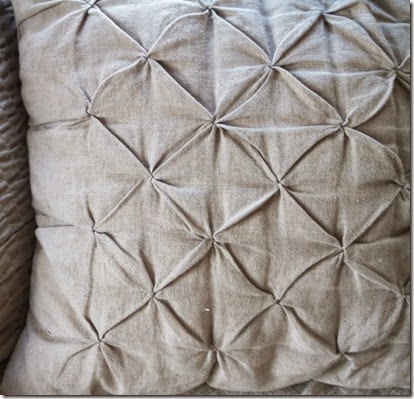
But truthfully, that is probably not going to happen. So I have been dreaming about a DIY-type covering that I could do. I’ve been toying with the idea of smocking. Wouldn’t something along these lines look cool on the back?

smocked-cushion-detailImage via

Or something like this

But, truthfully again, with a little baby in the house and trying to find that baby/work/life/life-with-baby balance, this project will probably remain one I am just dreaming about for a while…while I spend my time looking at/sitting in this old green chair. :)

So for fun, here is a baby picture. :)

DSC_0386

What projects have you been dreaming about lately? I should also attend to my yard at some point…I have big dreams for out there, too. :)

Tuesday, May 21, 2013

Living Room Curtains Done!

*Thoughts and prayers going out to everyone across the US affected by tornadoes and storms.*

Over the weekend, I actually got my living room curtains sewn and installed!

living room curtains done!

The fabric is from OnlineFabricStore.net. It’s by Premier Prints – this one’s Barber Powder Blue Twill.  I ended up getting the lining from Fabric.com because it was on sale and I didn’t have to leave the house. :)

living room

I’m so happy with how they turned out and how the living room looks now. I’m so inspired to keep working on the living room and really finish things off.

On my to-do list are:

  • make/find throw pillows for the couch
  • decide how to re-finish/paint the lamps
  • make some sort of cool gray background art for the mantel…along these lines
  • reupholster the red chairs with already purchased chevron fabric
  • ugh…finish taking the behind-the-couch bookshelf to the ceiling


I also think I’ll be posting some behind-the-scenes of curtain-making, but this whole project was not full of my smartest moments…so an actual “tutorial” might not be what’s coming. :)  But I’m sure I have more to say on the matter of these lovely curtains.

Do you have any projects that have got you all inspired to do more?

Thursday, May 2, 2013

Living Room Curtain Fabric Purchased!

I finally took the plunge and bought 12 yards of this fabric for my living room curtains (from OnlineFabricStore.net) thanks to a $5 off coupon posted on Facebook!


I'm pretty excited for it to come! I know I have a million projects in progress (yard, sewing room, life, living room chairs to be recovered) but I hope I get on this one soon.  It should be pretty simple and I think it will make a big impact on the living room.

I think I'll swing by JoAnn's later today for some lining. Their home dec fabric is all 50% off and there's an extra 15% off coupon through Saturday. Gotta love multiple discounts!

What (many) projects do you have going on?

Monday, February 11, 2013

What Color Should I Paint This Cat?

Yesterday, in my photos of the living room, you got a sneak peak of my current attempts at mantel styling (oh wait, there were also sneak peeks here and on Facebook).  I’m definitely still working on this one…playing with frames and accessories, thinking of staining this awesome mirror an ash brown…just normal stuff I like to think about :)

DSC_0959

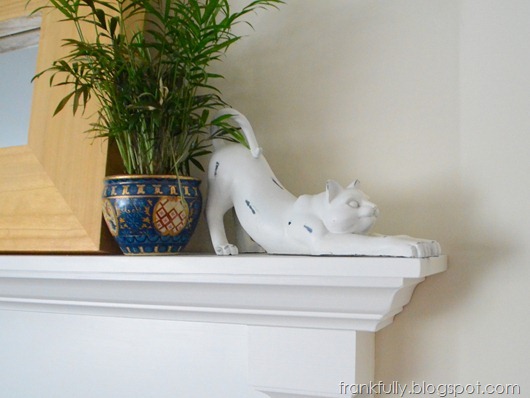
But I think the most important question right now is, what color should I paint this cat?

DSC_0963

I’ve had it for ages, and while I was always tempted to paint it, until now, white seemed to work wherever I put it. But now it’s just getting lost in all the other white/beige around it. 

I could put something behind it of course…what do you think? Tack a wall hanging up back there?

Or paint it. Opinions? A fun aqua? Some sort of blue? Gray? Oil-rubbed bronze? Some other color entirely?  Give me your thoughts!

Sunday, February 10, 2013

New Year, New Bookshelf Pictures

My friend, Ashley, mentioned to me that I hadn’t really posted an update to my new bookshelves since I built them last year (though I did post a mini-update with kinda terrible pictures over the summer).  So I thought I’d just post a few pictures.  (Again, since I need to force myself to put together a house tour, this is just fine!)

It’s still a work in progress, but here are my lovely bookshelves.

bookshelves

I’ve got a few organizational/container/basket things to work on and of course, a little styling, but I’m overall so happy with the look and function!

bookshelves

I’m currently trying to figure out a fun dog bed that actually looks like it belongs in the room and is nice to look at. :)

bookshelves

Mmmmm…..makes me so happy!

And just for kicks, here are some more shots of the living room.

living room with bookshelves in progress

Definitely need to work on finishing those bookshelves! Boo!  And recovering that little ottoman…and actually getting up some curtains and throw pillows…

living room with fireplace in progress

Never mind the Christmas wrapping paper that’s still in frames either. :)  I’m working on it all, though, and it’s so fun. And that’s what this is all about, right?

I am clearly fine with projects in progress.  Are you happy with things in progress or do you want them all to be done right now?

Friday, February 8, 2013

Our Hole in the Floor

This is not going to be an exciting post, but it’s exciting to me.

So, I just posted about how we created a nice, larger opening in between our kitchen and living room. Unfortunately, a result of that was a cold air return stuck in the middle of our floor.

opening from living room to kitchen

See that nice ol’ hole in the floor right in the walkway?

I tried a few different register covers on it, but all of them presented a tripping hazard in one way or another. They bent when you walked on them, or you stubbed your toe ‘cause they stood up too high.  I mean, it wasn’t surprising since most register covers are made to be out of the way, not right in the middle of where you walk.

Most of the time, Brian and I were completely fine walking around the hole, but the real problem came when we had family over or parties.  First of all, people don’t expect to find a hole in your floor,  and secondly, when there are a lot of people around, it’s just much harder to avoid said hole.

So after about 3 years, we finally fixed it.  We moved the cold air return to over by the bar (it took some time for Grandpa and me to figure out a convenient place to relocate it – but with lots of coffee and several trips to the basement, we worked it out) so that we were able to just cover up the hole with some leftover hardwood that I pre-finished with Waterlox to make our job easier.

DSC_0847

No more hole!

Isn’t that the least exciting picture ever?  But I love to walk across it. For fun. Because I can.

Even though I prefinished the hardwood, there were some installation issues (that’s the nice way of putting it) resulting in the need to touch up the finish.  To keep the dogs and cat (and us) from walking over my wet finish, I created a little Stonehenge of paint cans to protect the area. We lived like this for days. It was silly.)

DSC_0829

Have you done any little, boring projects lately that have made a big difference to you? Even if no one else notices, your heart still sings, right? :)

Thursday, February 7, 2013

The Opening

In my attempts to create my house tour, let me go back and tell you about some of the things we’ve already done to the house.

Less than 24 hours after we got the keys to our house, we began knocking out the wall between the kitchen and living room.

It started out like this, with a regular sized doorway between the two rooms.

our kitchen at the home inspection
(This picture was from the home inspection.)

To make the house feel more open, we decided to enlarge that opening to be 8’ wide.

Now it looks like this:

the opening into the living room
(These pictures are a tad bit old, but you get the idea.)

opening from living room to kitchen

(See that hole in the floor? That’s where a cold air return used to be in the wall, and was therefore in our floor. I will post about fixing that later!)

It was our absolute first project when we bought the house. Brian got started right away.

Brandon's first blow into the wall
(Don’t you love the lawn chair décor?)

You see a lot of sledge-hammer-full demos on TV, but in reality, demolition is so messy that you try to keep things as neat as possible. So we used a variety of saws to cut the drywall out in throw-away sized pieces.

demo: cutting out the drywall

We were doing a lot of work, so I didn’t get a lot of pictures, but once we got the wall down, Brian put up some new jack and king studs and a nice, new 2x10 header.

our new opening!

As messy as everything was, it was so nice to feel the new openness.

We got to fixing the drywall right away. Working on this house was like Grandpa’s and my full time job.

drywalling the opening

Clearly at this point, we had a long way to go, but eventually, we got this.

our opening from the kitchen to the living room

What a difference! I can’t even imagine our house without our great big opening, and you know, I even talk about making it bigger and more open!

Have you had any single changes that made your house feel so different?

Saturday, January 5, 2013

Coffee Table Facelift

Finally! I’ve been working on this small change to our coffee table since June, but being the procrastinator that I am, just got it done in time for New Year’s.

Here’s our coffee table now:

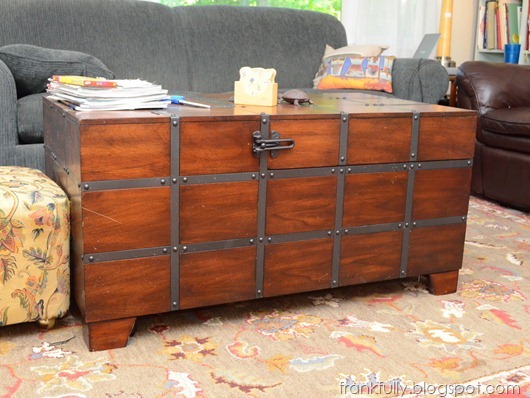
updated coffee table

And here it was before:

our coffee table before. from Ashley Furniture

I know, it’s not the biggest change ever, but I love the new look. It fits a lot better into our new, lighter living room scheme.

I got this coffee table quite a few years ago from Ashley Furniture and I love it because it’s on wheels and the top slides open.

our coffee table opens!

Isn’t that awesome? You can get to the storage inside without having to lift open a lid, meaning you can leave all your junk on the top of the table.

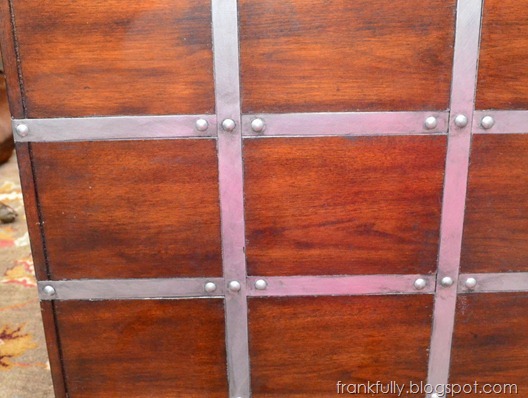
But like I said, I wanted it to blend a little better with all the lighter colors I’m using now, so painting the black metal seemed like a good option.  The coffee table still looks rustic/industrial, but blends with all the satin nickel finishes we have a little better.

I got out some Rustoleum Painter’s Touch Brushed Metallic Paint in Platinum that I bought for something else, a foam brush, and some painter’s tape.

Rustoleum Painter's Touch Brushed Metallic in Platinum

Then I began the tedious job of taping everything off. Prep work is always terrible and boring, but it’s the most important for good results!

tedious taping

Then I brushed on 2-3 light coats of the paint, varying my brush stroke directions to make everything look purposefully uneven and like real brushed metal.

The first coat was pretty thin and you could still see the black through it.

one thin coat of paint

But after I put on 1 or 2 more coats, it was nice and silver.

nice, bright silver

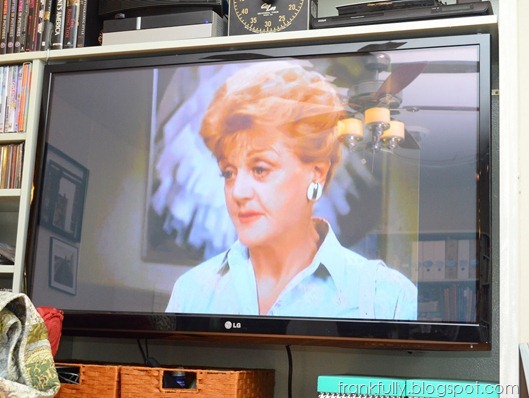
All that taping and waiting for coats to dry was tedious and I watched a lot of Murder, She Wrote(Thank you, Netflix.)

I watched a lot of Murder, She Wrote

Then, to keep with the rustic/weathered feel of the table, (and to hide any mistakes and imperfections), I got out some Rustoleum American Accents Antique Pewter top coat (that came with a spray paint kit) to add some antiquing.

Rustoleum American Accents Antique Pewter topcoat

I varied between brushing it on and wiping it off with a paper towel, and sort of dabbing it on with a paper towel and wiping off with one, too. It was all very imprecise but I liked the look I was getting.

with some antiquing

I did have some yucky mishaps. Whether it’s because I am a terrible taper (which is entirely possible) or because of the finish on the table (did I wipe it down with too much Pledge?) I got a lot of bleed through in some places.

terrible bleed through!

Ugh. I had to painstakingly, carefully scrape that all off with a razor scraper. What a pain! Some places came out very clean, but there was enough like this that I said bad words. I even tried Frog Tape with similar results. (That’s why I wonder if it was me/the finish on the table.)  Luckily, since I was antiquing it, I just used some of the darker paint to hide spots where I couldn’t get all of the silver paint off of the wood, so I still love the finished product. I just want to share the reality of the project!

Then, after I painted, scraped, and antiqued all four sides, I left the top looking basically like this for 5 months.

coffee table top, full of tape

Because I am terrible.

But I finally finished it all! And I couldn’t be happier. Here it is again, with a little more living room in the background, so you can see how good it looks. ;)

our coffee table in the living room!

Have you finally finished any projects lately? Like me, just in time for your New Year’s shindig?

Thursday, December 20, 2012

Finishing Touches on the Mantel

I’ve actually been finishing some projects. What is going on here?  (I guess the holidays and upcoming New Year’s celebration are helping kick my butt into gear!)  First the Maligayang Pakso sign got done in one day, then this mantel stuff.  I’ve also been doing other little things finally, that maybe I’ll group into one post.

So last time I left you with the mantel, it was looking pretty spiffy, but I just wanted a few last additions to really make it look well-planned and neatly finished (neither of which it was! ha!).

Here’s what I came up with!

finished mantel

See my cool corbels under the shelf and tiny detail trim on the tile?

Little things, I know, but just finishing touches.

Here’s where it was last time I posted about this project:

mantel in progress

I love the look of the corbels and the detail trim just meant I didn’t have to try to do a crazy caulk job in between the tile and the fluted trim.

I actually began these finishing touches right after I finished the mantel, but some snafus (as always) came up and set me back a bit.  I started by going to Lowes and finding the trim and corbels.
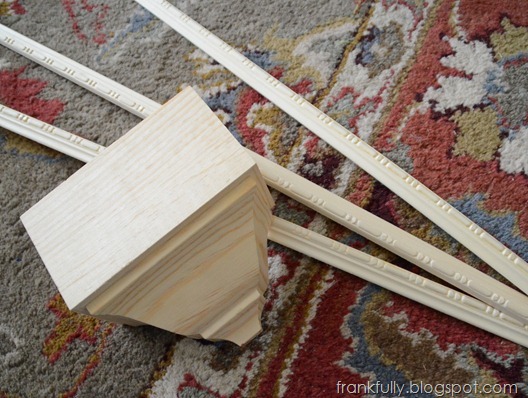
corbels and trim from Lowes

I gave them all a coat of Zinsser Smart Prime and then a couple of coats of Benjamin Moore Advance in Simply White, the same paint I used on the pantry and rest of the mantel.

But then, the grain had raised and was showing really badly on the corbels. The difference was so great, that when I sanded them down a bit, they looked like this:
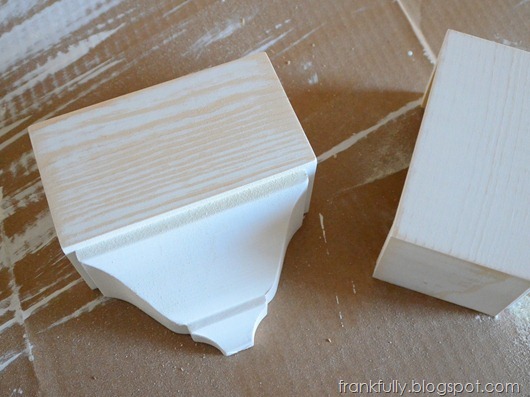
wood grain in the corbels

It’s not that I don’t like the look of wood grain under paint, but nothing else on the mantel is showing grain, so I just wanted the overall look to be consistent. So I primed, sanded (with 220 grit), and primed again, and sanded again a few times until I thought it all sort of smoothed itself out. I gave the corbels another coat of paint, (sanded a bit more), and painted on a second coat before they were ready to hang.

In the meantime, I hung the small detail trim, but my attempts to keep the nails from hitting the tile (or something hard under there!) didn’t quite work out, because I had 4-5 nails that looked like this:

DSC_0260

Yeah, that nail totally curved as it went in and came back out.  Because they’re just 18ga, I was able to cut them off with a pair of lineman pliers as close to the wood as possible, then used a nail punch set to sink them into the wood. I used wood filler to fill all the holes.

To attach the corbels, I first nailed little 1x2 scraps of wood to the top plate of the frame, then attached the corbels to the wood.
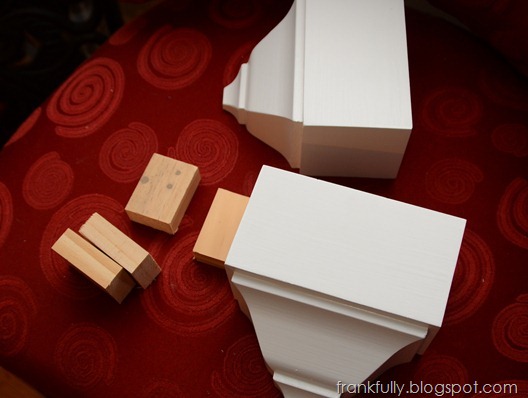
DSC_0732

I didn’t get pictures of the process because of course the 2 corbels had different measurements on the inside (the support braces inside were in different places) and I only measured 1 corbel when I cut my little blocks of wood. So I had to say some bad words as I was putting them up instead of taking photos.

But once all the nail holes were filled, and all the seams were caulked, and a little bit of touch up paint was applied, I had a totally finished mantel that I am so happy with!  We’ll just look at it again. :)

finished mantel

It’s so clean and neat.  I’m excited to see and post about the mantel post-Christmas with some other kinds of art, etc. up there!

Do the finishing touches on your projects take as long and go as wrong as they do on mine? ;)

Related Posts Plugin for WordPress, Blogger...