Showing posts with label sewing. Show all posts

Tuesday, May 21, 2013

Living Room Curtains Done!

*Thoughts and prayers going out to everyone across the US affected by tornadoes and storms.*

Over the weekend, I actually got my living room curtains sewn and installed!

living room curtains done!

The fabric is from OnlineFabricStore.net. It’s by Premier Prints – this one’s Barber Powder Blue Twill.  I ended up getting the lining from Fabric.com because it was on sale and I didn’t have to leave the house. :)

living room

I’m so happy with how they turned out and how the living room looks now. I’m so inspired to keep working on the living room and really finish things off.

On my to-do list are:

  • make/find throw pillows for the couch
  • decide how to re-finish/paint the lamps
  • make some sort of cool gray background art for the mantel…along these lines
  • reupholster the red chairs with already purchased chevron fabric
  • ugh…finish taking the behind-the-couch bookshelf to the ceiling


I also think I’ll be posting some behind-the-scenes of curtain-making, but this whole project was not full of my smartest moments…so an actual “tutorial” might not be what’s coming. :)  But I’m sure I have more to say on the matter of these lovely curtains.

Do you have any projects that have got you all inspired to do more?

Thursday, May 2, 2013

Living Room Curtain Fabric Purchased!

I finally took the plunge and bought 12 yards of this fabric for my living room curtains (from OnlineFabricStore.net) thanks to a $5 off coupon posted on Facebook!


I'm pretty excited for it to come! I know I have a million projects in progress (yard, sewing room, life, living room chairs to be recovered) but I hope I get on this one soon.  It should be pretty simple and I think it will make a big impact on the living room.

I think I'll swing by JoAnn's later today for some lining. Their home dec fabric is all 50% off and there's an extra 15% off coupon through Saturday. Gotta love multiple discounts!

What (many) projects do you have going on?

Friday, March 29, 2013

Vintage Wool for Sale

I’ve actually had some time, so I’m working on/in the sewing room.

(I’m finally getting around to the dresser, I can’t wait to share as I make progress!)

And I’m clearing out some fabric…which is hard for me because I’m a little bit of a hoarder.  Especially when it comes to gorgeous fabric.

But I just don’t have room for it all! So I’m selling some.

vintage wool

I have all this gorgeous wool suiting that I inherited from an older friend.  It’s all such amazing, high quality stuff.  It’s all brand new and in great shape.  I’m keeping a lot – trust me.  But what I can’t keep, I’m hoping will find loving homes. :)

Most is here on Bonanza.

And some is here on eBay.

And maybe some will even go on to Etsy.

Hopefully you or someone you know will give this fabric a loving home! I will keep listing as I go through my fabric! :)

Friday, March 1, 2013

Happy March!

I think everyone’s naming their post today “Happy March!”

Well, it IS happy! Spring is on its way and I can’t wait. I can’t wait to see if the things I planted in the fall will grow. (I also planted a lot of daffodil and crocus bulbs, as well as more wildflower seeds!)  Never mind all the snow that’s been falling today…

In the meantime, my little nephew, Cole, just turned one!  We’re going to head to his birthday party tomorrow, and I hope to get some cute pictures of him and all the things I’ve been creating for him. :)  I’ve been sharing some previews on Facebook, so here are a few more now.  His party is going to be sock monkey themed, so I made some shirts and bibs…

sock monkey t-shirt
(letters cut out on the Cricut. Fabric from here.)

sock monkey and bananas bib
(embroidery from here! I adjusted the smile and ears a little bit.) :)

And a big ol’ paper banner/bunting that says “Happy 1st Birthday Cole!” on it!  I printed it all out on the computer (thank you, Microsoft Publisher), then my amazing friend Jessica cut it all out and strung it on some jute twine for me.  It’s too big to take a picture of until we hang it at the party, but here’s a preview:

sock monkey happy birthday banner bunting

:) :) :)

I am so excited about it!

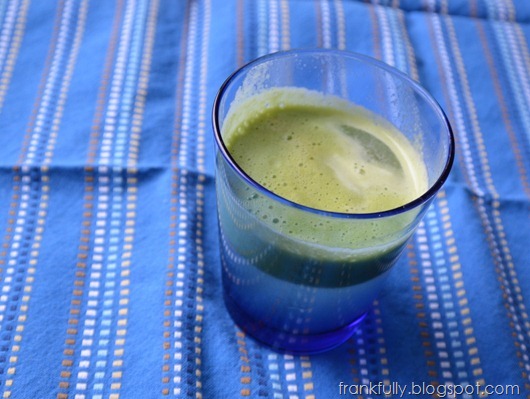
And “trying to be healthy” news, I bought a juicer on clearance at Aldi for $19.99.  I know there are nicer ones, but for the price, I couldn’t help but give this one a try…just to see how we like it.  I made my first glass of juice with a Granny Smith apple and a cucumber. It was pretty good! So, now I’m hoping to add fresh juice to our nutritional arsenal.

DSC_0174

Any juicing or baby-present making on your agenda? Are you excited for spring (even though it’s snowing?)

Friday, February 15, 2013

Paper-Covered Boxes for Fabric Storage

Last weekend, I spent a lot of time organizing and re-organizing and purging my massive stash of fabric.  And thus begins the great sewing room organization of 2013. :)

What I am doing is not nearly photo ready…I feel like I’m still getting a handle on how I want to really store all this fabric so it’s accessible…but I will share a small project that I did in the midst of this much bigger one!

I covered Bankers Boxes with wrapping paper.

Hahaha. Not the most exciting, but the results are cute and practical.

paper covered bankers boxes with chalkboard labels

A couple of words on cardboard boxes for fabric storage: there are pros and cons of course. The cons are that cardboard isn’t as durable and waterproof as plastic bins. The pros are that these boxes are inexpensive, have nice handles, and are a really great size for being able to see and access what you have.  Bins that are too big can just become a mess.

So, that being said, I got these Bankers Boxes from Costco. They were $18.99 for 10 of them, so a pretty similar price to the ones I saw at Target, but they are much heavier duty. So much better than the other ones I’ve bought before. I am definitely going to Costco for more of these.

bankers boxes from Costco

I found this cute wrapping paper at Old Time Pottery for $1.99.  It’s a little too cutesy for my normal decorating, but I thought it’s perfect for my sewing room where I can be as girly as I want.  And the colors are fantastic.

bankers boxes from Costco and wrapping paper from Old Time Pottery

I took a few boxes out to the garage and covered a work surface with a trusty drop cloth.  I got out some spray adhesive that I got at a deep discount (at Bailey’s Discount Center!) and used a couple of spare pieces of cardboard as masking.

covering bankers boxes with paper, spray adhesive

I roughly measured my boxes overall circumference and the height that I wanted to cover with paper. I was able to cut the length of the wrapping paper in half, which meant I got to cover 2 boxes for every cut of wrapping paper I made.

covering bankers boxes with paper

I lightly sprayed the box with adhesive, carefully wrapped the paper around it, and voila!

covering bankers boxes with wrapping paper

Exciting, right?

I sprayed a little adhesive on the edges of the paper that I needed to keep down, and I used some clear packing tape to reinforce the handles and a couple of spots on the bottom.

I even papered a couple of the lids!  (I left a couple white, ‘cause it was easier and I’m telling myself they coordinate.)

covering bankers boxes with paper

I papered some old boxes, too, with patterned Kraft paper from the dollar store.
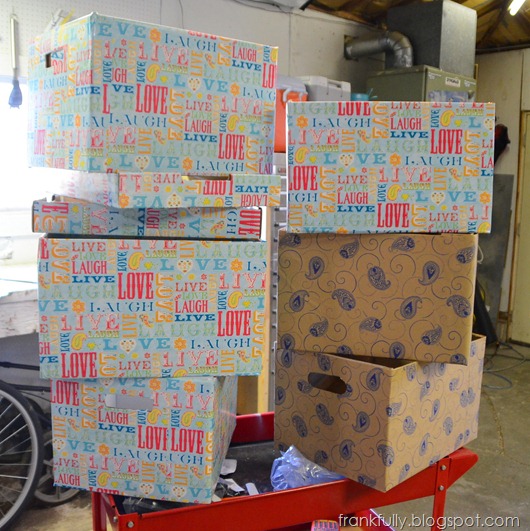
lots of bankers boxes decorated with fun paper!

As a final touch, I put some Contact paper chalkboard labels on and used my new favorite thing, my chalk pen, to label them.

paper covered bankers boxes with chalkboard labels

I wish this could be on some gorgeously organized shelves to show you…oh well, one day.

As for what’s in the boxes?  I used to have my quilting/crafting cottons sorted by color into boxes like these, but when I started to do less quilting, I threw them all together in one big plastic bin.

But it became a mess.

messy fabric in plastic bin

So I re-sorted the fabric for easier access and visibility.

fabric sorted by color into bankers boxes

I’ll have to get more boxes and keep sorting, but this is a great start.

Have you decorated any plain, ugly things lately to turn them into something easy on the eyes?

Thursday, January 10, 2013

Eric and Ashley’s Wedding in a Bar

I know you are dying to hear the rest of my thermostat tales, but we’re going to take a break for a minute to talk about my friends’ wedding in a bar.

You’ve already “met” Ashley, because she’s the one who guest posted about her amazing faux-granite countertops. Today, her amazing wedding from last year was featured on Offbeat Bride!

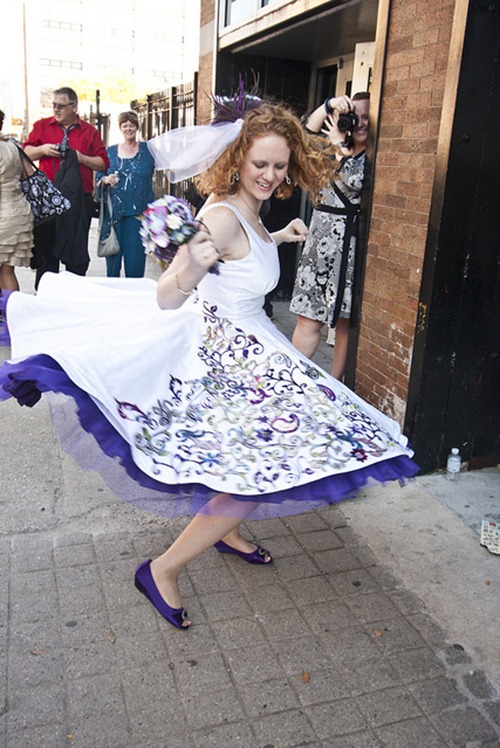
Spinny! by Ashley and Eric

I’m taking a break to post this, because I totally made her amazing wedding dress. Let me pause while I pat myself on the back. :)

Also, if you don’t already know about Offbeat Bride, check it out. It’s an awesome website for wedding ideas (with lots of DIY!) from mildly offbeat to wildly offbeat. Plus, it’s an amazing community that’s branched out into home and family life.

You may remember, also, that this is the wedding dress that won me a nice blue ribbon in this year’s Lake County Fair.

Now let’s just look at some more pictures because that’s fun.

Eric and Ashley

Ashley and Eric BW

Okay, fine, so I just posted dress pictures. Check out their featured post on Offbeat Bride to see some other awesome details from their wedding, including ticket place cards, journal-entry guest books, and a cartoon van cake topper!

Thursday, September 6, 2012

Sewing Room Organization Part #1: Shelves

So this will be part 1 of a very long long process of really putting my sewing room together in a functional and organized way. Every sewer or crafter knows just how easily their craft room turns into a tornado zone! I know you all have paths through the messes like I do. :)

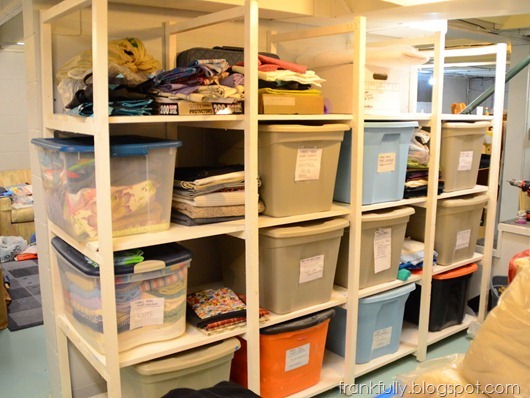
I’m starting my process with some shelving for the bins upon bins upon bins of fabric that I have. :) These shelves aren’t adorably styled or anything, but they are functional and the bins are labeled. That makes for a happy me. :)

new sewing room shelves

I don’t have real before pictures of what this section used to look like, but here’s what most of the sewing room looks like (this isn’t even the worst corner really, believe it or not!).

what most of the sewing room looks like

To make the shelves, I started with some pre-made shelving uprights from Menards and 1”x12”x8’ pine boards, two per shelf.

premade shelf uprights and 1"x12" boards

I put the unit together temporarily (with just a few screws) outside for painting. Grandpa helped me with all this, so even though it was hot and muggy, it wasn’t too bad.

I painted the unit with some old oil-based paint we found in the basement (with a pretty cool label, and like many oil-based paints, it mixed up like new! I don’t know if it had ever been opened, really) in, you guessed it, Grandpa’s trusty Wagner Wide Shot Power Painter. What would I do without that thing?

old oil-based paint and Wagner Wide Shot Power Painter Sprayer

I was very happy that just a nice, thick coat was all I needed. (Granted, I knew this shelf would be housing large plastic bins in the basement, so I wasn’t being too picky.)

painted shelves

Then, I somehow man-handled all the individual pieces into the basement by myself and installed it there. It’s held together mostly by itself (as the shelves screw into the uprights, they sturdy the whole unit up and keep it pretty plumb and level…though I helped it along of course!) but I did put a couple of concrete screws in it, too, to hold it to the wall and stop it from tipping. I think I used 1 or 2 concrete screws straight through the uprights and a concrete screw in an L bracket somewhere else. Just those 2 or 3 screws into the wall make a huge difference!

sewing room shelves installed

Once everything was secured together, I filled them up!

new sewing room shelves

I have some more plans for shelves like this elsewhere, some plans for shelves on wheels, and I’ll hopefully come up with some other fabric and notions storage solutions along the way as well. I will keep you updated in this long process, which I’m sure will be very drawn out. :)

What have you been building lately?

Monday, August 20, 2012

Janis’s Bunting Installed :)

Yay! The alphabet bunting that I was hoping to give Janis for her March baby shower has finally been delivered and installed in her nursery.

yay! the bunting is installed in Janis's nursery

I love how everything looks together! I love her espresso and white décor and how the bunting ties in perfectly with her awesome yellow lamp!

I will be posting more about the trials and tribulations of this huge project (and what took me so long!), but for now, I am so happy to stare at this great picture of everything put together. :)  I am so happy to have contributed more to Lincoln’s nursery.

I’ve mentioned this huge bunting project here and here.

Thursday, August 9, 2012

Sigh and Satisfaction

Janis! I have finally finished the bunting for your baby’s room!

DSC_0704-001

It was not in time for your shower in March, it was not in time for your baby’s birth in May, but it will hopefully be at your house in time for your own birthday. :)

I just have to write a nice long note to go along with it, then I can ship it off to you! :)

(Once Janis has received her gift, I’ll post about the trials and process of making this huge, full-alphabet bunting!)

What a sigh of satisfaction to have a big project done and as cute as I hoped it would be!

Tuesday, August 7, 2012

Lake County Fair Results!

Not to shabby for me this year, at the Lake County Fair!

Two firsts and a second!

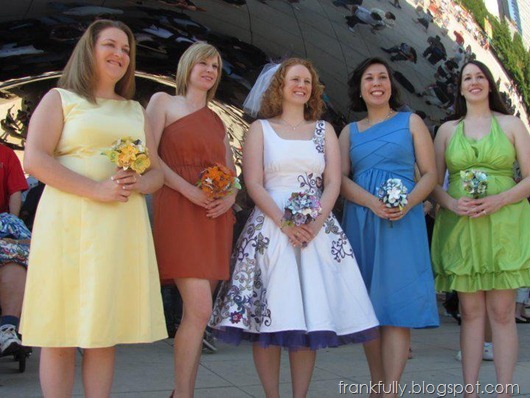
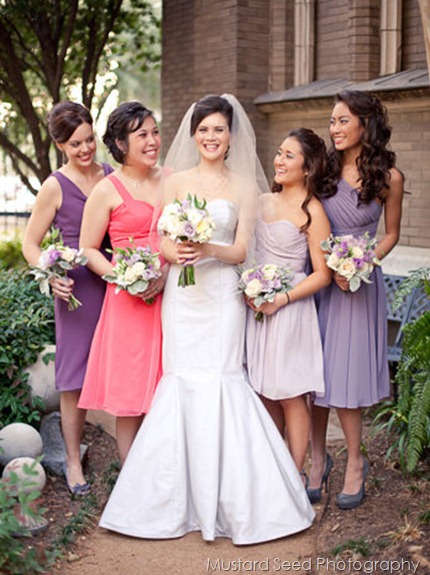
I won a first place ribbon for Ashley’s wedding dress, a first place ribbon for my pink bridesmaid’s dress, and a third place for my blue bridesmaid’s dress.

I also entered the christening dresses I made for my twin nieces and won second place…

Second place in christening dresses

…which is pretty respectable, considering that the first place christening dress also won Best in Show. :)

Just for fun, here are the dresses in action:

ashleybridalparty

At Ashley’s wedding, with her bridal party.

Jax wedding

At my friend, Jacqueline’s wedding. I made the wedding dress, too! :)
(Sorry this one’s not great quality…I’m working on getting the bride to send me higher quality pictures!) :)

207-001

At the twins’ christening.

So if you’re in Northwest Indiana, head over to the fair for some cotton candy and fun, and thanks for letting me share the results!

Friday, March 9, 2012

Cole’s Bunting

I’m over at the Modern Seamstress today, posting about how I made Cole’s cute little name bunting!

Head over there and check it out!

DSC_0017

Wednesday, March 7, 2012

Dyeing My New Favorite Sweatshirt

I love dyeing things. Inevitably, I find some sweater, top, t-shirt, or sweater in a style I love but there aren’t a lot of color options. Or I want to refresh/revamp a Goodwill find or a hand-me down. Or I realize just what a bad idea that white bathmat was.

So I dye it!

Here’s how I turned 3 gray sweatshirts into a gray sweatshirt, a turquoise sweatshirt, and a green sweatshirt!

DSC_0023

How to dye:

1. Start with your awesome garment/bathmat/whatever. Make sure it is mostly (60% or more) made of a fiber that will accept dye:  cotton, wool, silk, linen, ramie, rayon, or nylon. Know that blends will dye a lighter color than what’s on the box or bottle, and that different fibers/fabrics accept dye differently. (That’s one way of saying, be willing to just go with the flow when dyeing. I’ve never tried to perfectly match a color, so I’m already not setting myself up for disappointment!)

I got this awesome sweatshirt from Old Navy (of course it’s no longer available). I like it because it’s got a cute style, but it really is comfy like a sweatshirt. I actually got it in a heather navy color, and I loved it so much that I ordered the only other color, gray. But since it’s 60% cotton/40% polyester, I knew I could dye them! So I ordered 3 grays. (I actually also ordered another navy one to dye a black/gray!)

DSC_0035

2. I went to Jo-Ann’s and picked out my Rit dye colors. I chose Aquamarine and Apple Green (never mind the black – that’s for the navy sweatshirt). I’ve used both the box (dry powder) dye and liquid dye super successfully. The liquid just had the colors I wanted this time.

I totally just follow Rit’s directions for washing machine dyeing. I always use the washing machine method! (I’ve only ever done it in a top-loading washer.)  Anyway, the directions tell you to add a cup of salt to the dye bath, hence the salt.

DSC_0362

3. Before I started dyeing, I removed the buttons.  My sweatshirt is 60% cotton/40% polyester, so I knew they would dye a little lighter than the bottle. The cording on the buttons and loops looked like they were 100% cotton, so I knew they’d soak up the dye, and to its full brightness! I didn’t want them to look funny, and I wanted to keep the cute contrast, so I used a seam ripper to take them off, planning to sew them back on later. (Wood can accept dye also!)

It was tedious, but worth it!

2012-02-17 dyeing sweatshirts

DSC_0360-001

4. Then, I set my washer on the hottest temp that the fabric will allow. Hot water and cold rinse, and on the smallest load setting.

I thoroughly wet the sweatshirt to ensure even dyeing. I just used the water from the washing machine till it was soaked through. Then set the sweatshirt aside.

2012-02-17 dying sweatshirts

(A note about shrinking cotton: I learned in fashion school that cotton will only shrink so much over it’s lifetime, say 3%. So if you buy a new item, and shrink it to that max 3% immediately, it won’t shrink any more. We think our clothes shrink in the washer or dryer because they’re always shrinking a little each time till they reach that 3% mark. Does that make sense? So just shrink your sweatshirt (or whatever) right now as you dye it, and it will stay the same forevermore!)

5. Add a cup of salt to the washing machine.

DSC_0368

6. Pour in the dye.  I let it all agitate for a bit to mix the salt and dye in the water before I put in the sweatshirt.

DSC_0373

7. Then I put the sweatshirt in, and let it agitate.

HERE’S THE IMPORTANT PART: Whatever you’re dyeing has to remain in the dye bath for at least 30 minutes. Most washing machines have an agitate cycle of 10-14 minutes, so I set my cell phone stopwatch (what would we do without cell phones?) to 10 minutes or so, and kept going back to the washing machine to reset the agitate cycle 3 or 4 times, whatever it takes to keep the sweatshirt in there for 30+ minutes.

DSC_0375

8. I let the washer complete its cycle. It rinses and rings out the sweatshirt and voila!

2012-02-17 dyeing sweatshirts1

9. Because I was also doing a green one, I repeated the whole thing with the green dye, without washing the washing machine (ha) in between. I figured I didn’t mind if my green was a little aqua.

2012-02-17 dyeing sweatshirts2

10. To clean your washing machine of all this dye, just run a large load (the highest water level) with detergent and bleach. I just pour some of each in without measuring! :) And I wipe down any dye splatter with a rag soaked in bleach.

(Also, it’s up to you if you wash your sweatshirts again right now or just do it later.)

11. I dried the sweatshirts and sewed the buttons back on.

DSC_0392

I kind of had to finagle with my scissors to get the cording back into the little pockets.

DSC_0393

12. And woohoo!! 2 new sweatshirts! Now I’ve got 3 different colored sweatshirts to wear this early winter/spring!

DSC_0010

(My aqua/turquoise sweatshirt debuted in yesterday’s post with Baby Cole!) :)

Related Posts Plugin for WordPress, Blogger...