Showing posts with label organization. Show all posts

Thursday, September 6, 2012

Sewing Room Organization Part #1: Shelves

So this will be part 1 of a very long long process of really putting my sewing room together in a functional and organized way. Every sewer or crafter knows just how easily their craft room turns into a tornado zone! I know you all have paths through the messes like I do. :)

I’m starting my process with some shelving for the bins upon bins upon bins of fabric that I have. :) These shelves aren’t adorably styled or anything, but they are functional and the bins are labeled. That makes for a happy me. :)
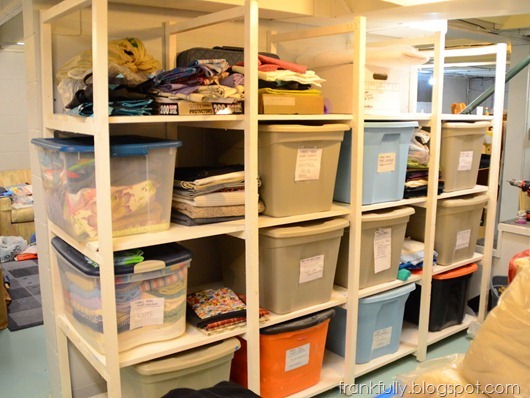
new sewing room shelves

I don’t have real before pictures of what this section used to look like, but here’s what most of the sewing room looks like (this isn’t even the worst corner really, believe it or not!).

what most of the sewing room looks like

To make the shelves, I started with some pre-made shelving uprights from Menards and 1”x12”x8’ pine boards, two per shelf.

premade shelf uprights and 1"x12" boards

I put the unit together temporarily (with just a few screws) outside for painting. Grandpa helped me with all this, so even though it was hot and muggy, it wasn’t too bad.

I painted the unit with some old oil-based paint we found in the basement (with a pretty cool label, and like many oil-based paints, it mixed up like new! I don’t know if it had ever been opened, really) in, you guessed it, Grandpa’s trusty Wagner Wide Shot Power Painter. What would I do without that thing?

old oil-based paint and Wagner Wide Shot Power Painter Sprayer

I was very happy that just a nice, thick coat was all I needed. (Granted, I knew this shelf would be housing large plastic bins in the basement, so I wasn’t being too picky.)

painted shelves

Then, I somehow man-handled all the individual pieces into the basement by myself and installed it there. It’s held together mostly by itself (as the shelves screw into the uprights, they sturdy the whole unit up and keep it pretty plumb and level…though I helped it along of course!) but I did put a couple of concrete screws in it, too, to hold it to the wall and stop it from tipping. I think I used 1 or 2 concrete screws straight through the uprights and a concrete screw in an L bracket somewhere else. Just those 2 or 3 screws into the wall make a huge difference!

sewing room shelves installed

Once everything was secured together, I filled them up!

new sewing room shelves

I have some more plans for shelves like this elsewhere, some plans for shelves on wheels, and I’ll hopefully come up with some other fabric and notions storage solutions along the way as well. I will keep you updated in this long process, which I’m sure will be very drawn out. :)

What have you been building lately?

Thursday, August 30, 2012

Baskets and Bookplates

So, even though I know my house (and in particular, my living room) is full of unfinished projects, I also know that any decorating I do will be eclipsed by the insane messiness that is my daily life.

I am just a mess.

The thing is, in general, the messes don’t bother me (except for their detracting from my pretty decorating).  I get blind to them. There are little piles of things all over, and I generally know what’s in each pile, so they don’t look messy to me. My problem is that if things don’t have a specific place, I’m scared to put them “away” in a random place. Because if things are hidden away in a random place, I will most certainly never be able to find them.

As I’ve stated, my current solution is just to leave things all over the place in piles. But a better solution, for my marriage, for my decorating, and for getting ready for company coming, is to get organized and find a place for things to live.

My friend Nicolette is on a mission to help me organize my house. (We bartered. In exchange, I remodeled her wedding dress.)

One of our first small steps was on the living room bookshelves.

I like a fun, busy look on bookshelves, but there is definitely a fine line between fun/busy and just plain cluttered.

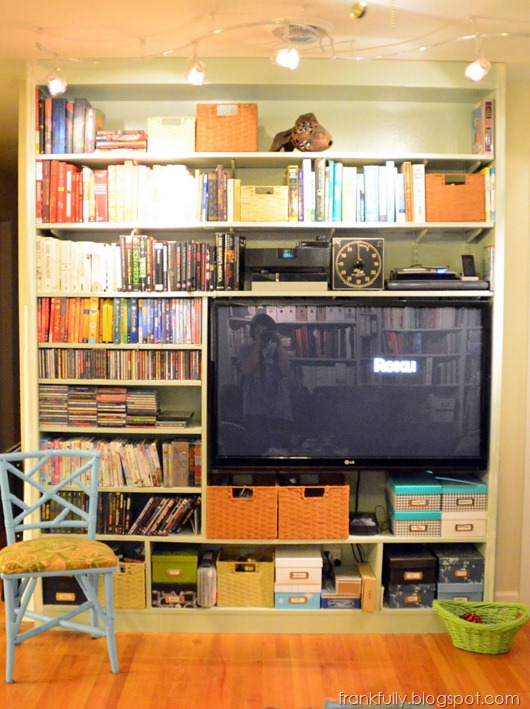
First, we cleared off non-book and non-decorative items from the shelves. (Here’s what the bookshelves looked like when we first put them up…they are a great catch-all!)

Then, I found some baskets around the house that match the wood tones of our floors (a suggestion from my designer friend, Valerie). Besides matching the floors, the baskets can now be the catch-alls…thus cleaning up my junk and keeping the bookshelves looking neat. 

Here’s where we are now. It’s not done, but it’s looking much better.

bookshelf

But in the spirit of organizing, I wanted to label the baskets…so that there’s never an excuse to not put something away, and so that I can always be assured that I’ll be able to find things later.

So I got to work.

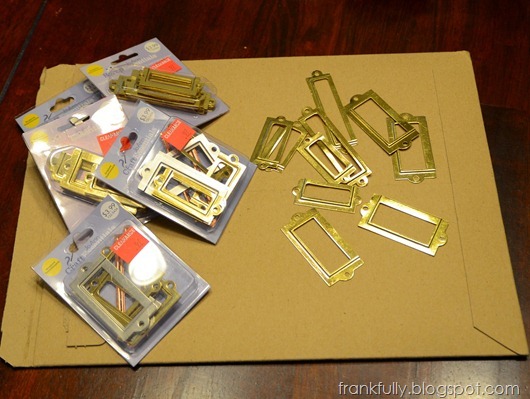
I wanted the labels to be changeable, so I dug out these bookplates that I got on clearance from the scrapbooking section of JoAnn’s a while ago.

bookplates

You’re supposed to be able to glue them right onto whatever your project is and be done.

But my baskets were a little too textured.

baskets

So I decided to glue the bookplates to thin cardboard, then glue the cardboard-backed bookplate to the basket.

bookplates in process

I traced the bookplate out onto cardboard from a mailing envelope, cut out the cardboard, used Loctite super glue gel to glue the cardboard to the bookplate, then the whole thing to the basket. Slip a little piece of paper (a little paper label, if you will) inside the bookplate, and you’re done!

baskets with bookplates

Labeled baskets with organized contents…all neat and cute on the shelf.

baskets with bookplates

baskets with bookplates

This small change is really making a difference in my “picking up the house” process. I can’t wait to keep this organizing trend going!

Upcoming organizing projects with Nicolette include the kitchen, the huge pantry, the rest of the living room, the closets, and the guest room/junk room.  So, pretty much the whole house.

Of course I will keep you updated.

What about you? Any good organizing ideas and tips? Of course, I keep pinning good ideas on Pinterest, but I’d like to hear/see any others you’ve got!

Thursday, August 2, 2012

Things I Love Thursday: Cute Dry Erase Boards!

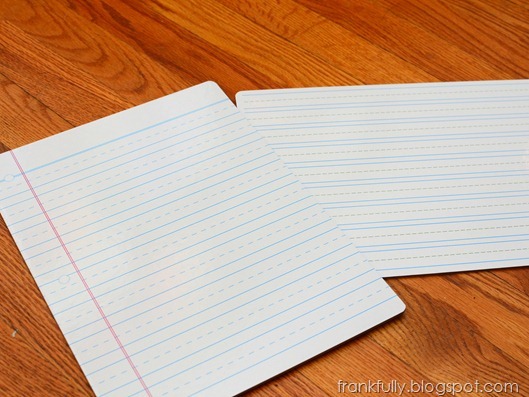
I was doing errands at Target the other day when I saw these cute dry erase boards in the $1 bins.

$1 dry erase boards at Target

I love that they look like paper! They’re supposed to be for kids to practice their handwriting, but I think they’ll be so cute for lists all over the house! For $1 each. You can’t beat that.

I love that these dry erase boards look like paper!

For grocery lists:

dry erase board for grocery list

For to-do lists:

dry erase board for to-do list

I really bought quite a few ;) and I will be putting them in various places all over the house. :)

And then, I was so inspired by cute dry erase boards to keep things organized, that I took the photo dividers that always come in photo storage boxes, laminated them, and put them in my pantry to label what’s supposed to be behind each door.

making dry erase labels

No excuses for not putting things away in their proper places :)

list in the pantry

An organized pantry makes for a happy lady.

list in the pantry

Kind of cute, right?

So, go to Target and get some cute paper-like dry erase boards!

Thursday, July 19, 2012

Things I Love Thursday: Velcro, Organization, & InvisibleHand

Oh man, did I get a good deal on some Velcro One-Wraps…the Velcro strips that you can use to organize all the cords in your life!

Velcro OneStrap to organize cords!

Look at those gorgeously tamed cords! And that’s just the beginning! I just grabbed a few things to photograph, but boy, pretty soon almost every cord in my house is going to have some Velcro around it, keeping it tidy!

Here are the straps I bought:

Velcro One-Wrap ties

I got the colorful ties at JoAnn’s when their notions were 60% off, and I had a coupon on my smartphone from their app for an extra 15% off! Each package of 10 was just over $1. They’re smaller wraps, 1/4” x 5”; supposed to be for portable electronics (think earbuds) but they work just as well on any cords (that aren’t overly long or thick that is). I got 3 packs and I was pretty excited to start Velcroing everything.

Then I realized, I wanted more One-Wraps. Okay so, I’m a bit of a hoarder…I’ll admit it. But also, when I find something that’s such a good and easy idea as this one, I want to go with it!

I found these on Amazon for a good price (and they’re bigger: 1/2” by 8”), but then my next favorite thing, my InvisibleHand extension for my internet browser, found me the same wraps at Walmart.com for about 1/2 the price! Woohoo! I bought 2 packs! 200 One-Wraps! I am in heaven!

InvisibleHand extension

So about the InvisibleHand extension: You install it as an add-on to your browser. It’s silent most of the time, but when you’re looking at product pages, it sees what you’re shopping for and searches the internet for a better price. Sometimes it turns up good  hits, sometimes it doesn’t.

But this time it was a gem! The link on Walmart.com was one that I wouldn’t have found easily on my own: it’s part of a “bundle” but you really don’t have to buy anything but the wraps. Each pack of wraps ships for $.97, so even with shipping it’s still a great price compared to anywhere else!

I love InvisibleHand since I always shop Amazon, I really don’t often think to check other websites. (Don’t worry, Amazon, you still have my loyalty and 90% of my business!) :)

Anyway, check out InvisibleHand and get yourself some Velcro One-Wraps to tame all your cords!

Related Posts Plugin for WordPress, Blogger...