Showing posts with label product reviews. Show all posts

Friday, August 19, 2016

My Current Skin Care Lineup


I am no beauty guru, but I'm at a place where I'm pretty happy with my skin and my skincare routine, so I thought I'd share!

Just for reference, I think my skin is a little on the oily side (at least the T-zone). I'm always battling a little bit of acne/hormonal acne, and I've been seeking other ways to tackle it than the continual drying/moisturizing cycle of over-the-counter acne products.

As a part of my semi-simple, semi-healthy personal campaign, I've also been after finding a set of products that really works for me, versus the constant trial and error (i.e. pitching in the garbage or letting collect dust in my bathroom) of prettily-packaged sale items at Target. :) Here is where I've gotten to today and some short product reviews.

My main exciting find:


In the first 2 weeks or so that I had it, I felt like it started shrinking red spots on my face immensely. I've been using it morning and evening nearly every day for over a month, and I love it so much, I've been recommending it to everyone! I generally shy away from bar soap, but this isn't like regular soap at all, and because it's in bar form, it seems like it will last forever (making it seem like a deal compared to some other beauty products!)
Beautycounter is on a mission to give women safe ingredients in skin and makeup products, which shockingly isn't something that you can be guaranteed is in most of your cosmetics. Read more about their mission here. And shop through these links with my friend, Janis! I know she's happy to answer any questions you might have.

My other, every-night product:


These products only use water to work, which makes them both simple and healthy! I take off my makeup with the makeup removal cloths (duh), eliminating the need for any other makeup remover (for me, at least!) Then, I wipe my face down with the body cloth - it seems like it's giving me some slight exfoliation, and just makes my face feel clean. Some people say it's helped their acne by really cleaning and removing oil and bacteria from their face. I can at least say that I think my face has been much more under control (ie no crazy unexpected breakouts) since I've started my new routine.

You don't *need* to use a facial cleanser after the Norwex cloths, but I do. I generally follow with the charcoal bar. The body cloth is great in the morning, though, to feel like you've got a fresh face for makeup without necessarily using more cleansers.

My previous cleanser that I still rotate in:

I really like this cleanser - it's smooth and gentle, but feels very effective without drying out my skin. It's got little beads in it that I assume are part of the "3-in-1" formula, and somehow make me feel like the product is working :) I still use it a couple of times a week, and I have a bottle in the shower. I also love my Mary Kay consultant!

My other secret facial weapons are a face oil serum and essential oils which I will post about next!

Do you have a facial skin care routine that works or do you feel like you're stuck in a rut?!

Saturday, July 16, 2016

Best Toy Ever!

Gotta teach the DIY young :)

We got this Mighty Digger at Menards for $20ish!

PS...renovations are starting on the house!

Thursday, July 7, 2016

Semi-Natural, Semi-Homemade, and Product Reviews

When I started this blog (and really, part of the reason I've ever wanted to blog) was to share product reviews: of things I've made (I love to DIY almost anything!) and things I've bought, and my experiences with both. I've just wanted to pass along some notes and thoughts about ... well, pretty much anything and everything.

Lately, I've wanted to kind of simplify parts of my life (don't we all!) and be more conscientious of things I use/ingest/expose myself to. I know I'll never be a totally crunchy hippie, but I think it doesn't hurt to be mindful and somewhat healthy! :) I also only want to surround myself with things that make me happy (Marie Kondo's "sparking joy"!) whether it be in my nighttime routine, house cleaning, eating, or clothes-wearing! 

And...I pretty much rely on product reviews I read online, so I want to add to the conversation, especially if it can help someone else out! I always want to be honest with my thoughts, and I'll mostly be sharing my enthusiasm for products I find fantastic!!

I'm adding some labels to the blog: semi-natural, semi-homemade, semi-simple, semi-healthy, etc. (Wasn't there a cooking show in the early 2000s about this? Semi-Homemade? I don't really remember the show, but I love the concept!) I won't ever be a paleo-vegan-marathon runner (but I love you if you are!), but I will be a somewhat-healthy, somewhat-natural happy person. Hence the new blog labels/categories. :)

Anyway, these are my quick thoughts about reviewing products: store-bought and semi-homemade. Honest and hopefully fun and helpful!
 

AndroidVid Pro: Video Editor App

This is the app I use for editing videos on my phone and it's great! I generally do just basic stuff: trimming video, converting the size (for text and email) and cropping, and it's always been easy and straight forward to use. I think it's the best video editing app I've found! I like it better than things I use on my computer!

https://play.google.com/store/apps/details?id=com.androvidpro&hl=en

Check it out if you're looking for something for Android!

Thursday, November 5, 2015

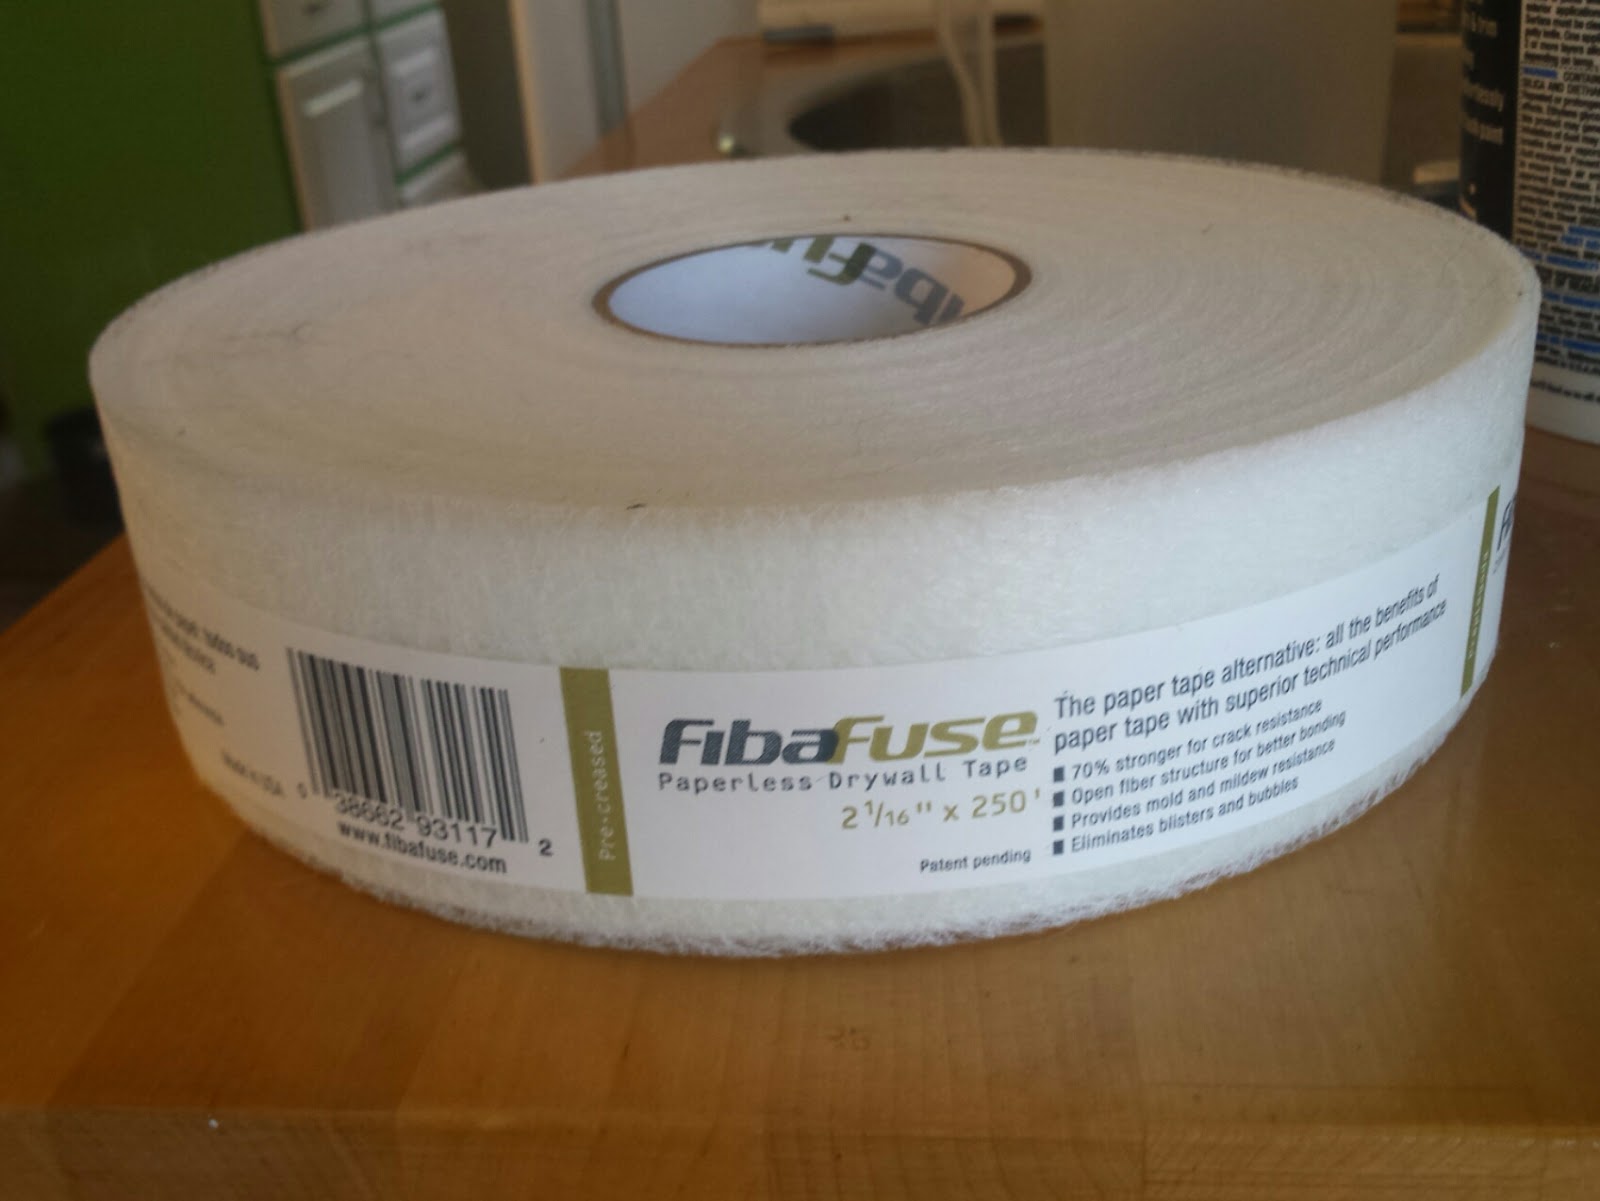
FibaFuse Paperless Drywall Tape

I have probably said this before, but I don't love drywall finishing work (and I am certainly not a pro at it!), but I always get stuck doing it because I have more patience than Brian.

I recently found this joint tape and have only mudded with it a few times, but I think I really like it. I can't yet speak to its longevity, but it embeds easily into the mud and seems easy to cover. I don't like that the fiberglass feels like it gets in your hands like insulation does, but if I was using it a lot, I should probably wear gloves. 

Has anyone else used it? Does anyone actually like mudding drywall?  

Tuesday, October 20, 2015

Things I Love Tuesday: Jag Jeans

I used to do “Things I Love Thursday”…but now the youngin’s do “Throwback Thursday”?? I don’t know, but I don’t want to confuse matters and who knows if I’ll actually remember to keep up these posts on Tuesdays anyhow.

So anyway, Jag Jeans. I’m usually late to the party, so I don’t know if everyone already knows about these amazing jeans, but I love them and I want to spread the love.

THEY HAVE ELASTIC WAISTS!

Let me tell you the best part of being pregnant (besides eating all the cheeseburgers): It was the elastic waist pants. I didn’t want to give up that luxury just because my baby is on the outside now.

And luckily a friend told me I don’t have to.

They look like regular jeans…except they fit better and they stretch. And you don’t have to zip them. (I think Jag makes some zip jeans…who knows why. The “Pull On” is what you’re looking for here.)

You can go get your size and style now at Zappos or Nordstrom and usually Amazon.

Or you can be a cheapy like me and wait for your size and style to come on sale at 6pm.com or Sierra Trading Post. (You can always find coupon codes for Sierra Trading Post, too!) I pay an average of $25 a pair for these babies!

(I got my first pair or 2 on Amazon – free shipping and free returns! Nothing to lose if you don’t like them or don’t like the size. Same with Zappos!)

My favorites are the Paley bootcut (I’ve also got Keller bootcut and like them just fine) and the Nora skinny jean.

You’re welcome.

Thursday, November 7, 2013

The Bathroom Has Drywall!

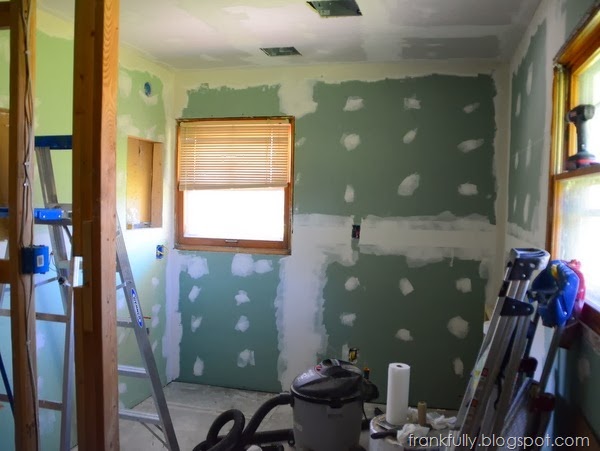
The bathroom is about 90% drywalled (only 90% due to some snafus) and it has been for about a month now.

bathroom drywall

To do the ceiling, Brian and his stepdad rented a drywall lift from our local Menards, and they said it was worth every penny!  (Call around when you’re renting tools. We’ve rented lots of tools from Home Depot and our local rental place, but for some reason renting this drywall lift was half the price at Menards than anywhere else!)

drywall lift

This amazing contraption holds the drywall up in the air so you don’t have to! You can use it to hang high vertical sheets as well, but we just used it for the ceiling. Having it was like having a third set of tireless hands and arms on your side and gave us the opportunity to make the many many cut outs we needed for all the lights/fans/etc.

drywall lift

This isn’t a terribly big room, but all those cut outs took time – and we’re no pros! The ceiling took about 5ish hours including breaks and mess-ups :) and only cost about $20 in drywall-lift-rental.

bathroom drywall

All in all, most of the drywall installation has been straightforward and quick. The mudding is a pain as always, but it’s coming along…if only there were some magical tool for mudding and sanding the ceiling, I’d be set!

The shower installation is becoming a dramatic saga, and that’s what’s currently been holding this project up. Ah, the joys of home improvement and DIY. Once we actually get near a “finished” stage on that, I will tell you all about it!

Friday, May 24, 2013

New Toy: Holga Lens for DSLR

We all have fun playing with the fun filters on Instagram and similar programs, so when, during my daily immersion in the internet one day, I found a plastic Holga lens to fit on a DSLR, I thought it might be a fun thing to play with.

Blue Holga Lens on Nikon D5100

I got the blue version :) because I love blue and because I didn’t really care if it looked a little nutty on my camera (there is a black version, as well as lots of other colors!). It’s a toy lens after all!

Before I got it, I read some reviews, so I was prepared to mess around with manual settings to be able to actually take pictures.  (Thanks, Shoot Fly Shoot, for teaching me how to mess with those!) 

taken wiht plastic Holga lens; 1/25 sec, ISO 400
Puppy the cat in the yard

taken with plastic Holga lens; 1/25 sec, ISO 500
Shadow the dog

taken with plastic Holga lens; 1/25 sec, ISO 500
Flowering bush

taken with plastic Holga lens; 1/50 sec, ISO 800
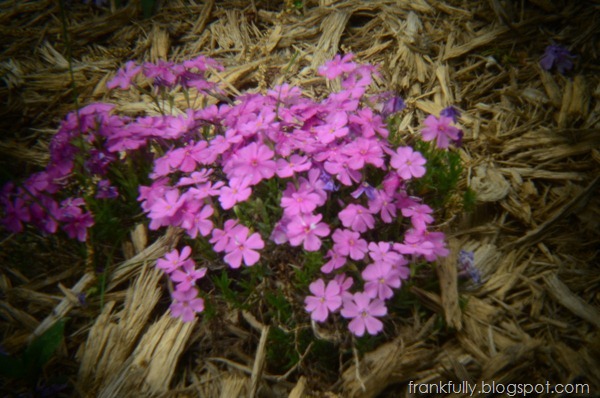
Siberian Wallflowers

The opening on the camera side of the lens is the tiniest hole ever, and the whole thing is plastic, so there are no aperture settings.  You adjust the brightness or darkness of the picture with shutter speed and ISO settings, and even then, it pretty much only works outside. :)  The day I took these pictures was sort of overcast. I can’t wait to get to try it when there’s some cool bright spots and shadows.

Here are some pictures where I was changing up the settings.

taken with plastic Holga lens; 1/50 sec, ISO 800
1/50 sec, ISO 800

taken with plastic Holga lens; 1/15 sec, ISO 800
1/15 sec, ISO 800

taken with plastic Holga lens; 1/50 sec, ISO 800
1/50 sec, ISO 800

taken with plastic Holga lens; 1/25 sec, ISO 800
1/25 sec, ISO  800

There’s a “focus ring” on the lens…I put it in quotes because it’s pretty primitive :) and really, the point of this lens is that it’s a toy lens, so I wasn’t too worried if the pictures were really in focus or not. I did notice when I took some flower close-ups it looked better when I had the lens set to “portrait” or whatever on the focus ring. The whole thing’s plastic, so I did have to be really careful when I was adjusting anything, for fear that it might pop off the camera! :)

I definitely want to keep playing with this lens and having fun with it. What do you think? Like the pictures? Would you want to play around with a lens like this?

Bigger pictures on Flickr.

Thursday, February 14, 2013

Things I Love Thursday: Chalk Pens

So I’m a little late to the chalk pen game. 

Now that I think about it, I must have seen the results of this amazing product everywhere, but just wasn’t thinking about it, or realizing just how glorious it must be. 

Chalk Ink from Amazon

I love chalkboard stuff: paint, labels, you name it, but the chalk, of course, is messy. (There used to be a nice layer of yellow dust under my island where the dogs eat.)  Then I saw this post on Evolution of Style, and when I asked Jenny what she was using to write on her chalkboard labels, she said “chalk pen”!  I was excited.

She got hers at Hobby Lobby, I got mine on Amazon.  And ever since, I have been one happy gal. The chalk pen is inky and wet-erase, so it goes on like a paint marker and doesn’t wipe off as easily as chalk. And your writing is much neater and cleaner.

I shared a little sneak peek of the cute jars my friend Janis got me from Anthropologie: they are much cuter and more practical when written on with a chalk pen.

jars from Anthropologie written in chalk pen

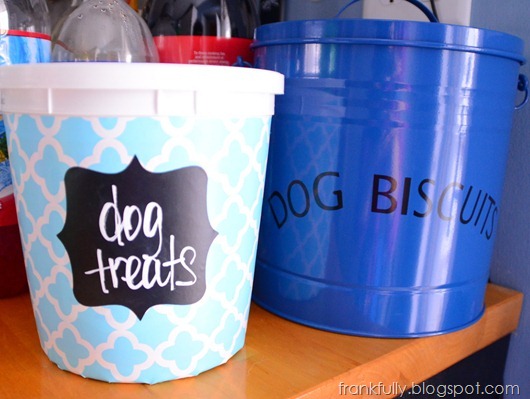
I covered an old Nestle Toll House container (the big one from Costco) with some Contact paper (from Marshalls), cut a Contact paper chalkboard label out on my Cricut, and labeled it with the chalk pen.  Voila, dog treat container!

dog treat containers! one with chalkboard label, one from HomeGoods

You know I love dry erase things, and for some things I still do love dry erase, but in the instance of these jars I have, my labels were just getting erased. The one on the right used to say “raw sugar” and the on the left used to say “hot chocolate” (that label was completely gone!).

jars with erased dry-erase labels

But now, with chalkboard Contact paper and chalk pen, I’ve got this!

blue kitchen jars with chalkboard labels

(The dark blue canisters above still have dry erase labels that have remained in tact!)

And my island! I still have regular old chalk around for when kids (or adults!) come over because it is totally fun to write on the island and erase and start over…but in the meantime, I’ve semi-immortalized (what would that really be? just “extended the life of”?) this cool horse drawing that a friend’s daughter drew and neatened up my “dog’s diner” with the chalk pen! Doesn’t it look nice?

chalkboard island written with chalk pen

I don’t know how those dogs are so messy when they eat/drink, but chalk on that side never lasted! But chalk pen is so far holding up great!

So tell me the truth, am I really the last person to have heard about chalk pens? Are you as excited as I was when I found out? Are you going to go buy one right now? :)

Thursday, December 13, 2012

Things I Love Thursday: Tamron 18-200mm Lens

Here’s a little review of the Tamron 18-200mm lens that I got for my birthday in August.  I’ve had it for a while, and  in case you need a holiday gift idea or a good all-around lens for traveling this holiday season, this might be your answer!

I’ve already told you how much I love my boyfriend of a camera, as well as my 35mm lens, and SB400 flash!

Let me remind you that I  am no pro photographer. I’m just a picture-happy gal who wants to capture everything I see and keep the pictures as memories. That said, I definitely want to tell you how I use and like my gear because I know that a lot of you are in my boat, and when I'm shopping, I want this kind of review.  It's not techy or geeky or heavy on specs, just how I use it.

So, the Tamron 18-200.  I am so happy I got this lens as an all purpose/travel lens.  I really do have it on my camera 80% of the time now. (I put the 18-55mm Nikon lens that came with my camera into my camera basket on the living room bookshelves.) The Tamron 18-200mm zooms out to the 18mm wide angle so I can take pictures of rooms and large groups of people and it also has the ability to zoom in and frame shots or take nice close up shots of things across the street.  Traveling in Boston with it was amazing. I felt like I never missed a good shot (and was able to put together an awesome photobook of memories with it!)

Green Dragon Tavern

I chose the Tamron version of this lens over the Nikon version based on weight but mostly price. (Really, mostly price!)  As far as techy/geeky things go, I was a little worried about the lack of VR (vibration-reduction, for when you’re zoomed out all the way to 200mm, a feature that’s on the Nikon but not the Tamron), but so far that hasn't been a huge issue for me.  It's definitely heavier (just read the specs) than my kit 18-55 or my trusty 35mm...in fact, when my mom is using my camera with this lens attached and the SB-400, she gets tired of holding it.  (Remember, I don't, that's just my mom who's used to a point and shoot, but still good for you to know!)  To me, though, the extra weight is worth the amazing versatility. (And when traveling, I don’t normally have my external flash attached.)  Another techy/geeky note, in some reviews comparing the Tamron version to the Nikon version, people talked about sharpness, distortion, etc, of the lens (I say “etc” because my eyes began to glaze over), but I haven’t noticed. Maybe pro or art photographers would, but for my snapshots, I couldn’t be happier with the Tamron!

my Nikon D5100 with Tamron 18-200mm lens, 77mm step up ring, and SB400 flash
My Nikon D5100 with Tamron 18-200mm lens, 77mm step up ring, and SB400 flash

This Tamron lens uses 62mm filters, so I did get a nice clear filter to leave attached all the time to protect the lens.  For other filters, though, I did get a 77mm step up ring that I am leaving attached all the time.  I don't always use a lot of filters, but I like to be prepared when I do.  I’ll sometimes use a star filter, warming filter, or polarizing filter, and since my other lenses are 52mm, I was going to have to buy a new set anyway. Well, I would hate to buy a set of 62mm, then need another size in case I do get other lenses later. 77mm seems to be the biggest, non-commercial lens size you can buy, so I’ll be getting step up rings for any future lenses to accommodate 77mm filters.

The lens does creep (zoom out as you’re walking) :) so I use the lock – which is why they put it on there!  The Nikon version may be a "better" lens, but for my picture taking, I couldn't be happier with this lens, especially for the price.  After getting this lens, (along with the things already in my camera bag), I haven't been craving a lot of gear like I was before.  (Though, there are a few things on my Christmas list, like colored gels for my flash and a wired remote, hint hint.) :)

What about you? Do you have a lens like this and like it? Did this rambling review help you choose a lens? Is there another lens that you have and love that I need? :)

Friday, November 2, 2012

Finishing the Fireplace, Part 2

When last I chatted about the fireplace, I was all in a tizzy over having my mantel materials.

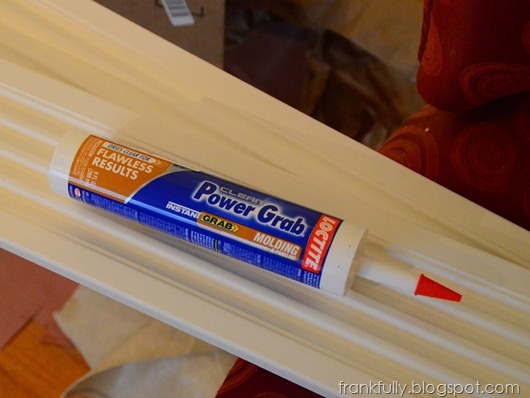
Putting together the surround was easy. I’m no woodworker, so I was careful to do one step at a time, and take measurements carefully before each new cut. First, I measured the height for the fluted MDF molding that would form the 2 sides of the surround. I cut them to length with our miter saw, then used Loctite PowerGrab Molding adhesive on each piece.

Power Grab molding adhesive

mantle surround in progress

I tried just using painters tape to hold the molding in piece, but it wasn’t quite happening. So I crossed my fingers and got out my 18 gauge pneumatic nailer and little air compressor to see if they’d penetrate the concrete backerboard that’s behind the molding, and it worked! Just a couple of nails in the top, middle, and bottom held the board in place while the glue dried.

mantle surround in progress

Then I measured the final finished width of everything before cutting my 1”x8” board for across the top.

mantle surround in progress

After rave reviews of Zinsser’s Smart Prime from Young House Love, I went to a local Benjamin Moore dealer to pick up a gallon. (It wasn’t available at Menards or Lowe’s.)

Zinsser Smart Prime

I got it because while I love the great fast-drying and stain-blocking properties of all Zinsser primers, this one is supposed to be self-leveling/smoothing, so you’ll see less brush strokes/roller marks. So far, I must say I’m extremely pleased, but I’ve been using it on raw wood. I’ll keep you updated as I use it on other projects around the house.

mantle surround in progress

After priming the top piece, I wanted to let it dry for 24 hours. Although you can topcoat the Smart Prime in a hour, the can says to let it dry longer for better stain and tannin blocking. I don’t often see tannin from pine bleed through, but I have before and wanted to take the extra precaution so I wouldn’t have to repaint this project later.

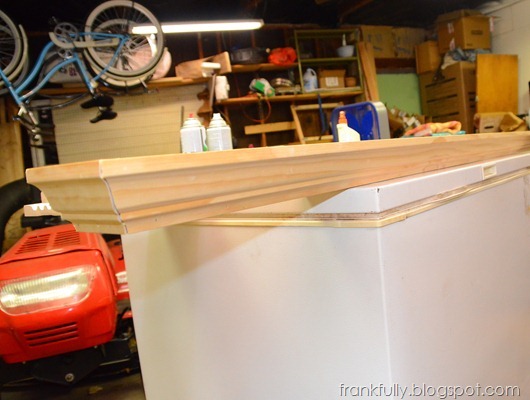
So I got to work building the mantel. My plan was to use the 1”x4” as the bottom of the mantel, cover it with the crown molding, that would then hold up the 1”x8” shelf. Simple enough, except that I have never worked with crown molding before.

To miter the outside corners of the crown molding, I Googled around and read what I could, then I kept this eHow video up, as well as this reference page from DeWalt tools to guide me along. Truthfully, though, it was  lot of trial and error. And really, I have no idea how I ended up successfully getting my corners to (pretty-much) match up, so I can’t give you tips. But it worked, and with a little bit (or a lotta bit) of caulk, they’re looking pretty good.

I didn’t really know how to photograph this, so here’s what I got. This is the 1”x4” inside the crown molding. (I used wood glue and 18 ga nails to hold it together.)

mantle shelf in progress

And here’s the outside, where you can see the 1”x4” is hidden.

mantle shelf in progress

Next, I began the tedious process of caulking up all my not-quite-matching joints. I ended up doing about 3 layers of caulk and a little wood filler. I’m normally not that worried about the details that no one will notice, but because this is the mantel and I want people to believe that it’s a fine bit of woodworking, I took the time to really cover my mistakes. :)

Stay tuned for more!

Young House Love Book!

I got my copy of the Young House Love book today in the mail!

Young House Love book

I’ve only wasted a little time perusing it’s pages and I’m so happy! (I did manage to get a coat of stain on our back porch today.)  It’s got some super great ideas, including some about projects and problems I’ve recently been thinking about.  Yaaaaay!!!  One of my favorite blogs come to book form – and all their hype was right on. It’s not just a rehashing of their blog, but it’s just as good as their blog! It’s an idea book, and it’s just what I was hoping for! (Don’t you love all these exclamation points and excitement! I do!)

Be back in a bit with more mantel updates!

Tuesday, October 16, 2012

Go Boston Card

As I was researching the things I wanted to do in Boston, I came across this Go Boston Card from Smart Destinations. A lot of the things I wanted to see or do in Boston were free or had a minimal fee, like the Freedom Trail and Paul Revere’s house, but then other things, like the Duck Boat Tours, had real admission fees. All in all, I figured things would add up, so I started looking around for deals. :)

I considered trying to buy Groupons (I found a couple for the Duck Tours and a guided Freedom Trail tour) but since Groupons come out sporadically, I missed some, and you have to read the fine print about when they’re valid, etc, because once you buy them, you’re stuck. So I wasn’t sure if Groupons were the right thing for this trip.

Somehow in my Googling, I stumbled upon the Go Boston Card. I’m often pretty skeptical of these “deal” cards, wondering if  I’ll really get my money’s worth and whatnot, but there were so many attractions listed on it, along with a guide to the attractions. I saw it was also sold on Costco.com which was a point in its favor (as not being some kind of scam, that is!) :)

As I was deciding whether or not to buy the card, I looked around for reviews…so I thought I’d post my own here. A little giving back to the internet community.

I loved all the options of attractions on the card, and I really wanted to make this a sightseeing trip.  We didn’t end up doing/seeing quite all I wanted to on the card, mostly because places are only open from 9-5ish and there’s only so much you can do in that time, and eat lunch, and travel from point a to point b; but I’m so happy with the flexibility it gave us.  We always had ideas for what to do next, and we could decide to do something different if we wanted.  We took a Boston Harbor cruise and rented bikes for a day: two of our favorite things that we wouldn’t have done without the card.

I ended up buying us each a 3-day pass with a bonus attraction. I’ve noticed there are different sale prices all the time, but I paid about $100 each for our cards, so $200 total.

Here are the things we did with the card:

We got a discount at the Green Dragon Tavern. ($8)

Boston 725

We got free glassware on the Sam Adams tour. ($16)

Sam Adams Boston Brewery tour

We rented bikes for the day and got admission into Paul Revere’s house. ($64 + $7)

Brandon and Victoria and bikes at Paul Revere's house

We took a Boston Harbor Cruise to the USS Constitution. ($39)

Brandon and Victoria on Boston Harbor Cruise

We took a Duck Boat Tour!!! ($66)

Brandon and Victoria in front of Dorchester Dottie, the Duck Boat (tour)

We took the Fenway Park tour. ($32)

Brandon and Victoria

We visited the Old State House museum and Boston Massacre site, complete with tours. ($15)

Old State House

All of which totaled about $247! So we got our money’s worth for sure. Having the card inspired us to do just a little more than we might have if we didn’t have it and felt like being lazy. You know, we would say to ourselves, “Let’s just go to the Old State House. There’s time and it’s on the card!” So that was a sightseeing bonus in itself!

There are lots of other tours and museums included on the card, so I think if we ever go back to Boston, I’d really consider getting the card again!

Do you buy into these deal-cards when you travel?

Thursday, August 2, 2012

Things I Love Thursday: Cute Dry Erase Boards!

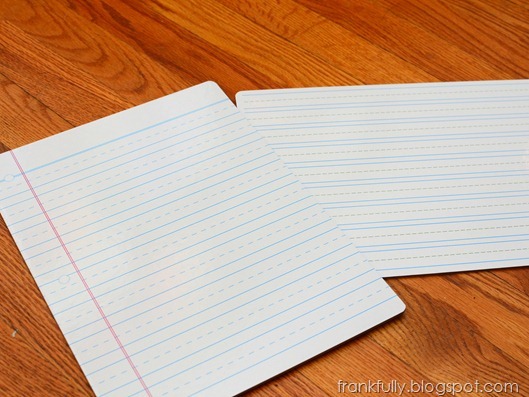
I was doing errands at Target the other day when I saw these cute dry erase boards in the $1 bins.

$1 dry erase boards at Target

I love that they look like paper! They’re supposed to be for kids to practice their handwriting, but I think they’ll be so cute for lists all over the house! For $1 each. You can’t beat that.

I love that these dry erase boards look like paper!

For grocery lists:

dry erase board for grocery list

For to-do lists:

dry erase board for to-do list

I really bought quite a few ;) and I will be putting them in various places all over the house. :)

And then, I was so inspired by cute dry erase boards to keep things organized, that I took the photo dividers that always come in photo storage boxes, laminated them, and put them in my pantry to label what’s supposed to be behind each door.

making dry erase labels

No excuses for not putting things away in their proper places :)

list in the pantry

An organized pantry makes for a happy lady.

list in the pantry

Kind of cute, right?

So, go to Target and get some cute paper-like dry erase boards!

Related Posts Plugin for WordPress, Blogger...