Showing posts with label paint. Show all posts

Tuesday, February 19, 2013

How Should I Refinish This Dresser?

Wow, I’m just asking for all kinds of help lately, aren’t I? But isn’t that what blogging is all about? :)   So, do I paint it or stain it?

sewing dresser
Images from here and here.

Okay, so here’s what’s going on. As a part of the great sewing room organization of 2013, I figured I should actually start working on this dresser I got from my aunt.

sewing room dresser being sanded

See all that junk on top? Yeah, this dresser’s just been sitting here collecting junk, which is pretty much the opposite of its intended function. (The junk is supposed to go inside the dresser, not on top.)

Last year (or longer ago than that?) I got this dresser from my aunt. It used to be my lola’s (Filipino grandma) and it’s just been sitting in my aunt’s garage.

sewing room dresser before

I generally don’t love dressers for sewing room storage – they’re meant to hold clothes, not sewing gear. The drawers are usually too deep, don’t slide easily enough, and the dimensions of the dresser itself is usually all wrong. My dream is to have kitchen-type cabinets of all shallow-ish drawers. (I had something pretty much ideal when I was living at home with my parents, so I’m spoiled!)

But this dresser actually is pretty great. It’s 6 feet long. Yes, 6 feet long. So its proportions are more along the lines of something you’d special order in the kitchen department. And it’s just over 29” tall, which is almost exactly the height of my sewing table – so as an added work surface it’s going to be ideal. The drawers are still a little deeper than I’d like, but they generally slide very well, so I think I can make this piece work.

You can see that the style is such that all the drawers touch. Well, over time, they’ve sort of started to stick to each other, probably from swelling and expanding and whatnot. So I’m getting on sanding and planing down the drawers a bit.

planing and sanding the drawer

I'm using an old planer of my dad’s that I found in the garage. :) Hey it works! I think the blade could use a bit of sharpening, which I’ll get on. I learned all about hand planes from Tommy on Ask This Old House.

planing the drawer

This is my first time using a hand plane, and I’ll admit I’m making a mess of it in some places (from not following Tommy’s advice. Oops!).

Anyway, as I’m working on the dresser, I’m finding it’s made of some nice wood. I thought at first that the finish was that really thick plasticky finish that I’d basically have to paint over. I planned on using Valspar’s Pacific Pleasure (color #5009-10) for the body and keep the top nice and white. Something along the lines of this color:

moisesesquenazi_thumb1
Image from here.

Really gorgeous right?

But like I said, it’s a nice piece of furniture (Thomasville), and I’m finding it’s not hard to sand off the finish down to bare wood. So, then I thought, should I do something like this? And refinish and stain it something gorgeous like Clara’s changing table from Young House Love?

ClarasRoom-After-Changing-T

Thoughts, ideas, questions, comments? I’d love your advice! 

The sewing room is painted a neutral gray, and I’m generally trying to keep all work surfaces white. (Don’t want colors clashing or affecting your judgment while you’re working!)  I do have another desk that is blue and I plan on updating with Valspar’s Pacific Pleasure. 

So do I go with two blue and white dressers to keep things cohesive? Or bring in some nice, neutral wood tones? Opinions? Help!!

Monday, February 11, 2013

What Color Should I Paint This Cat?

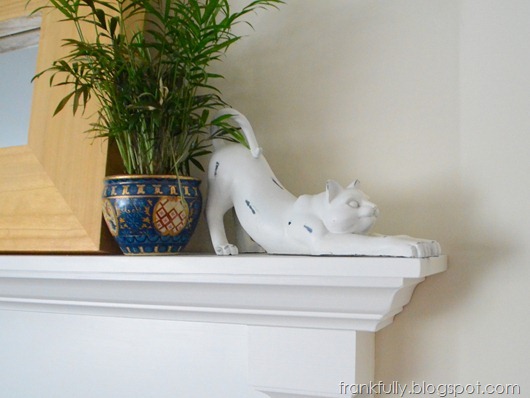
Yesterday, in my photos of the living room, you got a sneak peak of my current attempts at mantel styling (oh wait, there were also sneak peeks here and on Facebook).  I’m definitely still working on this one…playing with frames and accessories, thinking of staining this awesome mirror an ash brown…just normal stuff I like to think about :)

DSC_0959

But I think the most important question right now is, what color should I paint this cat?

DSC_0963

I’ve had it for ages, and while I was always tempted to paint it, until now, white seemed to work wherever I put it. But now it’s just getting lost in all the other white/beige around it. 

I could put something behind it of course…what do you think? Tack a wall hanging up back there?

Or paint it. Opinions? A fun aqua? Some sort of blue? Gray? Oil-rubbed bronze? Some other color entirely?  Give me your thoughts!

Friday, January 11, 2013

DIY Pretty Thermostat Cover

So, after all that work putting in a programmable thermostat, here’s how I covered it up. :)

"six impossible things" thermostat cover

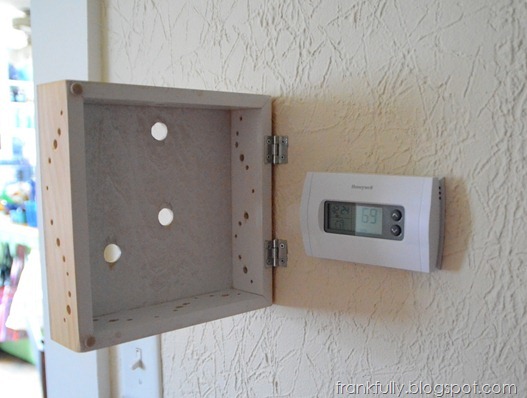
It’s on hinges, so you can open it up and get to the thermostat!

the inside of the cover, hinged to access the thermostat cover

I got the idea from this pin that was for an alarm cover.  I plan on making the hallway where this thermostat is into a gallery of artwork, and this new artistic cover will be the starting point. :) The pin used a canvas to cover an alarm panel, but I knew that the thermostat needed to be able to gauge the room’s air temperature, so I worked on something that I could drill holes into.

I’ve had it installed for about a month now, and so far so good with the thermostat and the furnace trucking along happily.

I was inspired by this paper cut from Etsy that I saw ages and ages ago. “Why, sometimes I’ve believed as many as six impossible things before breakfast,” says the White Queen to Alice, in Through the Looking Glass.

I started by finding this 8”x8” wooden “canvas” at Michael’s.

8x8 wooden "canvas" from Michael's

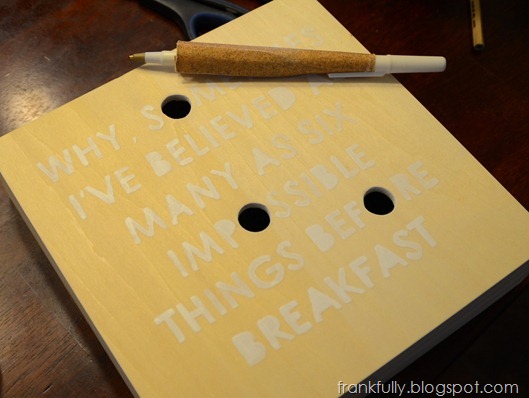
I printed out the quote several times in several sizes before deciding what I thought would look best size-wise, then taped the paper to the board and used the technique I found from this pin to “trace” the letters on to the board.

"tracing" the letters on to the wood

The pen leaves a light indentation in the wood which you can then follow with paint.

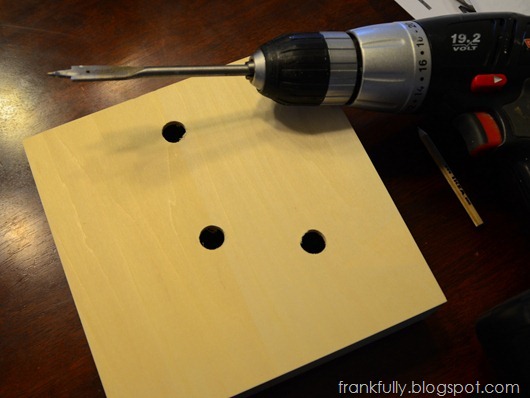
But first, I drilled holes where the ‘o’s would be to allow for airflow to get to the thermostat. I found that a 3/8” drill bit about matched the size of my ‘o’s.

I drilled holes for the 'o's. I used about a 3/8" drill bit

Then I painted the letters.

painting the letters

I started out with white paint because I was so in love with the idea of the inspiration photo. I knew that the holes would be darker, but I just kept thinking how much I like the light look.

I wrapped some sandpaper around a pen to smooth the insides of the holes.

sandpaper wrapped around a pen to sand the inside of the holes

To increase the amount of air that would reach the thermostat, I drilled holes into the sides of the wood canvas. I lightly drew them out with pencil in a wavy pattern and used different sized drill bits to make the whole thing look designed and purposeful, not just that I’m trying to keep the thermostat working. :)

many holes in the side, in a wavy pattern

After sanding the sides, after a few coats of white paint on the lettering, I put about 3 coats of water-based satin clear coat over it for protection.

satin clear coat

I did a very light sanding (with 22o grit paper) in between coats and the results were phenomenal.  The whole piece is super smooth and well-protected, but the satin clear coat is so matte, you can barely tell it’s there. It didn’t change the color of the wood at all.

white lettering and holes

Doesn’t it look so cool?

I wanted to spray pain the inside of the box white, for protection and just in case it helped visibility of the thermostat in any way (white reflects light, right?). So I taped off all the holes (so the spray wouldn’t mist through onto the front) and went to town.

taping up the holes before spray painting the inside

tiny hinges from lowes

I bought these tiny hinges at Lowe’s.  They’re just 1” tall and I made sure they weren’t really wider than the thickness of the wood.

I placed them and pre-drilled holes. If I was fancy, I could have/should have notched the wood out for the hinges so they’d be flush, but I really didn’t want to take time for that step. :)

pre-drilled the holes for the hinges

It took me a minute and some trouble to really mount it level on the wall, and I just sort of trucked along and maybe said some bad words, so I don’t have pictures of that step. I will say I tried to make marks, level it, place one screw, level it, place another and so on. It turned out pretty good. 

the inside of the cover, hinged to access the thermostat cover

My one important tip:  since the screws for the hinges were so so tiny, much too tiny for any kind of wall anchor, I actually put wood glue all over the threads before I screwed them into the drywall, because I didn’t want them to just pull right out. I know we’ll be opening and closing this cover a lot. As we use this guy, I will tell you how the glue in the drywall holds up.

Anyway, after installation, I had this!

I loved the white lettering with the wood and the walls, but the holes didn't look quite how I'd hoped.

I loved the white letters on the light wood with the light wall. But I sort of hated how obvious the holes looked. I totally wanted to set up some tiny LED behind there so that the light would shine through (like above!) but let’s be real, Victoria. That’s ridiculous.

So I just had to re-think it. I decided to repaint the letters in a really dark blue or black. I ended up deciding on a sort of navy color, and the way the lighting is in the hallway, it really does look cool: it’s very dark, you can hardly tell it’s blue, and the holes blend much better.

"six impossible things" thermostat cover

So I actually unscrewed the hinges from the wood side, took it down and repainted it. My painting definitely got a little messier since I was painting 2-3 more coats over the white I already had, but it’s okay to be imperfect. And in the hall where you’re really not staring at it, it looks great.

And I’m really happy to have a new cornerstone for my future gallery wall/hall! Now I just need to start hanging the rest of the pictures!

What do you think? Are you willing to embark on this tedious process to cover up your thermostat? :)

Saturday, January 5, 2013

Coffee Table Facelift

Finally! I’ve been working on this small change to our coffee table since June, but being the procrastinator that I am, just got it done in time for New Year’s.

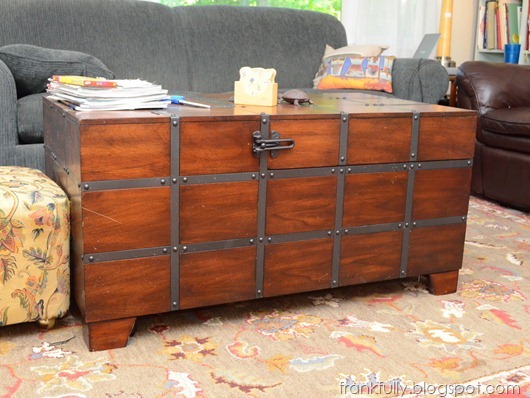
Here’s our coffee table now:

updated coffee table

And here it was before:

our coffee table before. from Ashley Furniture

I know, it’s not the biggest change ever, but I love the new look. It fits a lot better into our new, lighter living room scheme.

I got this coffee table quite a few years ago from Ashley Furniture and I love it because it’s on wheels and the top slides open.

our coffee table opens!

Isn’t that awesome? You can get to the storage inside without having to lift open a lid, meaning you can leave all your junk on the top of the table.

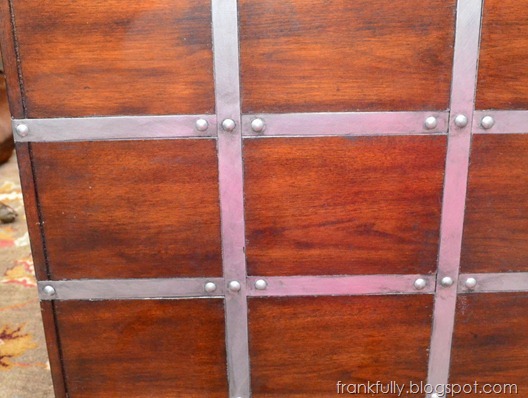
But like I said, I wanted it to blend a little better with all the lighter colors I’m using now, so painting the black metal seemed like a good option.  The coffee table still looks rustic/industrial, but blends with all the satin nickel finishes we have a little better.

I got out some Rustoleum Painter’s Touch Brushed Metallic Paint in Platinum that I bought for something else, a foam brush, and some painter’s tape.

Rustoleum Painter's Touch Brushed Metallic in Platinum

Then I began the tedious job of taping everything off. Prep work is always terrible and boring, but it’s the most important for good results!

tedious taping

Then I brushed on 2-3 light coats of the paint, varying my brush stroke directions to make everything look purposefully uneven and like real brushed metal.

The first coat was pretty thin and you could still see the black through it.

one thin coat of paint

But after I put on 1 or 2 more coats, it was nice and silver.

nice, bright silver

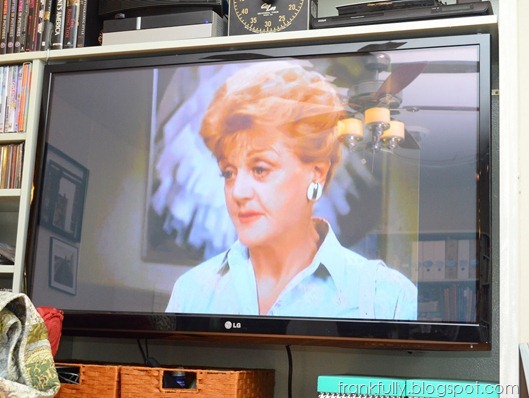
All that taping and waiting for coats to dry was tedious and I watched a lot of Murder, She Wrote(Thank you, Netflix.)

I watched a lot of Murder, She Wrote

Then, to keep with the rustic/weathered feel of the table, (and to hide any mistakes and imperfections), I got out some Rustoleum American Accents Antique Pewter top coat (that came with a spray paint kit) to add some antiquing.

Rustoleum American Accents Antique Pewter topcoat

I varied between brushing it on and wiping it off with a paper towel, and sort of dabbing it on with a paper towel and wiping off with one, too. It was all very imprecise but I liked the look I was getting.

with some antiquing

I did have some yucky mishaps. Whether it’s because I am a terrible taper (which is entirely possible) or because of the finish on the table (did I wipe it down with too much Pledge?) I got a lot of bleed through in some places.

terrible bleed through!

Ugh. I had to painstakingly, carefully scrape that all off with a razor scraper. What a pain! Some places came out very clean, but there was enough like this that I said bad words. I even tried Frog Tape with similar results. (That’s why I wonder if it was me/the finish on the table.)  Luckily, since I was antiquing it, I just used some of the darker paint to hide spots where I couldn’t get all of the silver paint off of the wood, so I still love the finished product. I just want to share the reality of the project!

Then, after I painted, scraped, and antiqued all four sides, I left the top looking basically like this for 5 months.

coffee table top, full of tape

Because I am terrible.

But I finally finished it all! And I couldn’t be happier. Here it is again, with a little more living room in the background, so you can see how good it looks. ;)

our coffee table in the living room!

Have you finally finished any projects lately? Like me, just in time for your New Year’s shindig?

Thursday, December 20, 2012

Finishing Touches on the Mantel

I’ve actually been finishing some projects. What is going on here?  (I guess the holidays and upcoming New Year’s celebration are helping kick my butt into gear!)  First the Maligayang Pakso sign got done in one day, then this mantel stuff.  I’ve also been doing other little things finally, that maybe I’ll group into one post.

So last time I left you with the mantel, it was looking pretty spiffy, but I just wanted a few last additions to really make it look well-planned and neatly finished (neither of which it was! ha!).

Here’s what I came up with!

finished mantel

See my cool corbels under the shelf and tiny detail trim on the tile?

Little things, I know, but just finishing touches.

Here’s where it was last time I posted about this project:

mantel in progress

I love the look of the corbels and the detail trim just meant I didn’t have to try to do a crazy caulk job in between the tile and the fluted trim.

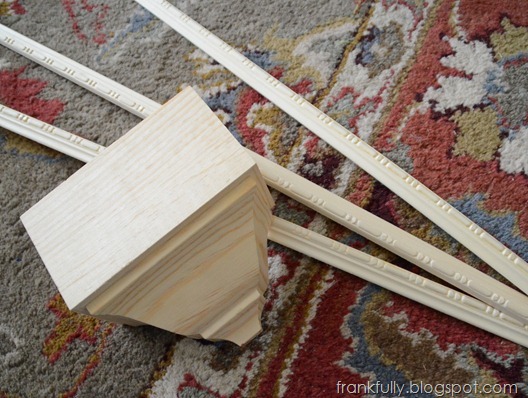
I actually began these finishing touches right after I finished the mantel, but some snafus (as always) came up and set me back a bit.  I started by going to Lowes and finding the trim and corbels.

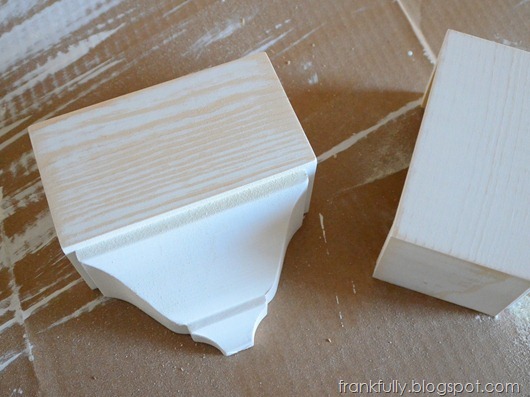
corbels and trim from Lowes

I gave them all a coat of Zinsser Smart Prime and then a couple of coats of Benjamin Moore Advance in Simply White, the same paint I used on the pantry and rest of the mantel.

But then, the grain had raised and was showing really badly on the corbels. The difference was so great, that when I sanded them down a bit, they looked like this:

wood grain in the corbels

It’s not that I don’t like the look of wood grain under paint, but nothing else on the mantel is showing grain, so I just wanted the overall look to be consistent. So I primed, sanded (with 220 grit), and primed again, and sanded again a few times until I thought it all sort of smoothed itself out. I gave the corbels another coat of paint, (sanded a bit more), and painted on a second coat before they were ready to hang.

In the meantime, I hung the small detail trim, but my attempts to keep the nails from hitting the tile (or something hard under there!) didn’t quite work out, because I had 4-5 nails that looked like this:

DSC_0260

Yeah, that nail totally curved as it went in and came back out.  Because they’re just 18ga, I was able to cut them off with a pair of lineman pliers as close to the wood as possible, then used a nail punch set to sink them into the wood. I used wood filler to fill all the holes.

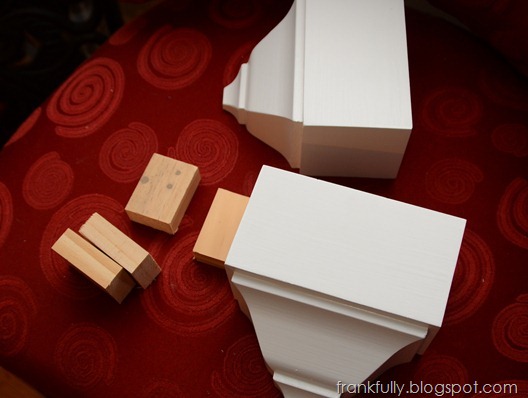
To attach the corbels, I first nailed little 1x2 scraps of wood to the top plate of the frame, then attached the corbels to the wood.

DSC_0732

I didn’t get pictures of the process because of course the 2 corbels had different measurements on the inside (the support braces inside were in different places) and I only measured 1 corbel when I cut my little blocks of wood. So I had to say some bad words as I was putting them up instead of taking photos.

But once all the nail holes were filled, and all the seams were caulked, and a little bit of touch up paint was applied, I had a totally finished mantel that I am so happy with!  We’ll just look at it again. :)

finished mantel

It’s so clean and neat.  I’m excited to see and post about the mantel post-Christmas with some other kinds of art, etc. up there!

Do the finishing touches on your projects take as long and go as wrong as they do on mine? ;)

Thursday, December 6, 2012

Maligayang Pasko

I am so proud of myself for actually seeing a project through, start to finish, in a day. :)

Maligayang Pasko

“Maligayang Pasko” is how you say “Merry Christmas” in the Philippines!

When I saw these posts on House of Hepworths, I was totally inspired. I knew I could do something similar for Christmas.


First, I went to my Gypsy (for Cricut) and designed a “Maligayang Pasko” using mostly the Calligraphy Collection font but a little of Gypsy Font. (The “li” were in the Gypsy font, just so I could get the cursive layout how I wanted it.)

Maligayang Pasko on the Gypsy for Cricut

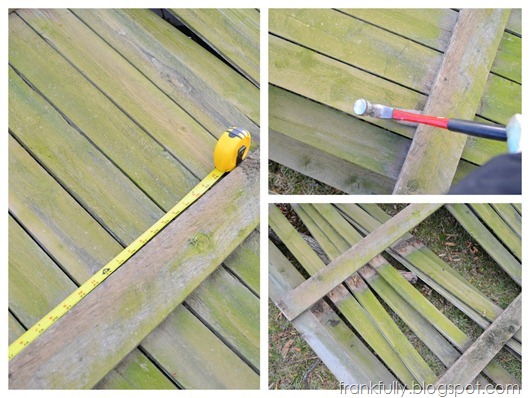
Since we’ve taken our fence down, we’ve got this pile of fence panels in the back yard. So I figured they would be perfect for this project.

taking boards off a fence panel

I set my Gypsy/Cricut design for the largest cutting mat, 12”x24”, so I knew I wanted my sign to be bigger than that. I measured the boards of the fence panel and decided I needed about 9 (which was about 32”), so I took about 11 off the panel (just to be safe since some were cracking).  (I decided to make two signs, one for myself and one for someone special who has to wait till Christmas to get it!)

cutting the boards, attaching them back together

I decided to use the greenish, weathered sign, since it looked like it could be festive. :)

I cut each one of my boards to about 19.5” (a random measurement that looked good to me!).  I cheated by just cutting the boards around the sections with the nails in them (that were previously holding the fence together). (The nail-y scrap pieces went straight into the garbage/burn pile.) 

I found another scrap board in the back yard that I to cut to the width of my sign as a backer for all the fence pieces. I used 5/8” 18ga nails in the nail gun to attach the planks to the back boards. (I should have also used some glue. Oh well.) I put those little nails in the front and back of the wooden sign.  Once it was all together, I gave everything a quick sanding with some old 100 grit paper.

Then I collected some paint and stuff.

paint and spray glue

I cut the first “Maligayang Pasko” (on the Cricut) out of freezer paper (shiny side down). (I think posterboard or something would have been ideal, but I didn’t have a piece around that was big enough or a new cutting mat that was sticky enough.)  I sprayed some adhesive on the back of the cutout, then placed it onto my first set of boards. It was really sticky, which was good for my rough boards.  Then I sprayed the whole thing with several light coats of red spray paint.

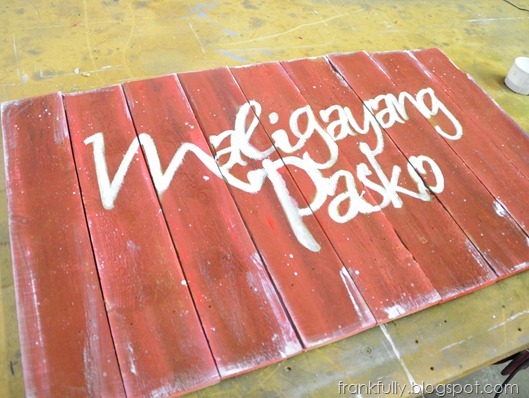
Maligayang Pasko reverse stencil

When I peeled off the stencil, I was so happy with the results!

Maligayang Pasko sign in progress

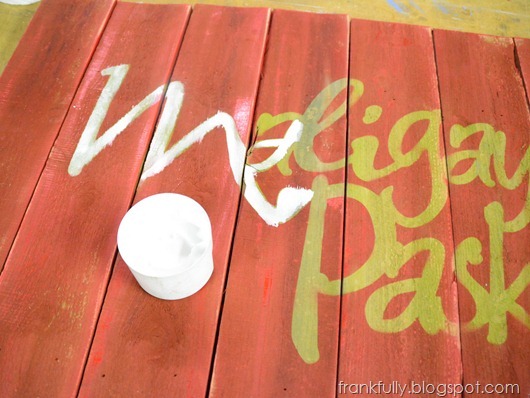
But, as cool as this green looks in the picture, in real life, it wasn’t quite what I wanted yet, so I decided to brighten up the lettering with some white paint. I took a small artists brush and some oil-based white paint diluted with mineral spirits (so it would be a little thinner and slightly runny) to keep everything looking weathered and rustic. (Latex paint probably wouldn’t have stuck to the spray paint/rough boards as well.)

painting in the letters of the sign

For fun and added interest, I splattered a bit of white paint around, and spread some white paint on the edges with a  bunched up paper towel.

Maligayang Pasko

I was finally in love with the sign. I added to the weathered old look by running the sander with some old 100 grit paper lightly over the whole thing. Then I sprayed it all with some clear coat to seal everything in.  Doesn’t it look great?

Here it is again on the mantel!

DSC_0663-002

I made two signs, start to finish, in a day, and both were done completely with stuff I already had around the house. Woohoo for a completed and free project!

What do you think? Will you be trying a decorative sign made of old boards? :)

Related Posts Plugin for WordPress, Blogger...