Wednesday, February 29, 2012

Aerogarden Update #4

Just a quickie post today!

Look how big this parsley has gotten in just a week!

DSC_0604-001

Much bigger than last week, huh? :)

Tuesday, February 28, 2012

Tiling the Fireplace

Well, it turns out I didn’t get a chance to take enough pictures to do a full tutorial and it turns out that this experience did not at all make me an expert to post a full tutorial. Tiling this fireplace was a lot more stressful and panicky than I expected. :) So instead of a tutorial, you will be getting a  journal of our actual, non-perfect adventure into tiling.

DSC_0533-001

Mixing the mortar wasn’t bad at all. Here’s Grandpa showing off its perfect consistency.

DSC_0466

We used this metal tile trim around the fireplace to give the tiles (and our cut edges!) a clean finish. It really came in handy when our tiles started sliding down the wall. :)

2012-02-25

Even though we fully understand gravity, we started with the top center of the fireplace because I wanted to make sure that we got the pattern of the subway tile centered, since I figured that’d be the first place your eye would really be drawn to. If we had used a more random mosaic tile (and something smaller, where an extra inch of tile here or there wouldn’t be noticeable) we could have just started from the bottom and worked our way up like smart people.

Of course the tile began sliding down the wall. I knew it would, I had read it so many times, but somehow I was still panickingly surprised and unprepared for it. Thank goodness we decided to use that metal edging! We propped the whole thing up with a 4-foot level and a piece of trim Grandpa cut to 4 feet.

DSC_0472

At this point, we clearly needed a humongous coffee break.

Next, we needed to start work on the sides – making sure that the pattern would line up with the top and the bottom.

Because our cutting guide on the wet saw only went out to 7 5/8” and our 2”x4” tiles were on 12” x 12” sheets, we had to figure out how to free hand cut the tiles in half. Grandpa lined up the full tile that we wanted to keep against the blade (it was noisy and the edges got shaved a little, but nothing that you notice) thereby using the full tile as the guide to cut the next tile in half.

Here’s a picture of our cutting mark – to help us visualize.

DSC_0543-001

Once that was done, we planned on having the tile extend about 8” on either side of the fireplace, but as I just said, the cutting guide only went out to 7 5/8”, and we wanted that guide to make sure we got straight cuts. So we went back to the fireplace and measured. We determined that (on the right side) we’d need 6 5/8” of tile to line us up with the existing tiles, so we went with it. (On the left side, it was 6 3/8”. Thank goodness we measured both sides. You can kind of tell, (I could tell that day, that’s why I measured again), but in general it’s not too noticeable, so we stuck with it. :)

DSC_0530-001

Then, with some more measuring, we realized that we’d have an inch or so between the last full tile and the floor (which would need room for grout lines). We decided that instead of making what seemed like a million small cuts, we’d make a mid-project run to Lowes to buy some 3/4” x 6” border tiles that I remembered they had. Those tiles were a lifesaver! We used them as the bottom row of tiles.

DSC_0542

(They also came in handy in another mis-measured spot that I’m choosing not to point out to everyone.) ;)

After that, we were ready to finish tiling the remaining 3 sides of the fireplace. It was stressful but really fine. The tiles kept sliding down as we worked our way down to the bottom; we had to work hard pushing the tiles up to get everything to fit where it was supposed to. Let me say, thank goodness for the person who invented tile spacers. They were another lifesaver! They were so so so helpful.

DSC_0491

The bottom and the last side were much easier since we weren’t fighting gravity with the tile, though I did end up messing up the pattern a bit at the end. Oops! I should never tell, but it bugs me, and I didn’t notice until the mortar was dry. Boo. That last side though, was when I realized what tiling really should be like – when you work from the bottom up, it’s much more bearable!

Anyway, it’s done and I’m happy.

DSC_0533-001

And we learned a lot:

Even though the mortar bag tells you to only mix up what you can use in 10 or 15 minutes, and that’s true, they also tell you to let the mortar slake for 10 minutes, which makes the mortar really workable for 20-25 minutes. We found this to be true and helpful, but not until the end. Before that, I was so worried about having the mortar dry up on us, that I was working too quickly, and the mortar wasn’t really set up yet. I think that’s one reason our tiling was sliding down so much (and working against gravity of course.)

Really, work from the bottom up. Plan ahead so you can. Now of course, the part over the top fireplace would have not had support underneath it in any case, so from that I learned to avoid having a fireplace be your first tiling experience.

Level the substrate before you start tiling. These seems super obvious, our cement backer board wasn’t that out of whack, and I thought I could just do it as I went along (adding more mortar underneath some spots, smoothing others out). But since we tiled the top, and then took a break, I didn’t realize where some of the uneven spots were until we started adding tile, and by then the mortar under the previously set tile was dry and therefore unable to be moved. Boo.

I also learned that although smaller tiles can be more expensive, and some may look trendy, I can see why they are popular with first time tilers. A lot of our measuring mistakes and issues wouldn’t have been so bad if we were using smaller tiles.

Again, though, I am happy. :)

I’m working on finishing the wall around it, and I’ll be back with more on that when I’m done.

(Even though my tile job is far from perfect, I’m sure it’d be worse if I hadn’t gotten tiling info from Young House Love and The Floor Elf.) :)

Saturday, February 25, 2012

Tile!

DSC_0509-002

Things I learned tiling:

A fireplace is not the best place to learn how to do tile. Start with something easier, like a kitchen backsplash?

Also, maybe using subway tile on your first tiling job isn’t the best idea either. 1” mosaic tile may be trendy, but it would have been easier!

But the fireplace is tiled and I love it! I will post more about our tiling experience when my muscles recover.

Next steps are to mud and tape the surrounding fireplace wall, grout the tile, and touch up any black paint on the fireplace before I finally get to take down the red rosin paper and clean up to see what this project really looks like! Then build and paint the mantel surround, and this project will be done. :)

I’ll keep posting on our progress/experiences!

Thursday, February 23, 2012

Tile Day!

DSC_0453

Oh man! Today is tile day!!

I’m so excited. We’ve got a wet saw. We’ve got tile. I bought just about every kind of trowel that looked like it could have anything to do with our project, so we wouldn’t be smack-dab in the middle of thinsetting (is that a verb?) and realize we really needed another tool.

Grandpa’s on his way over. I’ve got the area covered with red rosin paper.

DSC_0444

I thought I should start to get rid of the hideous gold before we tiled because I’m using high heat spray paint to cover it. (There’s a brush on, but I figured I’d get a smoother coat this way.) (And I really can not figure out how to get the doors out of/off this fireplace insert. I've googled it, I've looked at ours, I've tried brute strength. I just think ours won't come off. Maybe that feature's on the the more "upscale" versions of fireplace inserts.) :)

So it’s looking a little messy now, but there’s no more gold! I ended up really spraying the whole thing (there was also leftover paint and gunk on the fireplace from the wall we took down that I couldn’t scrape off, so I just sprayed that, too) because I think the new paint’s finish is more matte than the original fireplace finish, so I want everything to look even.

DSC_0457

I will keep you updated as we tile! Wish us luck!

Wednesday, February 22, 2012

Aerogarden Update #3


I finally have some parsley! It's still little, but it's got parsley-shaped leaves! Woohoo! The basil is still a little mound - I've done a bit of pruning on it, to hopefully shape it into a leafy, bushy plant. And the cilantro is humongous! I keep pruning/using it to avoid having to raise the grow-light lamp, since the baby parsley and basil still need it low. This Aerogarden is seriously a fun endeavor in my kitchen!

In other news, hopefully I'll be actually tiling soon! I'll keep you posted!

Posted by Picasa

Tuesday, February 21, 2012

More Tile Choices (again!)

(I hope you don’t mind being on this living room journey with me, watching/reading as I go through the decision making process…I do have some before and after posts of other things in the house to put together for you, but this is what I'm in the middle of right now, so it’s on my mind all the time!)

Well, apparently being "settled on a final tile decision" really means nothing, because of course I've changed my mind. Brandon says if you're reading my blog, these changes of mind will just help you get to know me, because apparently this is what I'm like.

So even though I was loving the octagon tile, I just keep going back to doing some kind of subway tile. Either the cute 1"x2" mosaic-type subway tile, or the slightly bigger 2"x4" subway tile.

Lowe's has white, 2"x4" white subway tile, in stock, for about $3 a square foot. Let me tell you, the price is right and the style is right.  I just feel like the subway tile is a look I won't get tired of and will be pretty versatile!

subway tile
from Lowes


I know the picture’s kind of hard to see, being white on white. :) Here’s a great image of white subway tile with gray grout – in a kitchen, but you get the idea.

kitchen backsplash white subway tiles dark grey grout
White subway tile with gray grout from here


So, we’d have to get and learn how to use a wet saw, which will be a fun adventure. But luckily, learning on inexpensive tile is less stressful than learning on pricey tile!

I’m also wondering if I want to just go for that Lowe’s subway tile, or if I want to take a trip out to the tile outlet to find something that looks like this:

caitlin creer fireplace
Gray mosaic subway tile from Caitlin Creer Interiors


And, in decorating/fabric news, now that I’ve decided to keep that rug, the fabric and art choices I made here might not really work any more :) but I found this great light blue chevron fabric via Pinterest, and I feel like it’d be a great accent fabric, right?

blue chevron fabric
from here

Yum, man I hope so! I know I just keep pulling things I love and throwing them onto this blog, and I know a lot of them are going to get nixed, but I hope you love them along with me anyway! :)

Friday, February 17, 2012

Little Living Room Update

DSC_0318-001

Valerie and I had a major shopping and decision making day yesterday, and then I did even more shopping on my own. Whew! Exhausting! But I’m excited with some of the progress and decisions we made.

We decided to stick with the rug. :) So it’s installed and in place. We moved around some of the end tables, and decided what new end tables we’re looking for. (A round one for the corner in between the 2 couches, and a mini one for my side of the couch, next to the fireplace.)  And even though the curtains were my original inspiration, we took them down. :) In their place will go some white or off-white sheers, and then real curtain panels, to be determined. We discussed other small changes, like lamps – a few of which were bought, but didn’t work out, so were promptly returned – that will happen after more of the major changes. All things in their proper order. :)

I think we settled on a final tile decision, which is a huge thing! Although I’m still wavering a bit between these and the penny tiles, these tiles from Lowes might win. They’re fun but a little less busy, they’re cheaper :), and in stock. I thought they were a little bathroom-y at first, but there will only be 6-8” of them, and they’re growing on me.

DSC_0300-001

I also started checking out mantel kits which is getting me really excited about this fireplace!

And, I think we’re replacing the ultra-modern wavy Ikea track lighting with something more like this:
taylor track light
Taylor Track Lighting

I’m excited, but there’s a lot of work ahead!

Thursday, February 16, 2012

Things I Love Thursday: Presidential Artwork

So the title sounds funny and pretty nerdy, but I figured it was timely with President's Day coming up.  Remember when people used to have framed photos or paintings of the president in their houses? Do you think this really happened? I just feel like in old movies or TV shows, you'd see the unfinished Gilbert Stuart portrait of George Washington over the fireplace or large writing desk, or a photo of Abraham Lincoln in the dining room.

Whether it really happened or not, I want to bring that trend back. In my future gallery wall, I totally plan to have some representations of Father George and Honest Abe...with modern, pop-art interpretations like this:

"Honest Abe" Pop Art

Because while photos of Lincoln like this:

President Abraham Lincoln Portrait 1863
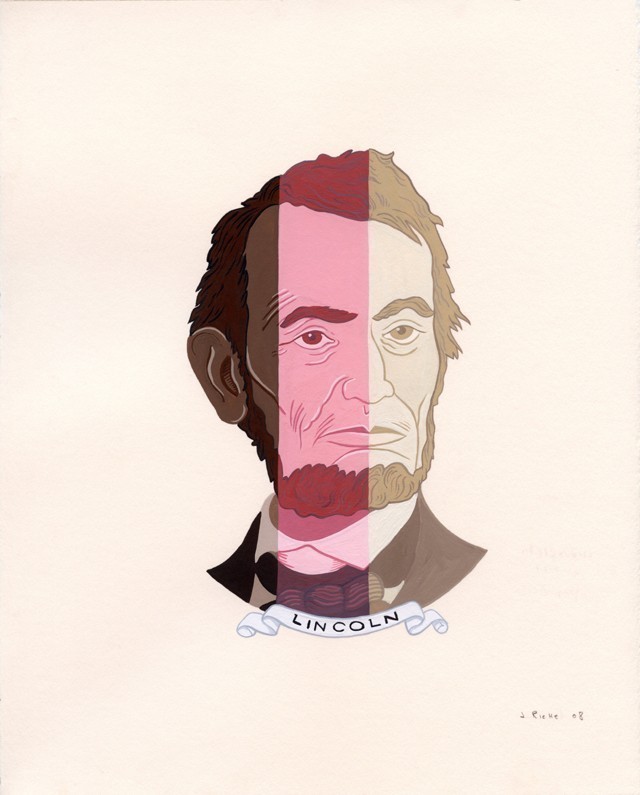
are amazing, iconic, and traditional, (and really, I might sneak this one in there somewhere) I am thinking it'd be totally awesome to adorn my walls with Lincoln portraits like this:

Neapolitan Abe

or this:

Lincoln Memorial Pop Art

And when we think of father of our country, I know we're all thinking of this:

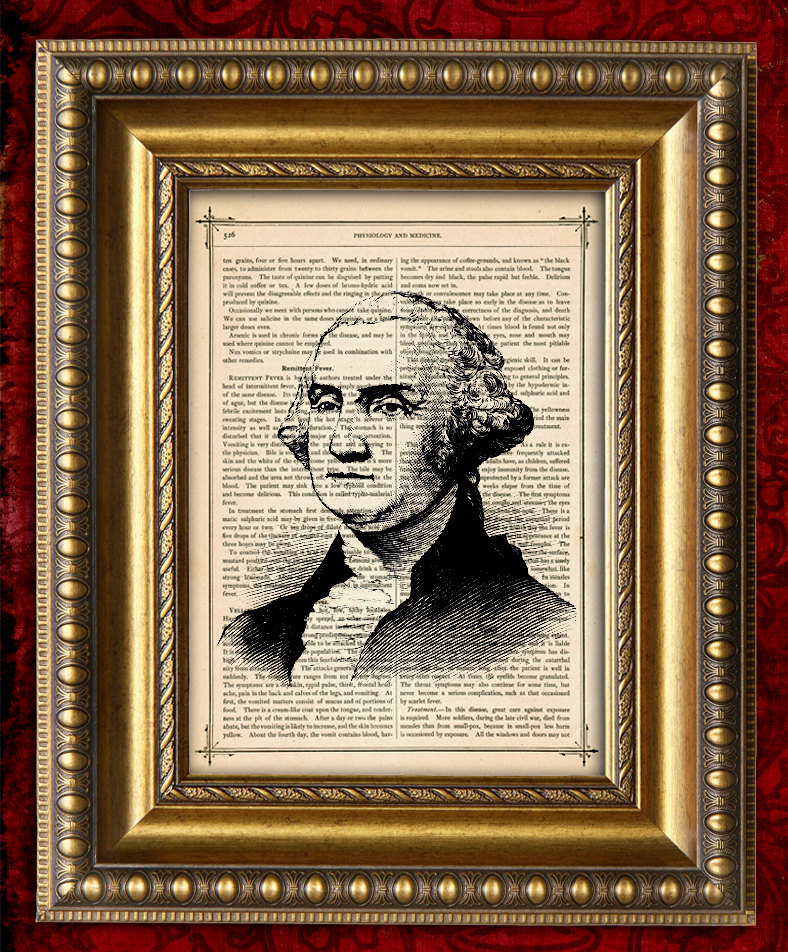
Unfinished Portrait by Gilbert Stuart
or this:

Landsdowne Portrait by Gilbert Stuart

But the winner in my personal gallery is going to be this:

George Washington on a White Charger Horse folk art

and maybe this:

George Washington Book Print

So here, here! to some American history in the house and a tribute to our forefathers every time I walk down the hall.  Have I convinced you to incorporated the presidents into your home decor?

Happy President's Day!

Wednesday, February 15, 2012

Rug Option #1

I found this amazing rug at my favorite place, Home Goods.  It's a great rug, plush wool, it's the right size, and it was a great price. The gray seems really muddy-dog friendly. :) If I keep it, it will be installed with the edges underneath the couches, so not as much of the border will be showing. 

Rug option #1!!

It's definitely different than my original inspiration rugs, though it does have the great reds in it.
images from here and here

I feel like if I keep this rug, I am really open to completely changing up my curtains (and curtain plan), new living room colors, and all kinds of new things! Which of course means more work :)

So, do I keep this rug and have fun changing the living room around it? Or aim for something closer to the inspiration rugs? Decisions, decisions... Any thoughts?  Any big decisions you're trying to make right now?
Posted by Picasa

Tuesday, February 14, 2012

DIY Lamps Idea

Okay, so lighting is something I don't usually think in depth about. I mean, I got a lovely new ceiling fan for our living room, then we installed some Ikea track lighting, and then I was just done. There's lighting, it's not perfect, but I can see. The end.

Ceiling fan and Ikea track lighting

But then Valerie (who really needs to get a website) told me I need lamps in the living room, because it produces light at more of an eye level -- and just looks cool. And yeah, all of a sudden I am noticing great lamps in all of the inspiration rooms I love.

The catch is that table lamps take up valuable table space, which at our house is usually reserved for laptops and candy.  Valerie and I have a shopping date planned, so I am trying to keep an open mind, because I think I know where she's going with this whole lamp thing, but I could be surprised.

Of course, because I'm a cheapskate and I like getting my own way, I've been thinking about how I could maybe make some lamps - so I could have one floor lamp and one table lamp that match, and hopefully kind of look like two matching table lamps, but really, one is on the floor - therefore saving space for candy and laptops.

And I came across this blog and these posts and I'm totally inspired.
Posts here and here
The blog: Not JUST a Housewife.  Great name, right? Something I'm explaining to people about myself all the time!

I think I'd stick with the scrap wood lamp (not the circles) because I'm lazy. I'd paint them with some nice primer and bold, solid paint to give them a modern feel and maybe hide some of the grain. And I'd make a matching table and floor lamp.

Imagine these gorgeous, bold lamps -- but in the scrap wood style. Yum. :)
image from here

Oooh, and you could purposely cut/stack the wood from largest to smallest, so it'd be reminiscent of stacked books like this:
image from here

Ooh, I am getting more excited about this lamp idea all the time! I'm not sure Valerie knew what she was getting herself into when she offered to "give me some ideas" for my living room!

But I will keep an open mind about buying lamps! (...or will I?)

Wednesday, February 8, 2012

Fireplace Update 1 + more tile choices

This little update isn't totally worthy of a blog post, but again, I came home from work last night to find more work done on the fireplace! Brandon put up the new piece of drywall! (And I didn't have to do a thing!)

It's greenboard because that's what we've had living in our house for 2 years...it's supposed to be for the master bathroom project that's 2 years on hold. :)

To fill this post out a bit more, here are a few more tile choices we've found.

We found this awesome 2x4 stainless steel subway tile at Schilling's, a local lumber yard/design center, and this white and gray 1/2" mosaic tile that we thought we might border with the stainless subway tile.


But I know that mosaic might be a little "trendy" and if I'm doing all this work on the fireplace, I'd like the look to be as long-lasting as possible so I don't have to do it again :)

I did find all-gray mosaic tile online, which I'd use with gray grout:
available here

Or, for the fun, modern yet vintage look, I was also thinking about using some white penny tile like this:

It's available at Overstock.com and HomeDepot.com.  I'm kind of loving it, and I think it's the #1 runner up right now.  I might border it with that fun stainless tile...or maybe keep it simple with a white wood surround. Who knows?

So, any thoughts? :)

I'm not gonna lie: I got the penny tile inspiration from one of my favorite blogs, Young House Love. :)

Tuesday, February 7, 2012

Fireplace Demo

I was getting so excited about pillows and rugs (I even bought a rug runner up) and fabrics, but I realized that I should maybe get onto some bigger projects: like the fireplace.

I really didn't know what I'd find under those cedar boards, so I took the project slowly so that I wasn't flinging cedar all over the place and all over myself! I kind of felt bad removing all that hard work that somebody else did, but I was getting pretty excited to see our own version of the fireplace!

 
I was pleasantly surprised to find some clean drywall underneath, but because of all the glue on it and damage I did to it while pulling the cedar off, I think we'll just replace it.
I know you love my creepy thumbs up!

So we ended up stripping the whole fireplace wall to the studs. (It was around this point that Brandon started helping me, because I was threatening to just leave it half done and a mess. I was tired!) :)

Scroll to the bottom of this post to see why I didn't get a picture of the demo-ed fireplace without the ladder! :)

We headed out to Menards to pick up some cement backer board to put up around the fireplace for under the tile, and to Home Depot to check out some tile choices.  Here are a couple I found there:

Arctic Ice 1x2 glass tile and  Majestic Ocean 1x1 glass tile

I love the subway tile look, but we'd definitely need tile nippers and/or a wet saw if we used those. The square tiles are nice because we'd get away with no tile cuts! I think I'd love to find all-gray 1" square tiles in our price range. I'll be off to a couple more stores in the next few days on the tile quest.
 
For now, I'm excited! This seemed like a huge project, but now that it's underway, it's seeming manageable. We'll see if I'm still thinking that as we go. I've never tiled before, so this will be an experience!
 
We're also not sure if we'll do a full mantel and wood surround - because I think that would take up nearly the whole wall, and I have to figure out how I want to integrate this angled fireplace with the bookshelves next to it. I have a feeling the shelves are going to get cut down a little bit...but one step at a time! As I go, I realize so many things are working out differently than I expected, so I'm not making any more big plans until we get to each new situation.
 
More updates coming as I go!

I didn't get a picture of the final demo without the ladder, because this is what I came home to after work last night:
Brandon put up the cement backer board while I was at work! So amazing! I love when projects just magically get done! :) I have to add screws to finish it off, and we still have to put the new drywall on top, but man, am I happy that the backer board is up and I didn't have to do a thing!

Monday, February 6, 2012

Aerogarden Update #2

Holy cow, my cilantro's getting huge!

My Aerogarden introduction was just about 2 weeks ago...look how big the cilantro's gotten in 2 weeks!

I've given it a few small prunings, to help encourage leafy growth, not stemmy growth, and it looks like it's paid off!  I totally used some fresh cilantro in my chicken tacos today!

The basil's still coming along, and the good news is there are some tiny green sprouts in the new Italian parsely!

Just for reference, here's where we were 2 weeks ago:


Also, over the weekend, I started demo-ing the fireplace! I'll hopefully post about that tomorrow! :)

Posted by Picasa

Thursday, February 2, 2012

Things I Love Thursday: HomeGoods

This will be a recurring theme on my blog, I'm sure.  I love HomeGoods. There isn't one really near my house, so whenever I'm out and about, I see if there's a HomeGoods nearby and try to visit it!  There are always gorgeous, high quality things in there at great prices.  And the thrill of the hunt at HomeGoods is...well, thrilling!

Here's just a couple super fun things I've found there.  Like I said, I'm sure this kind of post will be happening pretty regularly. :)

I didn't get this chair, but it was only $299 and I love the amazing pattern! I love that it looks like a club chair but is secretly a recliner!


I did get this blue capiz shell lamp (lamp?) and I have some plans to take it apart and use it to gussy up my dining room chandelier (is it really a chandelier?). For $24.99, it was cheaper than buying the capiz shells separately, and I adore the amazing colors! I'm just as excited to see that project as you are. :)


How fun are these lamps? What great shades, right? Unfortunately, I don't think they'll work in my living room, but if I didn't have a little Valerie (my interior design friend) sitting on my shoulder telling me to keep calm and think things through, I would have had these lamps in my cart immediately. I think they were $40 each or so.


Okay, and how great are these mugs? I love goldfish and this great owl!  Don't they look totally Anthropologie worthy? It took a lot of self restraint to not take these home with me.  So I am owning them vicariously through this blog.

Anyway, let me just say it again. I love HomeGoods!

PS - I do have plenty of TJ Maxx and Marshall's near my house, and I find amazing things there, as well, but oh, HomeGoods. There's no place like Home (Goods). :)
Posted by Picasa
Related Posts Plugin for WordPress, Blogger...