Showing posts with label chalkboard paint. Show all posts

Thursday, February 14, 2013

Things I Love Thursday: Chalk Pens

So I’m a little late to the chalk pen game. 

Now that I think about it, I must have seen the results of this amazing product everywhere, but just wasn’t thinking about it, or realizing just how glorious it must be. 

Chalk Ink from Amazon

I love chalkboard stuff: paint, labels, you name it, but the chalk, of course, is messy. (There used to be a nice layer of yellow dust under my island where the dogs eat.)  Then I saw this post on Evolution of Style, and when I asked Jenny what she was using to write on her chalkboard labels, she said “chalk pen”!  I was excited.

She got hers at Hobby Lobby, I got mine on Amazon.  And ever since, I have been one happy gal. The chalk pen is inky and wet-erase, so it goes on like a paint marker and doesn’t wipe off as easily as chalk. And your writing is much neater and cleaner.

I shared a little sneak peek of the cute jars my friend Janis got me from Anthropologie: they are much cuter and more practical when written on with a chalk pen.

jars from Anthropologie written in chalk pen

I covered an old Nestle Toll House container (the big one from Costco) with some Contact paper (from Marshalls), cut a Contact paper chalkboard label out on my Cricut, and labeled it with the chalk pen.  Voila, dog treat container!
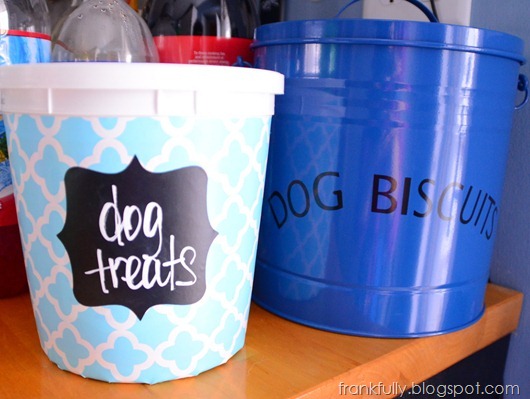
dog treat containers! one with chalkboard label, one from HomeGoods

You know I love dry erase things, and for some things I still do love dry erase, but in the instance of these jars I have, my labels were just getting erased. The one on the right used to say “raw sugar” and the on the left used to say “hot chocolate” (that label was completely gone!).

jars with erased dry-erase labels

But now, with chalkboard Contact paper and chalk pen, I’ve got this!

blue kitchen jars with chalkboard labels

(The dark blue canisters above still have dry erase labels that have remained in tact!)

And my island! I still have regular old chalk around for when kids (or adults!) come over because it is totally fun to write on the island and erase and start over…but in the meantime, I’ve semi-immortalized (what would that really be? just “extended the life of”?) this cool horse drawing that a friend’s daughter drew and neatened up my “dog’s diner” with the chalk pen! Doesn’t it look nice?

chalkboard island written with chalk pen

I don’t know how those dogs are so messy when they eat/drink, but chalk on that side never lasted! But chalk pen is so far holding up great!

So tell me the truth, am I really the last person to have heard about chalk pens? Are you as excited as I was when I found out? Are you going to go buy one right now? :)

Wednesday, January 30, 2013

Frankfully on Facebook!

Well, it seems I’ve created a Facebook page for my little ol’ blog.

I think it’ll be good for sharing projects in progress and updates that aren’t quite big enough or blog-worthy enough yet (not that I have really high standards for that!) :)

So, come on over to Facebook and “like” me to see updates!

Here are a couple of Frankfully photos/updates from Facebook/Instagram :)

I’m working on some mantel styling…and when I actually have it done/close to done, I plan on posting it here on the blog.  But in the meantime, here’s a sneak preview.

mantel_styling

I’m also obsessed with (and plan on posting about) chalkboard labels and the amazing chalk pen.

sugar_creamer_chalk

So, there! Hop on over to Facebook and like my page! :)

Thursday, January 19, 2012

Things I Love Thursday: Chalkboard Paint

I thought I'd round out the week with some chalkboard inspiration photos. Hopefully you're not sick of the chalkboard topic already. But let's face it. I am in love with chalkboard paint. So far, I only have my island covered in it, but my secret dream is to incorporate chalkboard paint into everything

How about for grocery lists in your pantry?


Images via Country Living.


Or as a fun writing space for the kids:

Or make your own chalkboard labeled jars or tins.  Or buy one like this one I found at HomeGoods.


Images: jars, tins.


How much do I want to paint an awesome dresser like this?

Image from here.


But your chalkboard paint doesn't all need to be black and dark!!

A light colored pantry or kids' drawing space? Yes, please!! And I'm sort of in love with the school-room green color for kids to draw on!

And who doesn't need this awesome green desk in their house?? I would make the whole thing chalkboard paint!!!

Image and inspiration from here.


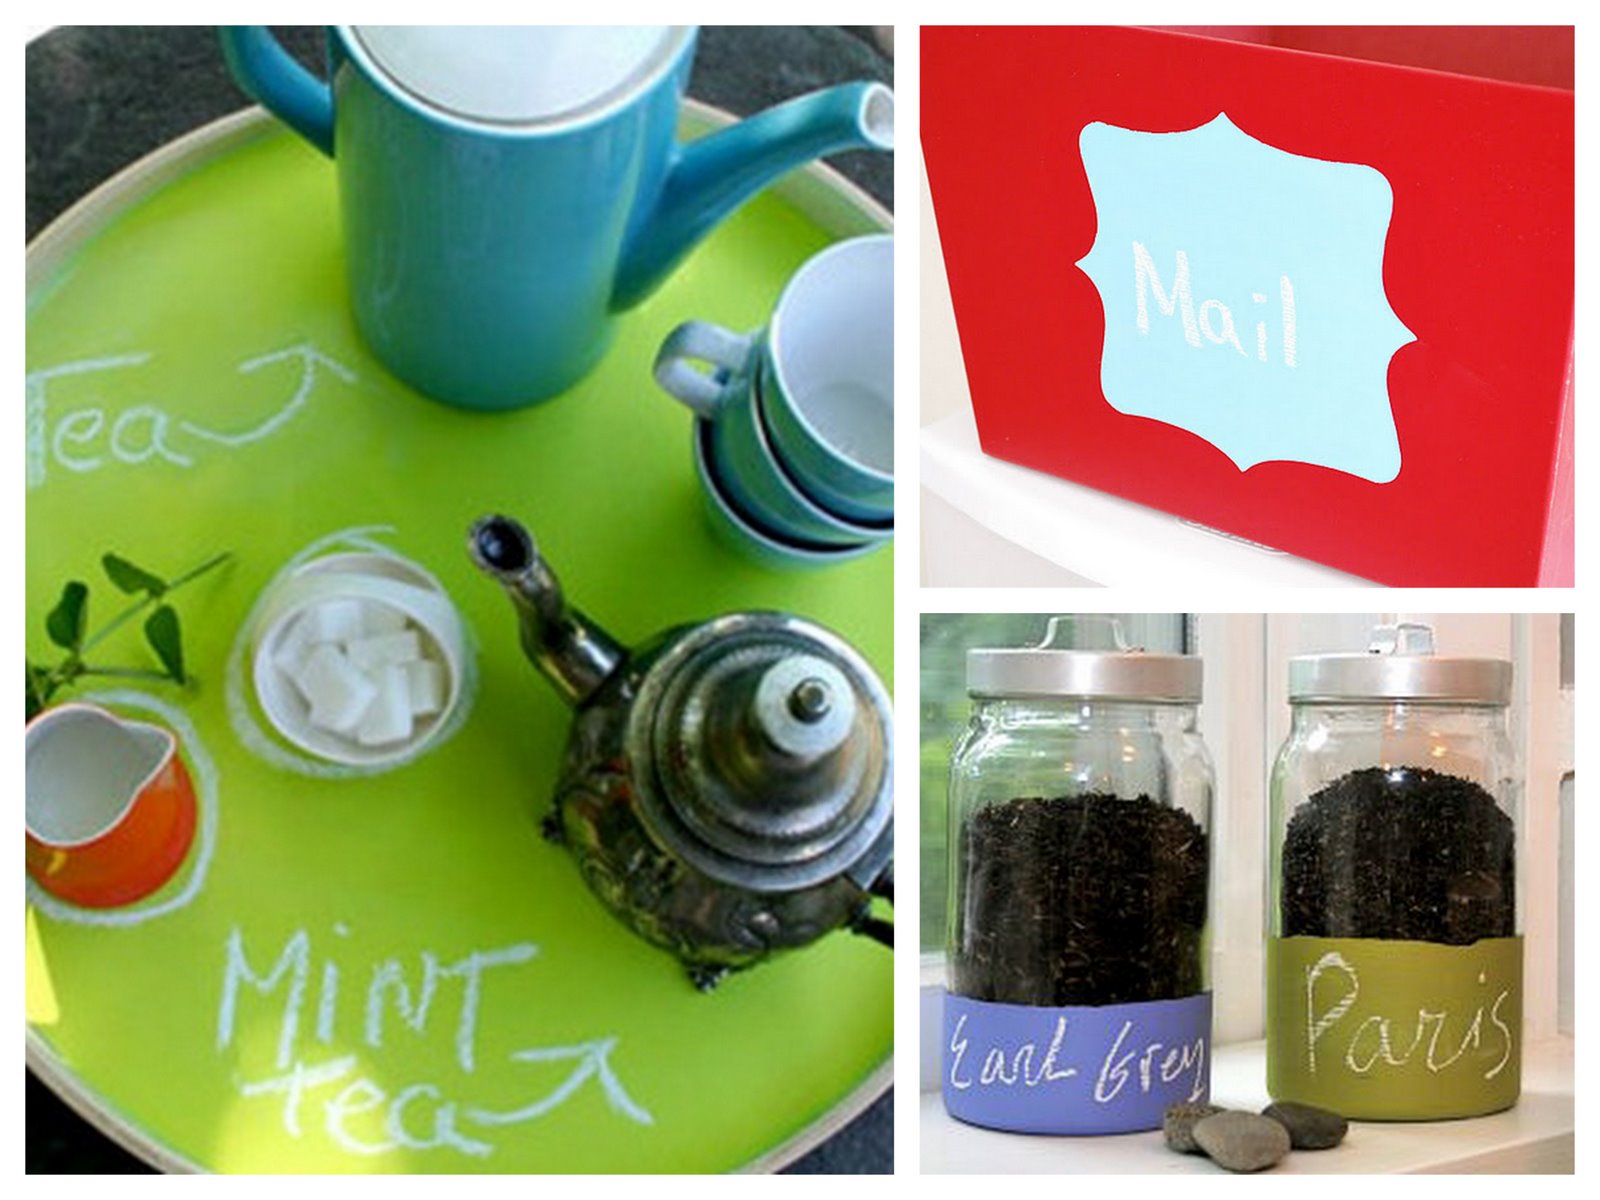
These are all fun, crafty projects featuring colored chalkboard paint.  I especially love the "mail" label- I want to make these and stick them all over my house!


If you are anyone other than a friend I've sent here, you don't know about my unhealthy obsession with all things blue. I'd forgotten about this picture, but now that I've found it again, I need to make these blue chalkboards. Really, maybe a whole blue chalkboard wall.

Thanks, again, Martha, for the awesome blue board idea and image.


Blue chalkboard walls you say? Okay! I will definitely need a way to sneak this look into my life somewhere.


Amazing blue wall image from here.


These images and more can also be found on  Follow Me on Pinterest!!

Posted by Picasa

Wednesday, January 18, 2012

Chalkboard Island in progress


Here's a little bit about how I actually accomplished my chalkboard island.

We started out with 2 base cabinets that we screwed together and put little furniture feet on. Secured again on top with the countertop, and viola! Here is the island we lived with for about a year. :)


Finally, in April (2011), I got around to putting 1/4" plywood onto the sides and back. I used 18ga 5/8" brad nails (in a pneumatic nail gun) to secure everything. Truthfully, it wasn't all perfect, so I used drywall mud to smooth out the edges and joints. That is my trick for everything. Drywall mud and caulk. Once it's painted, no one ever knows. Until I tell them. :)

I primed it with deep tint primer (Zinsser brand).  I don't think I had a reason for that. I think I was just using  primer we had around!

And then painted it with Rustoleum's Chalkboard Paint in Peapod green. I followed the instructions regarding the dry time, and "priming" it with chalk dust.

Then we lived with the island like this for 8 or so months.

My husband thinks I'm crazy for putting a new finish on something with a perfectly good (and factory applied!) finish, but those brown doors just weren't cutting it for me. I wanted the island to truly look like an "island" - a piece of furniture/cabinetry on its own, different than the rest of the base cabinetry.

So I decided to paint the brown doors and drawers white, similar to the upper cabinets, to make sure I wasn't bringing too many different colors/styles into the kitchen.

I took off the handles, removed the door (so I could paint the front and back) and gave it all a light sanding with 100 grit paper. I wasn't too worried about sanding, because I also used a liquid deglosser (by Zinsser) and a bonding primer (Zinsser's oil-based FastPrime) that would stick to the factory finish whether I sanded or not. But since it's a kitchen and the cabinets are used all the time, I took the time to sand a bit and use the deglosser. I wouldn't want to do all this work only to have to re-do it later!


I gave everything a thin coat of the oil-based primer, and I ended up doing 3 thin coats of the white paint. (I emptied some of the stuff in the drawers, but not everything, and used blue painters tape to protect the inside edge. I painted everything that showed that was brown, so it wouldn't look like I painted it. I want it to look like it was built this way!)

I put the hardware back on - and finally, a totally finished island!


Posted by Picasa

Tuesday, January 17, 2012

Chalkboard Island

There are a lot of projects going on in my house, and very few of them are actually completed, but this is one that is. With a sigh of relief and extreme happiness, I present my chalkboard island.

It's two of our base cabinets secured together, then finished off with 1/4" plywood on the back and two sides, which I primed, then painted with Rustoleum's Chalkboard Paint in Peapod Green (and coated with yellow chalk dust) :)


I added hooks across the back (where there was some thicker wood (well, particleboard) for securing the cabinets to the wall - ensuring that the hooks are nice and sturdy) which provide a perfect place to hang purses or grocery bags when coming into the kitchen!

I knew I wanted an island that was an accent color and looked different than the rest of the cabinets. I was inspired by pictures like this:

And greens like this:


...though I knew that I'd have to translate those looks into something functional in my smallish kitchen.  I also knew I wanted chalkboard paint somewhere (well, really, I want it everywhere.) So that's how I got to this island! The shade of green isn't exactly what I had in mind when I started this island project, but I am totally happy with how it turned out and how it looks in the kitchen (which is too messy to photograph and share with you now - and is still in progress itself!)!  

Plus, I love that it's great entertainment for kids (and adults) -- who doesn't love scribbling on chalkboards?? :)

Sorry, I don't have sources for the inspiration images! I saved them pre-blogging and pre-Pinterest. If you know where they're from, please let me know!
Posted by Picasa
Related Posts Plugin for WordPress, Blogger...