Friday, January 4, 2013

Happy New Year 2013!

What a year 2012 was! I blogged for a full year, I made over our mantel (including doing tile work for the first time), and just before the New Year hit, I finally fixed a hole in our floor (more on that later.) :)

The four days we’ve already had in 2013 have been pretty eventful for me, too. I rung in the New Year with an impromptu performance of Auld Lang Syne with friends. That was fun.

New Year 2013

I’ve already had a root canal. Not so fun.

I don’t really want to post any resolutions here on the blog, (because if I don’t fulfill them, I don’t want you to make fun of me) :), but I have taken a moment this New Year to step back and make myself a list of to-dos. In the 3 years we’ve lived at this house, we’ve already accomplished a lot of the changes we wanted to make, and we’ve got some big ones for down the road. But in the meantime, here’s what I’m hoping to get done in 2013.

For the blog:
  • Finally create a house tour already
  • Create a couple of other pages that you’ll hopefully find useful and entertaining
Big to-dos that are probably down the road a bit:
  • Get a new roof
  • Create our master bathroom
  • Remodel our current bathroom(s)
  • Add on to the house, possibly starting with enclosed porches/mudrooms
What house-projects I really should focus on in 2013:
  • The Sewing Room – I think I’ll make this my main project. There’s a lot that needs to happen there.
  • Clean out and organize the 2nd bedroom – this is another biggie. It’s currently the junk room, so I’ll just have to create a junk room somewhere else.
  • Finally finish up the details in the kitchen – like cabinet lights and trim, a backsplash, maybe paint the bottom cabinets.
  • Finally finish up details in the living room – like curtains, finishing the last bookshelf, painting the lamps, and reupholstering my little chairs.


What about you? Do you have any resolutions or big projects for 2013?

Friday, December 28, 2012

Blogiversary!

I have been looking forward to this day for a bit, but then the holidays came and preparations for holiday parties and I nearly forgot! Today is my first blogiversary!

I’m pretty excited because I have definitely attempted blogging before, several times, but it’s never lasted very long. I know I’m not the world’s best blogger by any means, but I’m happy to have made it through a full year of blogging!

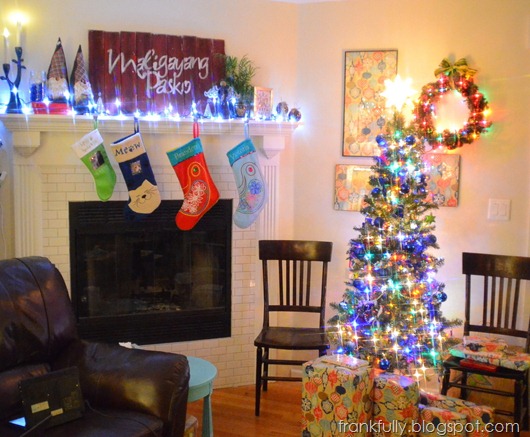
So to celebrate, here are some pictures of my party-decorated house. It’s twinkle lights galore in here. I put them up yesterday for my work’s holiday party and I’m leaving them up for/until our New Year’s party.

It’s like living in Pinterest and I love it!

twinkle lights

twinkle lights

twinkle lights in the kitchen

wreath

ornaments and lights

ornaments and lights

Happy Blogiversary and Happy (ongoing) Holidays!

Tuesday, December 25, 2012

The stockings were hung by the chimney with care…

In hopes that St. Nicholas soon would be there…

Merry Christmas!

When, what to my wondering eyes should appear,
But a miniature sleigh, and eight tiny reindeer,
With a little old driver, so lively and quick,
I knew in a moment it must be St. Nick.

I love Christmas and I’m enjoying every minute of it! I hope you’re having a wonderful holiday season as well.

Our Christmas morning tradition is opening presents at Brian’s parents’ house with all of his sisters.  Our twist this year is that everyone will have to answer a trivia question from the movies Elf  and How the Grinch Stole Christmas (the original cartoon version) in order to open a present. I’m pretty excited! All the cheesy stuff in Elf always tears me up. “The best way to spread Christmas cheer is singing loud for all to hear.” I’m sure I’ll be doing plenty of that! :)

What are your Christmas traditions and have you put a new spin on them?

Happy Christmas to all, and to all a good night!

Monday, December 24, 2012

Merry Christmas Eve!

I decorated my little Charlie Brown Christmas tree!

Charlie Brown Christmas tree

I love what some battery operated LED lights and little plastic ornaments can do! Charlie Brown and Linus always remind me of the true meaning of Christmas.

Spending time with family and friends over the past few days and days to come will be happy and wonderful.

Merry Christmas Eve!

Sunday, December 23, 2012

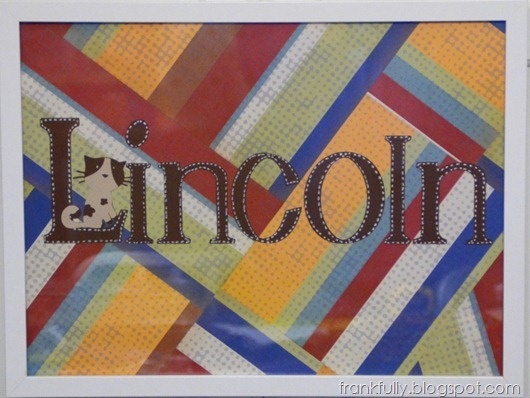
“Lincoln” Name Art

Thank you, Cricut, for helping me out with this project! It’s theoretically a simple one if you need a quick gift. (I say “theoretically” because you know these things never go as planned! But this one actually went pretty smoothly because I’ve been trying to learn my lesson and plan ahead.) :)

I used my Cricut to cut Lincoln’s name, placed it on some primary-colored background paper, and framed the whole thing! Cute name art for Lincoln’s nursery.

DSC_0129

When I make name art like this, the frame is almost always bigger than the paper I have to use as a background. In this case, the frame was roughly 11”x16” (or whatever size Ikea makes their frames) and the biggest paper I had was 12”x12”.  To make the background look purposeful and designed, I sort of cut up and pieced the paper back together in a new pattern (like quilting!).

piecing together background paper

I cut the letters out with my Gypsy and Cricut.

gypsy and cricut

I used the font on A Child’s Year. I love that it’s got an old school-book feel to it.  I also added a kitten from ZooBalloo. :)

a child's year font

One of the things I struggle with most when doing fun projects like this is making sure there’s enough contrast between the background and foreground, so I definitely try to test as much as I can (with dry-runs) before I start gluing things down!

I ended up using a white paint marker to draw on some “stitching” lines on the letters, just for fun.

white "stitching" lines

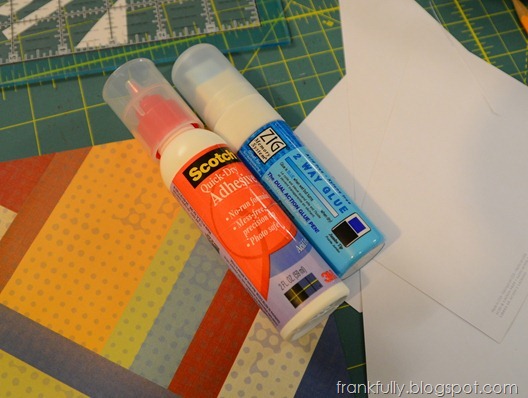
Speaking of glue, these are the two I use the most, and I’m pretty happy with them. Scotch Quick Dry Adhesive and Zig 2-Way Glue.

scotch quick dry adhesive and zig 2 way glue

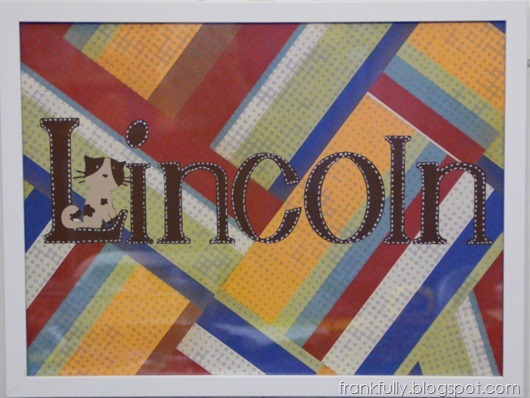
Then I just added the kitten, popped the artwork in an Ikea Ribba frame, and voila!

DSC_0129

A couple of tips when using your Cricut(…that I did not follow when I made Lincoln’s alphabet bunting, leading to a less than stellar crafting experience.)

1.) Use a new mat and a new blade.  I know you don’t want to change these things out, and that they cost money, but trust me, it’s so worth doing. Cuts come out so much cleaner when the mat is nice and sticky and the blade is nice and sharp. (This is especially true for fabric, thick paper, and delicate paper.)

2.) Make notes as you use different materials.  There are a several different “cheat sheets” out there for cutting settings on your Cricut (I like this one and this one), but everyone is different, so it’s so helpful to make notes for yourself. I have a sticky note/label on my Cricut with settings for cardstock, fabric, regular paper, etc. (This is especially helpful when cutting different kinds of fabric! And something I didn’t do/wasn’t doing when I was making the bunting!)

3.) Size matters! The Cricut can cut just about anything, but shapes with more intricate details definitely cut out better at larger sizes. When I was doing the bunting, part of my problem was that I was trying to cut out some relatively complicated shapes in a small size and in fabric and without a new blade/mat combo. Just disaster! :) With this project, I knew I wanted to keep everything simple and large and it went very smoothly. :)

If you decide to try a cute gift-project like this, have fun! Share the details with me!

Saturday, December 22, 2012

Gifts for Lincoln

I realize it’s the home stretch here now for Christmas, and maybe it’s too late to order these things online, but I’m still posting some awesome books I found for my friend Janis’ little son, Lincoln. You might need some awesome kids books any time of year!

The Velveteen Rabbit

I found this set at Kohl’s, in their Kohl’s Cares for Kids section, where the proceeds to go charity. So it’s cute and you’re benefiting others when you buy! Win win.  Anyway, how cute, right? The Velveteen Rabbit and a velveteen rabbit. I couldn’t pass it up.

the velveteen rabbit

I think and hope that they’re still in the store, because I’d like to pick up another set or two before Christmas!

Paul Thurlby’s Alphabet

This was a Pinterest find! As soon as I saw some of the illustrations posted, I tracked down the book and couldn’t be happier!

paul thurlby's alphabet

Who wouldn’t get excited about their letters when they’re illustrated like this?

paul thurlby's alphabet

I found the book at Walmart.com where the dust jacket folds out into a poster with all the letters/pictures on it, that you could totally use to decorate your kid’s room! And it’s also on Amazon (but no poster).

ABCs from the Met

I found two different book of ABCs with pictures from the Metropolitan Museum of Art! How cool, right? Learning ABCs and getting some fine art exposure at the same time seems pretty awesome.  One’s a board book and one’s a hardcover.

museum ABCs

You’re never too young to start appreciating fine art, right?

I also got him a copy of Of Thee I Sing, which I’ve gushed over before, and made him some name art that I will post about tomorrow! 

In shopping for these books, I’ve also found quite a few more good ones that I’ve started collecting for his birthday, so I’ll post about those for you too! (Also, Janis, so you don’t buy them!) ;)

What good kids books have you found lately?

Thursday, December 20, 2012

Finishing Touches on the Mantel

I’ve actually been finishing some projects. What is going on here?  (I guess the holidays and upcoming New Year’s celebration are helping kick my butt into gear!)  First the Maligayang Pakso sign got done in one day, then this mantel stuff.  I’ve also been doing other little things finally, that maybe I’ll group into one post.

So last time I left you with the mantel, it was looking pretty spiffy, but I just wanted a few last additions to really make it look well-planned and neatly finished (neither of which it was! ha!).

Here’s what I came up with!

finished mantel

See my cool corbels under the shelf and tiny detail trim on the tile?

Little things, I know, but just finishing touches.

Here’s where it was last time I posted about this project:

mantel in progress

I love the look of the corbels and the detail trim just meant I didn’t have to try to do a crazy caulk job in between the tile and the fluted trim.

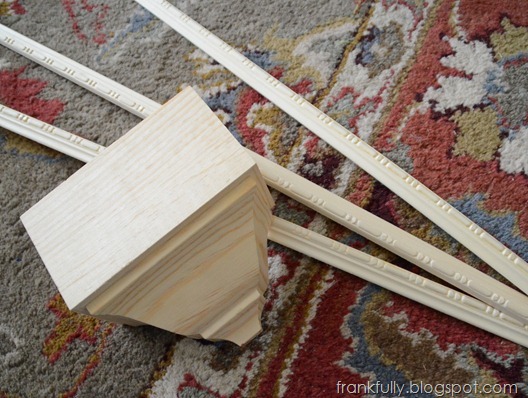
I actually began these finishing touches right after I finished the mantel, but some snafus (as always) came up and set me back a bit.  I started by going to Lowes and finding the trim and corbels.

corbels and trim from Lowes

I gave them all a coat of Zinsser Smart Prime and then a couple of coats of Benjamin Moore Advance in Simply White, the same paint I used on the pantry and rest of the mantel.

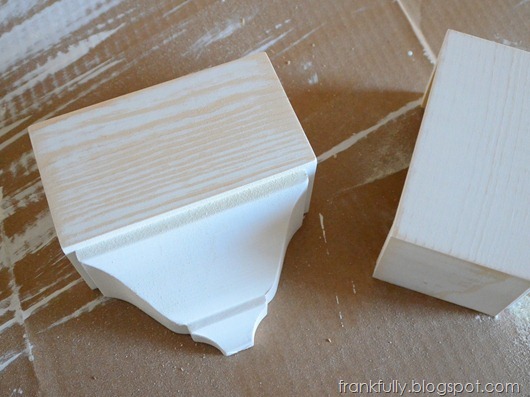
But then, the grain had raised and was showing really badly on the corbels. The difference was so great, that when I sanded them down a bit, they looked like this:

wood grain in the corbels

It’s not that I don’t like the look of wood grain under paint, but nothing else on the mantel is showing grain, so I just wanted the overall look to be consistent. So I primed, sanded (with 220 grit), and primed again, and sanded again a few times until I thought it all sort of smoothed itself out. I gave the corbels another coat of paint, (sanded a bit more), and painted on a second coat before they were ready to hang.

In the meantime, I hung the small detail trim, but my attempts to keep the nails from hitting the tile (or something hard under there!) didn’t quite work out, because I had 4-5 nails that looked like this:

DSC_0260

Yeah, that nail totally curved as it went in and came back out.  Because they’re just 18ga, I was able to cut them off with a pair of lineman pliers as close to the wood as possible, then used a nail punch set to sink them into the wood. I used wood filler to fill all the holes.

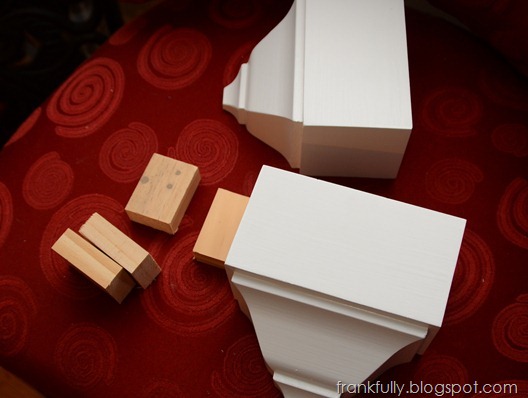
To attach the corbels, I first nailed little 1x2 scraps of wood to the top plate of the frame, then attached the corbels to the wood.

DSC_0732

I didn’t get pictures of the process because of course the 2 corbels had different measurements on the inside (the support braces inside were in different places) and I only measured 1 corbel when I cut my little blocks of wood. So I had to say some bad words as I was putting them up instead of taking photos.

But once all the nail holes were filled, and all the seams were caulked, and a little bit of touch up paint was applied, I had a totally finished mantel that I am so happy with!  We’ll just look at it again. :)

finished mantel

It’s so clean and neat.  I’m excited to see and post about the mantel post-Christmas with some other kinds of art, etc. up there!

Do the finishing touches on your projects take as long and go as wrong as they do on mine? ;)

Related Posts Plugin for WordPress, Blogger...