Thursday, February 2, 2012

Things I Love Thursday: HomeGoods

This will be a recurring theme on my blog, I'm sure.  I love HomeGoods. There isn't one really near my house, so whenever I'm out and about, I see if there's a HomeGoods nearby and try to visit it!  There are always gorgeous, high quality things in there at great prices.  And the thrill of the hunt at HomeGoods is...well, thrilling!

Here's just a couple super fun things I've found there.  Like I said, I'm sure this kind of post will be happening pretty regularly. :)

I didn't get this chair, but it was only $299 and I love the amazing pattern! I love that it looks like a club chair but is secretly a recliner!


I did get this blue capiz shell lamp (lamp?) and I have some plans to take it apart and use it to gussy up my dining room chandelier (is it really a chandelier?). For $24.99, it was cheaper than buying the capiz shells separately, and I adore the amazing colors! I'm just as excited to see that project as you are. :)


How fun are these lamps? What great shades, right? Unfortunately, I don't think they'll work in my living room, but if I didn't have a little Valerie (my interior design friend) sitting on my shoulder telling me to keep calm and think things through, I would have had these lamps in my cart immediately. I think they were $40 each or so.


Okay, and how great are these mugs? I love goldfish and this great owl!  Don't they look totally Anthropologie worthy? It took a lot of self restraint to not take these home with me.  So I am owning them vicariously through this blog.

Anyway, let me just say it again. I love HomeGoods!

PS - I do have plenty of TJ Maxx and Marshall's near my house, and I find amazing things there, as well, but oh, HomeGoods. There's no place like Home (Goods). :)
Posted by Picasa

Wednesday, February 1, 2012

Living Room "Befores" Part 2: Fireplace

Unlike, the easy pillows and rug updates, the fireplace is definitely going to be a bigger project.  Here's our living room and fireplace today.  It still needs a ton of work, but it's come quite a long way from when we bought it!


I know everything looks a little off-center/odd around the fireplace, but that should hopefully be evened out and cozy-ed up as we get things in place and in order!

This is what the living room and fireplace looked like when we had our home inspection.


The boards were (are?) a rough cedar, that I sanded down with the belt sander (not fun), primed with shellac-based primer, then painted in these fun stripes for the short term (inspired by a picture I'd seen in Real Simple).

Excuse the lawn chair. :) We didn't have furniture yet.
 
The current goal is to turn it into more of a traditional fireplace, with drywall above, a proper tiled surround and mantel (also bringing it up to code by surrounding it with non-flammables like it's supposed to be!), and tone down that blinding gold trim.  I'll have to take down those boards (I'm sort of dreading what's underneath them!) before I start the mantel and tile work. But it will be worth it. And hopefully it will look like this:

images from here and here

And maybe I'll put some artwork like Lisa Congdon's Summer Birches above it:


available here
 
And those red chairs have to be recovered.  I'm thinking something stripey that will give me a fun pop of color. Maybe like this Side-Step Stripe by Waverly?

from here

I also love these chairs!

image from here, chair available here


Oooh, and going back to yesterday's post, here's another gorgeous rug, this time from Horchow. But a Pinterest friend said she saw one like it at HomeGoods! I might be heading out there later this week!

image from here
 
Posted by Picasa

Tuesday, January 31, 2012

Living Room "Befores" Part 1: Couch and Rug

I'm working with my friend and interior designer, Valerie, from Vj Interiors, on the living room. It's really interesting (read: interesting and tough) adding someone into my creative mix when decorating my own home, because I'm so used to doing everything myself. I'm really excited for the polish and cohesion she's helping me bring to the room, since I am definitely all over the place, but seeing things through her eyes is a really different experience for me! She's brought a lot of great ideas to the room: ones that are completely amazing to me that I had never thought of, but I've found that I am a bit of a "function over form" type of girl and she is the opposite! I know we'll meet in the middle in a happy, happy place, and I'll end up with a "magazine worthy" room that is beautiful and functional.

I'll spend the next few posts giving you some of the plan and a lot of "before" pictures. I wanted to wait in posting this stuff, because it's kind of premature. I know I won't have any good "afters" right away...but I'm hoping that putting these "befores" out for all of you will get me motivated to actually complete some of these projects sooner than later!

These are my current curtains that are kind of serving as our color palate and inspiration: (There will be more layers of window treatments eventually.)


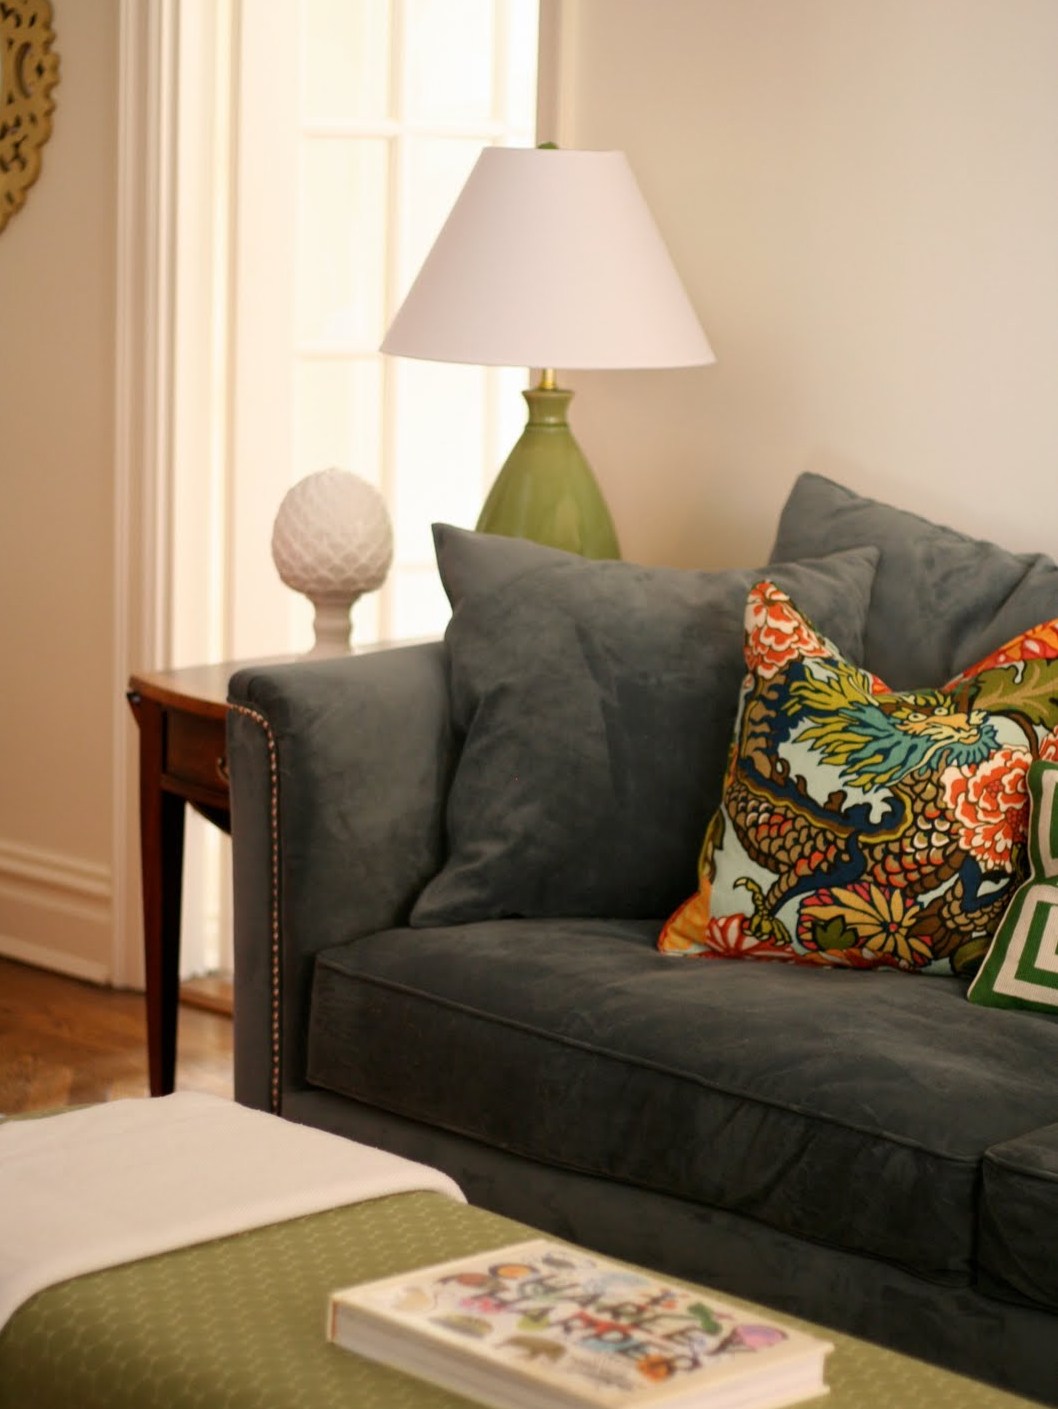
Here's my couch before:  It's plain, blue. The simple plan: add colorful throw pillows.


Finding pictures of pillows I love is easy.  Finding pictures of pillows that I can actually see living with on my very own couch is a little harder. Here's what I'm thinking, though:
Images: 1, 2, 3, 4, 5, 6

Here's a great inspiration picture, since the couch is nearly the same color as mine! :) I might have to get on this Chaing Mai Dragon bandwagon...I love that print!

Here's my rug. It's fine, it was on sale, but it's not quite the look I want for the living room. (Seemingly) Simple plan: Get a new rug.


This is our inspiration rug, and here's one I found at HomeGoods, but it was a little too small.  The style is more traditional than I would have thought would work in the room, but I'm excited to go in this direction. This is where Valerie is really helping me see new possibilities!


I'm excited to see what we really end up finding, purchasing, and installing!


She's also talking me into painting, which I am more open to after seeing the potential new rug...but one step at a time, one step at a time!

Thursday, January 26, 2012

Things I Love Thursday: Hens and Chicks


I'm talking succulents here. Hens and chicks are just adorable to me - I love their subtle floral look, I love the babies/chicks (of course. I'm sorry - I'm a girl and I love small things: "babies."), and I love surprising range of color in which they grow.

While they grow like weeds for my mom and auntie, I haven't had luck so far. Maybe I need to try some fake ones indoors. But really, I won't stop trying to grow them, because I love them so much!

Great colors:


from here and here

Love them in containers:

from here and here

Love them in super cutie containers!


from here, here, and here
(I put some chicks in cute square glass containers once...but didn't give them enough light so they died. :( But they were super cute while they lasted!)

How about chicks in homemade jar terrariums? Or a glass ball? Love!


from here, here, and here

And to go all out, a wall of succulents!


from here


And a gorgeous pillow of flowers, succulents, and chicks! That I can't kill... :)
from here


Find these images and more succulent chick fun over on my Pinterest gardening page!!

Posted by Picasa

Tuesday, January 24, 2012

The Aerogarden Project

There are a lot of reasons I love to DIY (DIM? Do it myself?). One is a kind of laziness: I'd rather make it myself than go to the store and get it. One is a kind of cheapness: I'd rather spend money doing something now if it will save me money later. One, of course, is a kind of pride in doing whatever it is.

Anyway, for the various above reasons, I decided to grow my own herbs. Brian decided he wanted fresh cilantro in more things. Since I've had not so great luck with cute little pots of herbs in the window, I decided to try an Aerogarden! So far things are going well, and I think I'll keep you posted on the project here at Frankfully!

Here's the Aerogarden when I first planted it, just after the first of the year. There's basil, cilantro, and Italian parsley. The little domes help the seeds germinate.


Here it is just over 2 weeks later! Nice big cilantro and fat little basil leaves, but the parsley never germinated. No worries, though, because Aerogarden guarantees their seeds to germinate, so they're sending me a new one.


I'm pretty excited to see how these little guys grow, and more importantly, to cook with the crops!

Thursday, January 19, 2012

Things I Love Thursday: Chalkboard Paint

I thought I'd round out the week with some chalkboard inspiration photos. Hopefully you're not sick of the chalkboard topic already. But let's face it. I am in love with chalkboard paint. So far, I only have my island covered in it, but my secret dream is to incorporate chalkboard paint into everything

How about for grocery lists in your pantry?


Images via Country Living.


Or as a fun writing space for the kids:

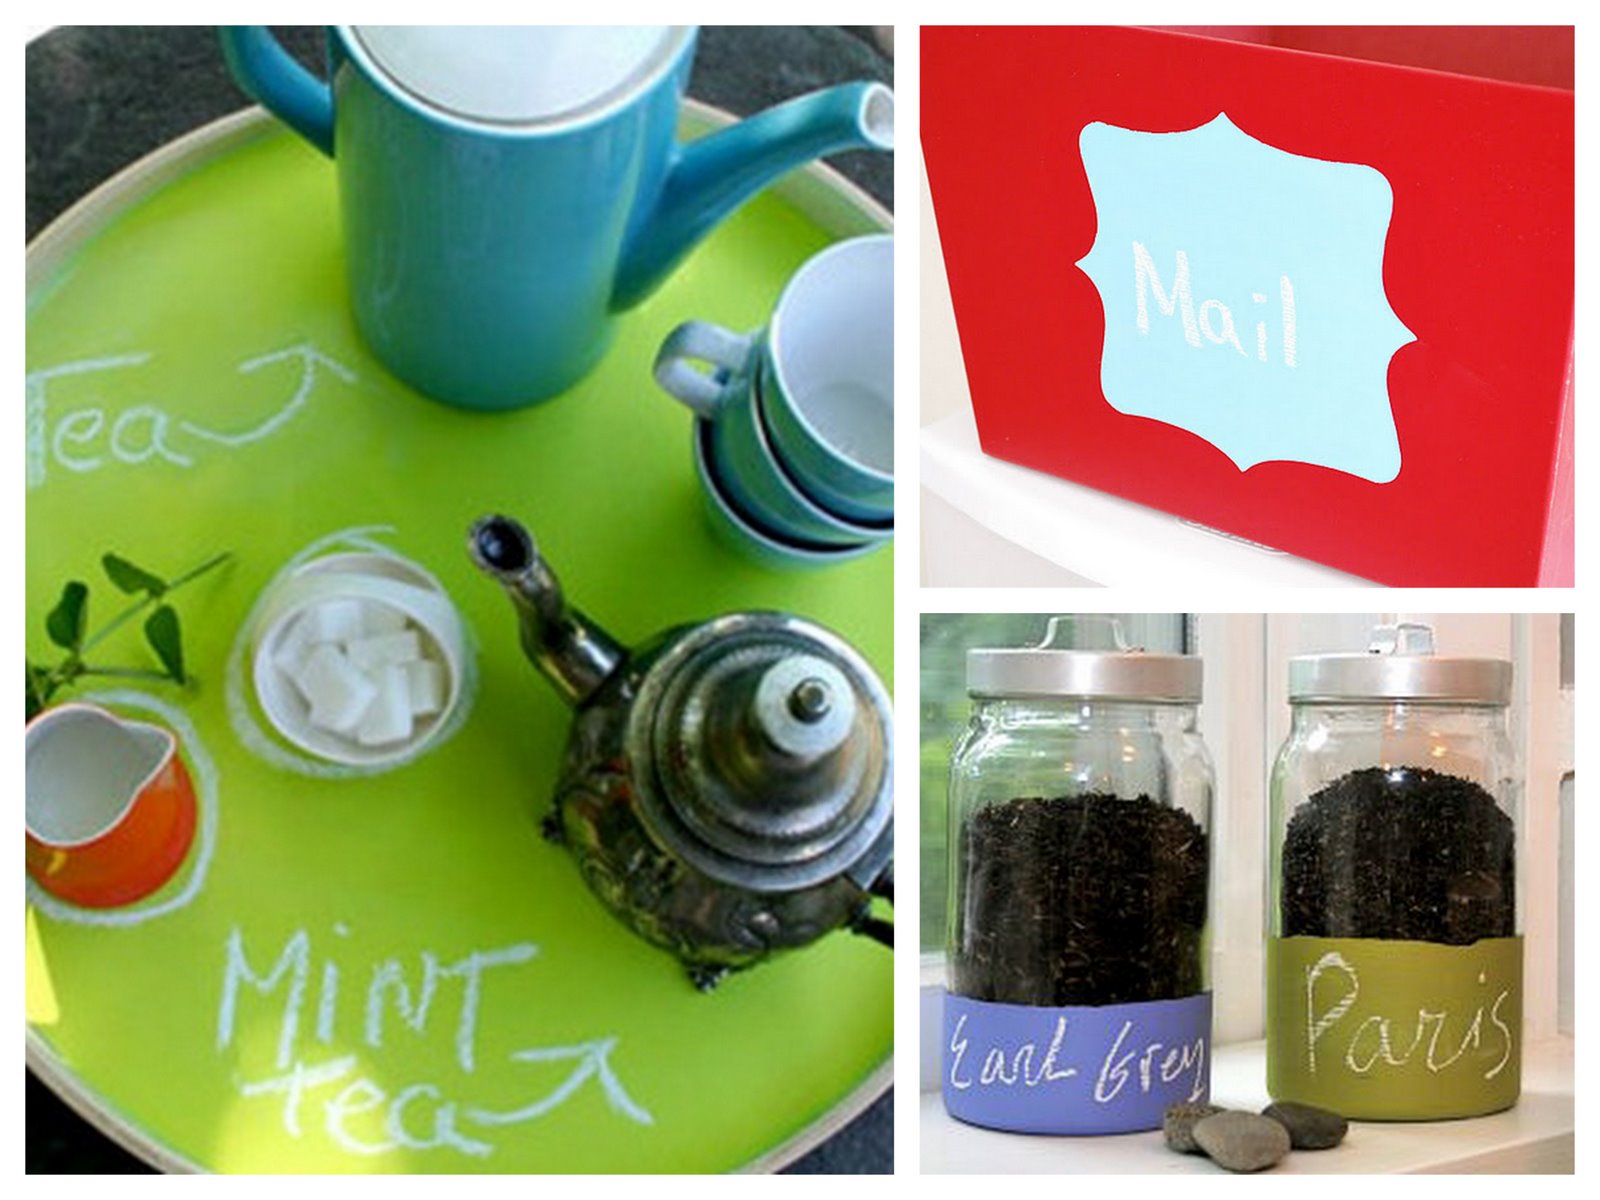
Or make your own chalkboard labeled jars or tins.  Or buy one like this one I found at HomeGoods.


Images: jars, tins.


How much do I want to paint an awesome dresser like this?

Image from here.


But your chalkboard paint doesn't all need to be black and dark!!

A light colored pantry or kids' drawing space? Yes, please!! And I'm sort of in love with the school-room green color for kids to draw on!

And who doesn't need this awesome green desk in their house?? I would make the whole thing chalkboard paint!!!

Image and inspiration from here.


These are all fun, crafty projects featuring colored chalkboard paint.  I especially love the "mail" label- I want to make these and stick them all over my house!


If you are anyone other than a friend I've sent here, you don't know about my unhealthy obsession with all things blue. I'd forgotten about this picture, but now that I've found it again, I need to make these blue chalkboards. Really, maybe a whole blue chalkboard wall.

Thanks, again, Martha, for the awesome blue board idea and image.


Blue chalkboard walls you say? Okay! I will definitely need a way to sneak this look into my life somewhere.


Amazing blue wall image from here.


These images and more can also be found on  Follow Me on Pinterest!!

Posted by Picasa

Wednesday, January 18, 2012

Chalkboard Island in progress


Here's a little bit about how I actually accomplished my chalkboard island.

We started out with 2 base cabinets that we screwed together and put little furniture feet on. Secured again on top with the countertop, and viola! Here is the island we lived with for about a year. :)


Finally, in April (2011), I got around to putting 1/4" plywood onto the sides and back. I used 18ga 5/8" brad nails (in a pneumatic nail gun) to secure everything. Truthfully, it wasn't all perfect, so I used drywall mud to smooth out the edges and joints. That is my trick for everything. Drywall mud and caulk. Once it's painted, no one ever knows. Until I tell them. :)

I primed it with deep tint primer (Zinsser brand).  I don't think I had a reason for that. I think I was just using  primer we had around!

And then painted it with Rustoleum's Chalkboard Paint in Peapod green. I followed the instructions regarding the dry time, and "priming" it with chalk dust.

Then we lived with the island like this for 8 or so months.

My husband thinks I'm crazy for putting a new finish on something with a perfectly good (and factory applied!) finish, but those brown doors just weren't cutting it for me. I wanted the island to truly look like an "island" - a piece of furniture/cabinetry on its own, different than the rest of the base cabinetry.

So I decided to paint the brown doors and drawers white, similar to the upper cabinets, to make sure I wasn't bringing too many different colors/styles into the kitchen.

I took off the handles, removed the door (so I could paint the front and back) and gave it all a light sanding with 100 grit paper. I wasn't too worried about sanding, because I also used a liquid deglosser (by Zinsser) and a bonding primer (Zinsser's oil-based FastPrime) that would stick to the factory finish whether I sanded or not. But since it's a kitchen and the cabinets are used all the time, I took the time to sand a bit and use the deglosser. I wouldn't want to do all this work only to have to re-do it later!


I gave everything a thin coat of the oil-based primer, and I ended up doing 3 thin coats of the white paint. (I emptied some of the stuff in the drawers, but not everything, and used blue painters tape to protect the inside edge. I painted everything that showed that was brown, so it wouldn't look like I painted it. I want it to look like it was built this way!)

I put the hardware back on - and finally, a totally finished island!


Posted by Picasa
Related Posts Plugin for WordPress, Blogger...