Monday, March 11, 2013

Oh yes, Potato Soup

So I did get around to making Pioneer Woman’s Perfect Potato Soup.

It was delicious.

And easy.

And wonderful.


(Image via Pioneer Woman: Perfect Potato Soup)

I’ve been experimenting with healthy recipes and/or recipes from scratch – you know, where I know what every ingredient is because I put them in myself. No monosodium poisonate here!

So I made this soup and it was delicious, and I don’t think it was actually that bad for us! There was some milk and a little bit of half and half, but mostly it was vegetables and potatoes and yum.

And because she’s the Pioneer Woman, and referenced hobbits in her post, I made Brian watch some hobbits with me (in the form of Lord of the Rings: The Two Towers, which will probably result in our watching the other two Lord of the Rings movies) (which have nothing on the books, of course).

                         Thanks Pinterest for always having a picture of what I need.

Any hobbits, potatoes, or soups in your life lately?

Thursday, March 7, 2013

Aerogarden Update

I haven’t updated you on the Aerogarden lately, because generally everything’s going swimmingly. My two basil plants are huge and so productive! (The one on the right is the first basil plant I ever planted – so it’s been living for over a year now!)

Aerogarden March 2013

I keep pruning it, so it’s nice and bushy – but I have lots of small leaves instead of a few nice big leaves.  I’m working on figuring that out. (I’m thinking another bowl washing is in order.)

And my cilantro has died. :(  It’s never really taken off in this planting like it did the first time.  Not that I’m an Aerogarden expert, but so far, in my two rounds of planting, I have not gotten cilantro and basil to grow successfully together. First, my cilantro was doing amazing, but my basil wasn’t. And now it’s vice versa. Womp womp. :(

So, I’m doing what any normal girl would do, and I’m getting a second Aerogarden! :) Mwhaha! They’re on sale now, and really I’ve been wanting another one, because I love this thing so much. :)

I had planned on growing lettuce, but I’ve been getting it cheap at a local produce market, and one of my friends said it’s easy to grow outside, so I think this second Aerogarden will consist of parley and cilantro.

And flowers!

Love Blooms

Flowers may not be the most “useful” thing to plant in an Aerogarden, but I’m sort of excited to have some pretty color mixed into my gardens. As I discover new herbs I like, I will attempt to grow them as well, of course, but flowers in the meantime seems pretty fun. :)

I hope you’re excited to join me on the next Aerogarden journey! :) :) :)

So, are you going to get yourself an Aerogarden now? :) Or just stick with pots in the window? :)

Friday, March 1, 2013

Happy March!

I think everyone’s naming their post today “Happy March!”

Well, it IS happy! Spring is on its way and I can’t wait. I can’t wait to see if the things I planted in the fall will grow. (I also planted a lot of daffodil and crocus bulbs, as well as more wildflower seeds!)  Never mind all the snow that’s been falling today…

In the meantime, my little nephew, Cole, just turned one!  We’re going to head to his birthday party tomorrow, and I hope to get some cute pictures of him and all the things I’ve been creating for him. :)  I’ve been sharing some previews on Facebook, so here are a few more now.  His party is going to be sock monkey themed, so I made some shirts and bibs…

sock monkey t-shirt
(letters cut out on the Cricut. Fabric from here.)

sock monkey and bananas bib
(embroidery from here! I adjusted the smile and ears a little bit.) :)

And a big ol’ paper banner/bunting that says “Happy 1st Birthday Cole!” on it!  I printed it all out on the computer (thank you, Microsoft Publisher), then my amazing friend Jessica cut it all out and strung it on some jute twine for me.  It’s too big to take a picture of until we hang it at the party, but here’s a preview:

sock monkey happy birthday banner bunting

:) :) :)

I am so excited about it!

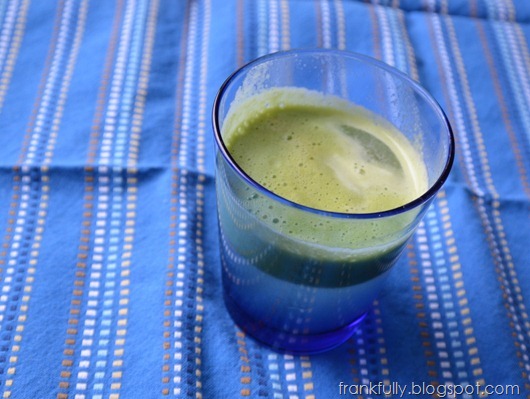
And “trying to be healthy” news, I bought a juicer on clearance at Aldi for $19.99.  I know there are nicer ones, but for the price, I couldn’t help but give this one a try…just to see how we like it.  I made my first glass of juice with a Granny Smith apple and a cucumber. It was pretty good! So, now I’m hoping to add fresh juice to our nutritional arsenal.

DSC_0174

Any juicing or baby-present making on your agenda? Are you excited for spring (even though it’s snowing?)

Friday, February 22, 2013

A Little Food Love for Friday

Happy Friday!

It’s almost dinner time and I’m finally posting! Whoops!

Brian and I are trying to get a little healthier here in 2013. We aren’t following an actual diet plan yet, but we’ve been absorbing all kinds of interesting information about nutrition, diets, weight loss, and overall health, and we’re taking steps to eat better.

So my kitchen currently looks like this:

lots of fruits and veggies!

Full of vegetables and fruits! (Well, this picture is mostly fruits. But there are tons of veggies in the fridge, which is a real change from what my fridge is normally full of!)

The other night, we had some delicious pseudo-caprese salad for dinner.  I halved grape tomatoes and threw them in a container with some chopped fresh basil, chopped flat-leaf spinach, and minced garlic, then drizzled everything with olive oil and let it sit over night. The next day we ate it with fresh mozzarella.  Doesn’t it look good?

tomatoes, basil, garlic, and fresh mozzarella

It really tasted as good as it looks.  And I was very happy that Brian, who’s usually a meat-eater, found it satisfying as well as yummy for dinner.

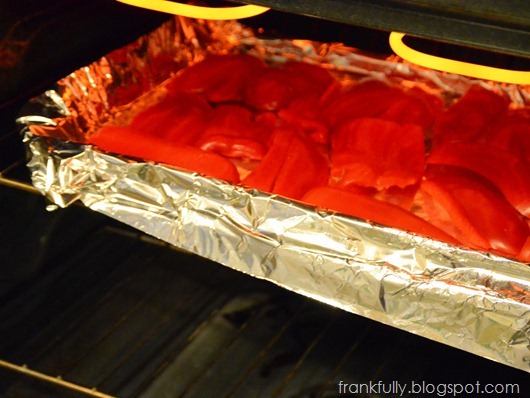
Tonight, I’m roasting some red peppers in an attempt to make roasted red pepper soup – with a recipe that I found over at Joyful Abode.

roasting red peppers

Over the weekend, I’m also hoping to try the creamy tomato soup recipe in my America’s Test Kitchen Cookbook.

America's Test Kitchen Family Cookbook

(I also found a recipe for a creamless creamy version by ATC!)

And sometime soon I want to try Pioneer Woman’s perfect potato soup.  Sounds so yummy!

These recipes aren’t exactly fat free :) but they’re loaded with veggies and are made with fresh (or at least not overly processed) ingredients, which is what we’re going for, at least for now.

What are you cooking up this weekend?

Update: The roasted red pepper soup is fantastic!! Definitely check it out!
(And for those of you who don’t do dairy, once it was all blended up, it was totally great without the cream!)

Tuesday, February 19, 2013

How Should I Refinish This Dresser?

Wow, I’m just asking for all kinds of help lately, aren’t I? But isn’t that what blogging is all about? :)   So, do I paint it or stain it?

sewing dresser
Images from here and here.

Okay, so here’s what’s going on. As a part of the great sewing room organization of 2013, I figured I should actually start working on this dresser I got from my aunt.

sewing room dresser being sanded

See all that junk on top? Yeah, this dresser’s just been sitting here collecting junk, which is pretty much the opposite of its intended function. (The junk is supposed to go inside the dresser, not on top.)

Last year (or longer ago than that?) I got this dresser from my aunt. It used to be my lola’s (Filipino grandma) and it’s just been sitting in my aunt’s garage.

sewing room dresser before

I generally don’t love dressers for sewing room storage – they’re meant to hold clothes, not sewing gear. The drawers are usually too deep, don’t slide easily enough, and the dimensions of the dresser itself is usually all wrong. My dream is to have kitchen-type cabinets of all shallow-ish drawers. (I had something pretty much ideal when I was living at home with my parents, so I’m spoiled!)

But this dresser actually is pretty great. It’s 6 feet long. Yes, 6 feet long. So its proportions are more along the lines of something you’d special order in the kitchen department. And it’s just over 29” tall, which is almost exactly the height of my sewing table – so as an added work surface it’s going to be ideal. The drawers are still a little deeper than I’d like, but they generally slide very well, so I think I can make this piece work.

You can see that the style is such that all the drawers touch. Well, over time, they’ve sort of started to stick to each other, probably from swelling and expanding and whatnot. So I’m getting on sanding and planing down the drawers a bit.

planing and sanding the drawer

I'm using an old planer of my dad’s that I found in the garage. :) Hey it works! I think the blade could use a bit of sharpening, which I’ll get on. I learned all about hand planes from Tommy on Ask This Old House.

planing the drawer

This is my first time using a hand plane, and I’ll admit I’m making a mess of it in some places (from not following Tommy’s advice. Oops!).

Anyway, as I’m working on the dresser, I’m finding it’s made of some nice wood. I thought at first that the finish was that really thick plasticky finish that I’d basically have to paint over. I planned on using Valspar’s Pacific Pleasure (color #5009-10) for the body and keep the top nice and white. Something along the lines of this color:

moisesesquenazi_thumb1
Image from here.

Really gorgeous right?

But like I said, it’s a nice piece of furniture (Thomasville), and I’m finding it’s not hard to sand off the finish down to bare wood. So, then I thought, should I do something like this? And refinish and stain it something gorgeous like Clara’s changing table from Young House Love?

ClarasRoom-After-Changing-T

Thoughts, ideas, questions, comments? I’d love your advice! 

The sewing room is painted a neutral gray, and I’m generally trying to keep all work surfaces white. (Don’t want colors clashing or affecting your judgment while you’re working!)  I do have another desk that is blue and I plan on updating with Valspar’s Pacific Pleasure. 

So do I go with two blue and white dressers to keep things cohesive? Or bring in some nice, neutral wood tones? Opinions? Help!!

Monday, February 18, 2013

Happy President's Day!

Maybe you're out shopping for good deals on TVs or just starting a normal work Monday like I am, but in any case, Happy President's Day. :)

I am sort of sad that last year at this time, I was blogging about the presidential artwork that I want to add to my gallery wall...but in that whole year, I've really barely progressed on said gallery wall (except covering my thermostat). Womp womp.


I have been continuing my work on the sewing room (that I started telling you about last week) and should hopefully have a few posts about that soon!

In the meantime, happy Monday and happy President's Day!

Friday, February 15, 2013

Paper-Covered Boxes for Fabric Storage

Last weekend, I spent a lot of time organizing and re-organizing and purging my massive stash of fabric.  And thus begins the great sewing room organization of 2013. :)

What I am doing is not nearly photo ready…I feel like I’m still getting a handle on how I want to really store all this fabric so it’s accessible…but I will share a small project that I did in the midst of this much bigger one!

I covered Bankers Boxes with wrapping paper.

Hahaha. Not the most exciting, but the results are cute and practical.

paper covered bankers boxes with chalkboard labels

A couple of words on cardboard boxes for fabric storage: there are pros and cons of course. The cons are that cardboard isn’t as durable and waterproof as plastic bins. The pros are that these boxes are inexpensive, have nice handles, and are a really great size for being able to see and access what you have.  Bins that are too big can just become a mess.

So, that being said, I got these Bankers Boxes from Costco. They were $18.99 for 10 of them, so a pretty similar price to the ones I saw at Target, but they are much heavier duty. So much better than the other ones I’ve bought before. I am definitely going to Costco for more of these.

bankers boxes from Costco

I found this cute wrapping paper at Old Time Pottery for $1.99.  It’s a little too cutesy for my normal decorating, but I thought it’s perfect for my sewing room where I can be as girly as I want.  And the colors are fantastic.

bankers boxes from Costco and wrapping paper from Old Time Pottery

I took a few boxes out to the garage and covered a work surface with a trusty drop cloth.  I got out some spray adhesive that I got at a deep discount (at Bailey’s Discount Center!) and used a couple of spare pieces of cardboard as masking.

covering bankers boxes with paper, spray adhesive

I roughly measured my boxes overall circumference and the height that I wanted to cover with paper. I was able to cut the length of the wrapping paper in half, which meant I got to cover 2 boxes for every cut of wrapping paper I made.

covering bankers boxes with paper

I lightly sprayed the box with adhesive, carefully wrapped the paper around it, and voila!

covering bankers boxes with wrapping paper

Exciting, right?

I sprayed a little adhesive on the edges of the paper that I needed to keep down, and I used some clear packing tape to reinforce the handles and a couple of spots on the bottom.

I even papered a couple of the lids!  (I left a couple white, ‘cause it was easier and I’m telling myself they coordinate.)

covering bankers boxes with paper

I papered some old boxes, too, with patterned Kraft paper from the dollar store.
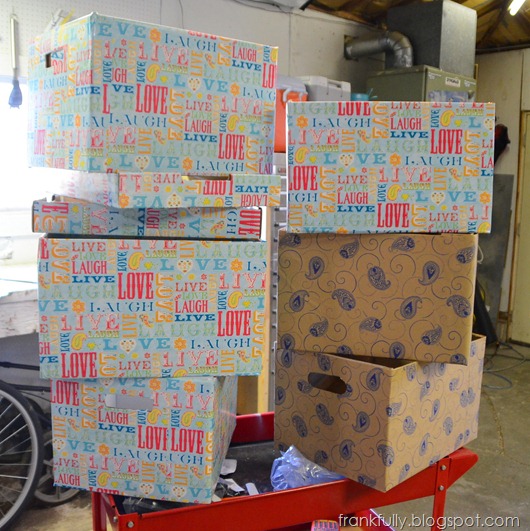
lots of bankers boxes decorated with fun paper!

As a final touch, I put some Contact paper chalkboard labels on and used my new favorite thing, my chalk pen, to label them.

paper covered bankers boxes with chalkboard labels

I wish this could be on some gorgeously organized shelves to show you…oh well, one day.

As for what’s in the boxes?  I used to have my quilting/crafting cottons sorted by color into boxes like these, but when I started to do less quilting, I threw them all together in one big plastic bin.

But it became a mess.

messy fabric in plastic bin

So I re-sorted the fabric for easier access and visibility.

fabric sorted by color into bankers boxes

I’ll have to get more boxes and keep sorting, but this is a great start.

Have you decorated any plain, ugly things lately to turn them into something easy on the eyes?

Related Posts Plugin for WordPress, Blogger...