Thursday, March 15, 2012

Things I Love Thursday: Deals + Art

deals and art

I love art. But as I looked at this deal for 20x200 today on Joss & Main, I realized I’ve never really bought any art for myself. Not art-for-art’s-sake art.

I’ve bought myself vintage movie poster reprints in art-type sizes, like these Audrey Hepburn posters:

2012-03-15 deals art

Images from AllPosters.com and Buy.com

I’ve bought prints and photos from places we’ve been, or that commemorate some cool historical event that is meaningful in some way:

2012-03-15 deals art1

My grandma worked at the Chicago World’s Fair in 1933!
Images from AllPosters.com

I’ve also framed lots of record sleeves and I’ve got an entire collection of cool Chicago and nature photography from my dad (more of which I’ll be sharing at some point).

DSC_0298 Photos by my dad, Howard Anderson

So, so far in my decorating, I’ve liked anything I hang on the walls to have meaning to me personally. So even though I love art, I haven’t ever really bought or hung any art for art’s sake.

Till over a year ago, I saw this print of a photograph by Younga Park, and shared it on my VictoriaVM blog.

proportional_500_2211_largeview

I’ve been loving it, coveting it, and thinking about it ever since. I don’t know why I never took the plunge and just got it.

But when I saw this deal on Joss & Main, I had no excuses. $35 for the $60 print! How could I pass that up!

So I am patiently waiting for my deal code to be delivered into my inbox. I didn’t even want to post this, because there are only 73 of the limited edition printing of 500 left, but I’m risking it. :) I’m so excited to get this print! I don’t even really know where it will go, but I will keep you updated when it finds a home here!

Wednesday, March 14, 2012

Chili Mafalda (really, just Chili Pasta)

On Sunday, I had to take a break from grouting to feed myself, Brandon who was installing a new utility sink, Grandpa and Brandon’s stepdad who were changing the brakes on their various vehicles, and whoever else was stopping in and out of the house. The nearest pizza place didn’t open till 4, and the hamburger joint that delivers was short on drivers. So I had to open my freezer and see what I could find.

DSC_0176-001

So I whipped up this Chili Pasta, based on a recipe I got from my cousin, Kirsten. This recipe is so easy and almost not worth posting about, but it works, is tasty, and might come in handy as an easy recipe for you sometime!

I did a variation on Sunday, so I’ll tell you what I did Sunday, what I usually do, and then post the original recipe.

“What I Normally Do”’s Ingredients:

  • 1 lb of ground beef or turkey (this Sunday, I used 2lbs because there were lots of guys…and it’s just what I happened to have in the freezer)
  • 1 chopped onion (I left it out this Sunday because Brandon’s stepdad doesn’t like onions)
  • 3 cups of mafalda noodles uncooked (really, I usually just end up using about a pound of whatever noodles I have on hand; bowties work really well)
  • 2 tsp chili powder (or more to taste) (and I doubled it on Sunday)
  • 1 tsp garlic salt (or more to taste) (and I doubled it on Sunday)
  • 1/4 c. ketchup (I used about 1/2 cup on Sunday)
  • 3 cups water
  • shredded cheese to top (I use Cheddar or Colby Jack, or really just whatever I have)

This is meant to be done as a one pot meal.  You brown the meat (with the onion if you’re using it), then add the water and pasta with the seasonings, and let the pasta cook in that liquid.  This Sunday, since I had 2 pounds of meat and hungry people waiting, I started water boiling for the pasta, then began browning the meat in a separate pan. I cooked the pasta for about half the time listed on the package, drained it, and put it back in the pot. When the meat was browned, I used a slotted spoon to drain it as I scooped it into the pot with the pasta. 

Once you’ve got the pasta and meat together, add the water, seasonings, & ketchup; stir, and let cook down so the pasta absorbs the liquid. Easy, right?

2012-03-11

Serve topped with cheese (this is the most important part!) for a delicious and filling meal that’s also great reheated the next day.

DSC_0176-001


Here’s the original recipe that I got from my cousin Kirsten, that I will try fully one day:

Chili Mafalda

Ingredients:

  • 1 lb lean ground beef
  • 3/4 cup chopped onion
  • 3 cups water
  • 1 jar (16 oz) med or mild thick n’ chunky salsa
  • 1/4 cup ketchup
  • 1 can (15 oz) black or kidney beans, drained
  • 1-2 teaspoons chili powder
  • 1 teaspoon garlic salt
  • 3 cups Mafalda uncooked
  • 1 cup shredded Cheddar cheese

In a large saucepan over medium heat, cook meat and onion until meat browns and onion is tender; drain. Stir in water, salsa, ketchup, beans, and seasonings; heat to boiling. Stir in uncooked pasta; reduce heat. Simmer, uncovered for 13 minutes, stirring every 2 minutes or until pasta is tender and most liquid is absorbed. Sprinkle with cheese; serve immediately.

Tuesday, March 13, 2012

Grout-tacular

Well, the fireplace is grouted!

DSC_0193-001

Of course, it was more panicky and harder work than I expected, but what hasn’t been on this project? It looks so “finished” and that’s all that matters. I am so ready to get started on the mantel!

Here’s a close up of the Warm Gray grout (before I totally wiped everything down – don’t mind the haze.)

DSC_0186-001

I got help from Valerie in picking out the color – who knew there’d be so many grout color choices! I got the Warm Gray grout from Lowes and I used this grout boost additive instead of water, it’s supposed to eliminate the need for sealing the grout. (Though I might seal it anyway because of the fireplace soot.)

DSC_0159

My panic arose from mixing too much grout at once (I wanted to make sure I had the right proportions since I was using that additive, but I should have just gone with my first gut instinct and mixed only half at a time.) and I got about as much grout on the rosin paper as I did in the seams.

DSC_0188-001

I learned that next time I need to pay more attention to my tile spacing and whether or not I should use sanded or unsanded grout.  But it all worked out! So well, that you can see I even took down the rosin paper from the fireplace!

DSC_0193-001

I’m tired, but excited to keep moving forward on this project. I’ve got more boring wall-work to do (I’ll save all these days worth of boring-ness for one post) and then on to the mantel. Woodworking is something I can handle. (I say that now…)

Friday, March 9, 2012

Cole’s Bunting

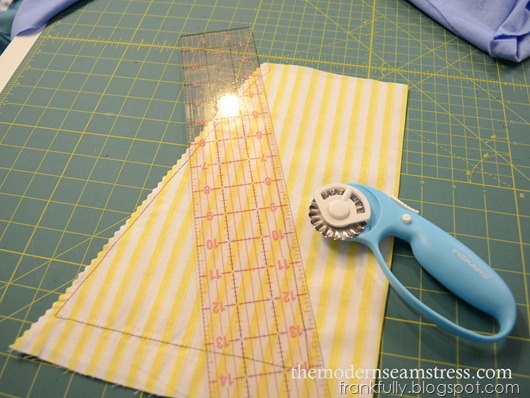
I’m over at the Modern Seamstress today, posting about how I made Cole’s cute little name bunting!

Head over there and check it out!

DSC_0017

Wednesday, March 7, 2012

Dyeing My New Favorite Sweatshirt

I love dyeing things. Inevitably, I find some sweater, top, t-shirt, or sweater in a style I love but there aren’t a lot of color options. Or I want to refresh/revamp a Goodwill find or a hand-me down. Or I realize just what a bad idea that white bathmat was.

So I dye it!

Here’s how I turned 3 gray sweatshirts into a gray sweatshirt, a turquoise sweatshirt, and a green sweatshirt!

DSC_0023

How to dye:

1. Start with your awesome garment/bathmat/whatever. Make sure it is mostly (60% or more) made of a fiber that will accept dye:  cotton, wool, silk, linen, ramie, rayon, or nylon. Know that blends will dye a lighter color than what’s on the box or bottle, and that different fibers/fabrics accept dye differently. (That’s one way of saying, be willing to just go with the flow when dyeing. I’ve never tried to perfectly match a color, so I’m already not setting myself up for disappointment!)

I got this awesome sweatshirt from Old Navy (of course it’s no longer available). I like it because it’s got a cute style, but it really is comfy like a sweatshirt. I actually got it in a heather navy color, and I loved it so much that I ordered the only other color, gray. But since it’s 60% cotton/40% polyester, I knew I could dye them! So I ordered 3 grays. (I actually also ordered another navy one to dye a black/gray!)

DSC_0035

2. I went to Jo-Ann’s and picked out my Rit dye colors. I chose Aquamarine and Apple Green (never mind the black – that’s for the navy sweatshirt). I’ve used both the box (dry powder) dye and liquid dye super successfully. The liquid just had the colors I wanted this time.

I totally just follow Rit’s directions for washing machine dyeing. I always use the washing machine method! (I’ve only ever done it in a top-loading washer.)  Anyway, the directions tell you to add a cup of salt to the dye bath, hence the salt.

DSC_0362

3. Before I started dyeing, I removed the buttons.  My sweatshirt is 60% cotton/40% polyester, so I knew they would dye a little lighter than the bottle. The cording on the buttons and loops looked like they were 100% cotton, so I knew they’d soak up the dye, and to its full brightness! I didn’t want them to look funny, and I wanted to keep the cute contrast, so I used a seam ripper to take them off, planning to sew them back on later. (Wood can accept dye also!)

It was tedious, but worth it!

2012-02-17 dyeing sweatshirts

DSC_0360-001

4. Then, I set my washer on the hottest temp that the fabric will allow. Hot water and cold rinse, and on the smallest load setting.

I thoroughly wet the sweatshirt to ensure even dyeing. I just used the water from the washing machine till it was soaked through. Then set the sweatshirt aside.

2012-02-17 dying sweatshirts

(A note about shrinking cotton: I learned in fashion school that cotton will only shrink so much over it’s lifetime, say 3%. So if you buy a new item, and shrink it to that max 3% immediately, it won’t shrink any more. We think our clothes shrink in the washer or dryer because they’re always shrinking a little each time till they reach that 3% mark. Does that make sense? So just shrink your sweatshirt (or whatever) right now as you dye it, and it will stay the same forevermore!)

5. Add a cup of salt to the washing machine.

DSC_0368

6. Pour in the dye.  I let it all agitate for a bit to mix the salt and dye in the water before I put in the sweatshirt.

DSC_0373

7. Then I put the sweatshirt in, and let it agitate.

HERE’S THE IMPORTANT PART: Whatever you’re dyeing has to remain in the dye bath for at least 30 minutes. Most washing machines have an agitate cycle of 10-14 minutes, so I set my cell phone stopwatch (what would we do without cell phones?) to 10 minutes or so, and kept going back to the washing machine to reset the agitate cycle 3 or 4 times, whatever it takes to keep the sweatshirt in there for 30+ minutes.

DSC_0375

8. I let the washer complete its cycle. It rinses and rings out the sweatshirt and voila!

2012-02-17 dyeing sweatshirts1

9. Because I was also doing a green one, I repeated the whole thing with the green dye, without washing the washing machine (ha) in between. I figured I didn’t mind if my green was a little aqua.

2012-02-17 dyeing sweatshirts2

10. To clean your washing machine of all this dye, just run a large load (the highest water level) with detergent and bleach. I just pour some of each in without measuring! :) And I wipe down any dye splatter with a rag soaked in bleach.

(Also, it’s up to you if you wash your sweatshirts again right now or just do it later.)

11. I dried the sweatshirts and sewed the buttons back on.

DSC_0392

I kind of had to finagle with my scissors to get the cording back into the little pockets.

DSC_0393

12. And woohoo!! 2 new sweatshirts! Now I’ve got 3 different colored sweatshirts to wear this early winter/spring!

DSC_0010

(My aqua/turquoise sweatshirt debuted in yesterday’s post with Baby Cole!) :)

Tuesday, March 6, 2012

Baby Presents in Action

It was so fun meeting little Cole! What a cutie!

DSC_0282-002

All wrapped up in his personalized blanket :)

The bunting blends perfectly with his Classic Pooh themed nursery.

DSC_0196-002

And “Mr Sanders” is the perfect complement to his espresso crib and 100 Aker Wood map :)

DSC_0221-001

Here’s a shot of me giving the little guy a taste of what life will be like with me and my camera! :)

DSC_0310-002

What a great weekend with family and a new little baby!

Thursday, March 1, 2012

Things I Love Thursday: New Baby Presents!

Not new baby-presents, but new-baby presents! I’m so happy for some of my favorite cousins who’ve just welcomed their first baby into the family! A little boy they named Cole!

We’re hoping to head down to their house soon to meet the little guy, but in the meantime, here are some gifts I’ve made for him!

(I’ll get better pictures of everything once it’s all installed around the baby or in his room!) :)

His name on a bunting:

DSC_0034

A Winnie-the-Pooh blanket to go with their nursery theme:

DSC_0042-1

A “Mr Sanders” vinyl decal for above the nursery door: (This is one I really can’t wait to see installed!!)

DSC_0007

And when I saw this fabric, I couldn’t pass it up for first-time parents! Run the edges through the serger  and call them receiving blankets!

DSC_0001

Making things for new babies is so fun!!!

Related Posts Plugin for WordPress, Blogger...