Showing posts with label gifts. Show all posts

Friday, March 1, 2013

Happy March!

I think everyone’s naming their post today “Happy March!”

Well, it IS happy! Spring is on its way and I can’t wait. I can’t wait to see if the things I planted in the fall will grow. (I also planted a lot of daffodil and crocus bulbs, as well as more wildflower seeds!)  Never mind all the snow that’s been falling today…

In the meantime, my little nephew, Cole, just turned one!  We’re going to head to his birthday party tomorrow, and I hope to get some cute pictures of him and all the things I’ve been creating for him. :)  I’ve been sharing some previews on Facebook, so here are a few more now.  His party is going to be sock monkey themed, so I made some shirts and bibs…

sock monkey t-shirt
(letters cut out on the Cricut. Fabric from here.)

sock monkey and bananas bib
(embroidery from here! I adjusted the smile and ears a little bit.) :)

And a big ol’ paper banner/bunting that says “Happy 1st Birthday Cole!” on it!  I printed it all out on the computer (thank you, Microsoft Publisher), then my amazing friend Jessica cut it all out and strung it on some jute twine for me.  It’s too big to take a picture of until we hang it at the party, but here’s a preview:

sock monkey happy birthday banner bunting

:) :) :)

I am so excited about it!

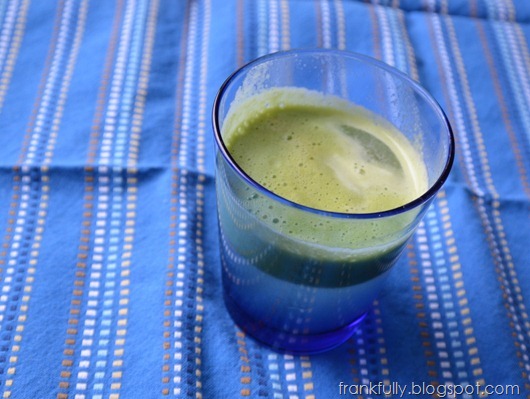
And “trying to be healthy” news, I bought a juicer on clearance at Aldi for $19.99.  I know there are nicer ones, but for the price, I couldn’t help but give this one a try…just to see how we like it.  I made my first glass of juice with a Granny Smith apple and a cucumber. It was pretty good! So, now I’m hoping to add fresh juice to our nutritional arsenal.

DSC_0174

Any juicing or baby-present making on your agenda? Are you excited for spring (even though it’s snowing?)

Thursday, February 14, 2013

Happy Valentine’s Day!

A little bit of love for and from one of my new favorite artists, Katie Daisy.

love

teach love

love more

Let’s all spread some love and teach some love! Today and every day.

Happy Valentine’s Day!

Sunday, December 23, 2012

“Lincoln” Name Art

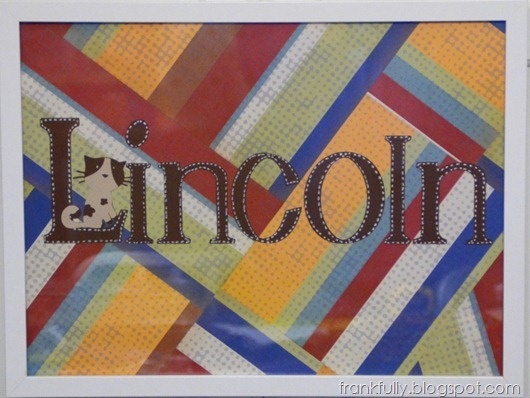
Thank you, Cricut, for helping me out with this project! It’s theoretically a simple one if you need a quick gift. (I say “theoretically” because you know these things never go as planned! But this one actually went pretty smoothly because I’ve been trying to learn my lesson and plan ahead.) :)

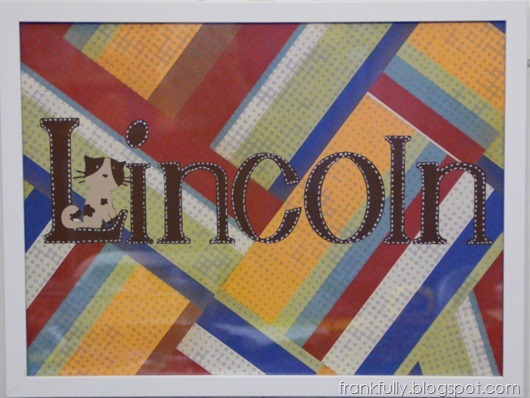
I used my Cricut to cut Lincoln’s name, placed it on some primary-colored background paper, and framed the whole thing! Cute name art for Lincoln’s nursery.

DSC_0129

When I make name art like this, the frame is almost always bigger than the paper I have to use as a background. In this case, the frame was roughly 11”x16” (or whatever size Ikea makes their frames) and the biggest paper I had was 12”x12”.  To make the background look purposeful and designed, I sort of cut up and pieced the paper back together in a new pattern (like quilting!).

piecing together background paper

I cut the letters out with my Gypsy and Cricut.

gypsy and cricut

I used the font on A Child’s Year. I love that it’s got an old school-book feel to it.  I also added a kitten from ZooBalloo. :)

a child's year font

One of the things I struggle with most when doing fun projects like this is making sure there’s enough contrast between the background and foreground, so I definitely try to test as much as I can (with dry-runs) before I start gluing things down!

I ended up using a white paint marker to draw on some “stitching” lines on the letters, just for fun.

white "stitching" lines

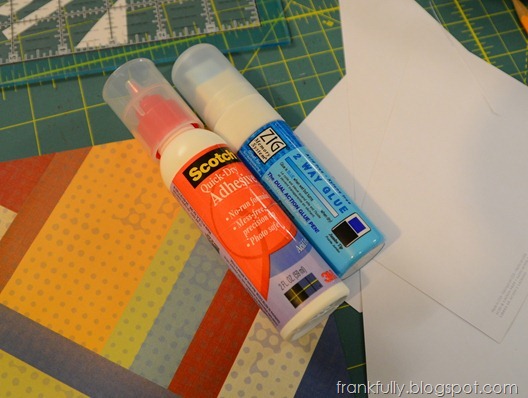
Speaking of glue, these are the two I use the most, and I’m pretty happy with them. Scotch Quick Dry Adhesive and Zig 2-Way Glue.

scotch quick dry adhesive and zig 2 way glue

Then I just added the kitten, popped the artwork in an Ikea Ribba frame, and voila!

DSC_0129

A couple of tips when using your Cricut(…that I did not follow when I made Lincoln’s alphabet bunting, leading to a less than stellar crafting experience.)

1.) Use a new mat and a new blade.  I know you don’t want to change these things out, and that they cost money, but trust me, it’s so worth doing. Cuts come out so much cleaner when the mat is nice and sticky and the blade is nice and sharp. (This is especially true for fabric, thick paper, and delicate paper.)

2.) Make notes as you use different materials.  There are a several different “cheat sheets” out there for cutting settings on your Cricut (I like this one and this one), but everyone is different, so it’s so helpful to make notes for yourself. I have a sticky note/label on my Cricut with settings for cardstock, fabric, regular paper, etc. (This is especially helpful when cutting different kinds of fabric! And something I didn’t do/wasn’t doing when I was making the bunting!)

3.) Size matters! The Cricut can cut just about anything, but shapes with more intricate details definitely cut out better at larger sizes. When I was doing the bunting, part of my problem was that I was trying to cut out some relatively complicated shapes in a small size and in fabric and without a new blade/mat combo. Just disaster! :) With this project, I knew I wanted to keep everything simple and large and it went very smoothly. :)

If you decide to try a cute gift-project like this, have fun! Share the details with me!

Saturday, December 22, 2012

Gifts for Lincoln

I realize it’s the home stretch here now for Christmas, and maybe it’s too late to order these things online, but I’m still posting some awesome books I found for my friend Janis’ little son, Lincoln. You might need some awesome kids books any time of year!

The Velveteen Rabbit

I found this set at Kohl’s, in their Kohl’s Cares for Kids section, where the proceeds to go charity. So it’s cute and you’re benefiting others when you buy! Win win.  Anyway, how cute, right? The Velveteen Rabbit and a velveteen rabbit. I couldn’t pass it up.

the velveteen rabbit

I think and hope that they’re still in the store, because I’d like to pick up another set or two before Christmas!

Paul Thurlby’s Alphabet

This was a Pinterest find! As soon as I saw some of the illustrations posted, I tracked down the book and couldn’t be happier!

paul thurlby's alphabet

Who wouldn’t get excited about their letters when they’re illustrated like this?

paul thurlby's alphabet

I found the book at Walmart.com where the dust jacket folds out into a poster with all the letters/pictures on it, that you could totally use to decorate your kid’s room! And it’s also on Amazon (but no poster).

ABCs from the Met

I found two different book of ABCs with pictures from the Metropolitan Museum of Art! How cool, right? Learning ABCs and getting some fine art exposure at the same time seems pretty awesome.  One’s a board book and one’s a hardcover.

museum ABCs

You’re never too young to start appreciating fine art, right?

I also got him a copy of Of Thee I Sing, which I’ve gushed over before, and made him some name art that I will post about tomorrow! 

In shopping for these books, I’ve also found quite a few more good ones that I’ve started collecting for his birthday, so I’ll post about those for you too! (Also, Janis, so you don’t buy them!) ;)

What good kids books have you found lately?

Tuesday, December 18, 2012

Gifts for Jessica

Yesterday was my dear friend Jessica’s birthday!

gifts for jessica

I thought I’d share what I got her, because I loved it all (and so did she!) and in case you need ideas for last-minute Christmas gifts or any kind of gift, birthday or other, all year long!

I’ve already posted about these Peace on Earth prints by Katie Daisy.  While on Etsy, I also found her this awesome Kenya print from an Indiana artist on Etsy :) since she’s been on several medical mission trips there.

artwork from sweetteashoppe and thewheatfield on etsy

(I actually framed 2 and gave her her choice of framing style.) :)

(Side note: I definitely bought this many frames at Ikea for my various Christmas gifts!)

lots of frames from ikea

(It’s a lot of frames, right?)

Because Jessica’s my craftiest friend, I also got her this awesome Pantone craft paint set from the Home Depot’s Black Friday sale. It’s so beautiful in its packaging! I wouldn’t even want to take the bottles out to use them! (But you have to, of course!)

pantone paint set

Isn’t it such a good gift set for a crafter? Gorgeous.

And in the top picture, you can see the little “Gift for You” card that Amazon lets you print out when you buy a magazine gift subscription. I told her she’s getting a few more years of House Beautiful whether she likes it or not.

But she said she likes it.

Got any other good gift ideas to share?

Thursday, December 6, 2012

Maligayang Pasko

I am so proud of myself for actually seeing a project through, start to finish, in a day. :)

Maligayang Pasko

“Maligayang Pasko” is how you say “Merry Christmas” in the Philippines!

When I saw these posts on House of Hepworths, I was totally inspired. I knew I could do something similar for Christmas.


First, I went to my Gypsy (for Cricut) and designed a “Maligayang Pasko” using mostly the Calligraphy Collection font but a little of Gypsy Font. (The “li” were in the Gypsy font, just so I could get the cursive layout how I wanted it.)

Maligayang Pasko on the Gypsy for Cricut

Since we’ve taken our fence down, we’ve got this pile of fence panels in the back yard. So I figured they would be perfect for this project.
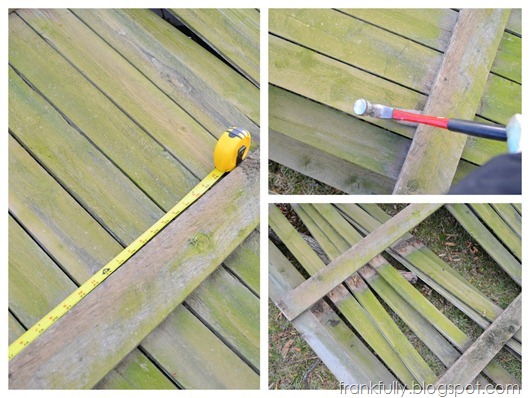
taking boards off a fence panel

I set my Gypsy/Cricut design for the largest cutting mat, 12”x24”, so I knew I wanted my sign to be bigger than that. I measured the boards of the fence panel and decided I needed about 9 (which was about 32”), so I took about 11 off the panel (just to be safe since some were cracking).  (I decided to make two signs, one for myself and one for someone special who has to wait till Christmas to get it!)

cutting the boards, attaching them back together

I decided to use the greenish, weathered sign, since it looked like it could be festive. :)

I cut each one of my boards to about 19.5” (a random measurement that looked good to me!).  I cheated by just cutting the boards around the sections with the nails in them (that were previously holding the fence together). (The nail-y scrap pieces went straight into the garbage/burn pile.) 

I found another scrap board in the back yard that I to cut to the width of my sign as a backer for all the fence pieces. I used 5/8” 18ga nails in the nail gun to attach the planks to the back boards. (I should have also used some glue. Oh well.) I put those little nails in the front and back of the wooden sign.  Once it was all together, I gave everything a quick sanding with some old 100 grit paper.

Then I collected some paint and stuff.

paint and spray glue

I cut the first “Maligayang Pasko” (on the Cricut) out of freezer paper (shiny side down). (I think posterboard or something would have been ideal, but I didn’t have a piece around that was big enough or a new cutting mat that was sticky enough.)  I sprayed some adhesive on the back of the cutout, then placed it onto my first set of boards. It was really sticky, which was good for my rough boards.  Then I sprayed the whole thing with several light coats of red spray paint.

Maligayang Pasko reverse stencil

When I peeled off the stencil, I was so happy with the results!

Maligayang Pasko sign in progress

But, as cool as this green looks in the picture, in real life, it wasn’t quite what I wanted yet, so I decided to brighten up the lettering with some white paint. I took a small artists brush and some oil-based white paint diluted with mineral spirits (so it would be a little thinner and slightly runny) to keep everything looking weathered and rustic. (Latex paint probably wouldn’t have stuck to the spray paint/rough boards as well.)
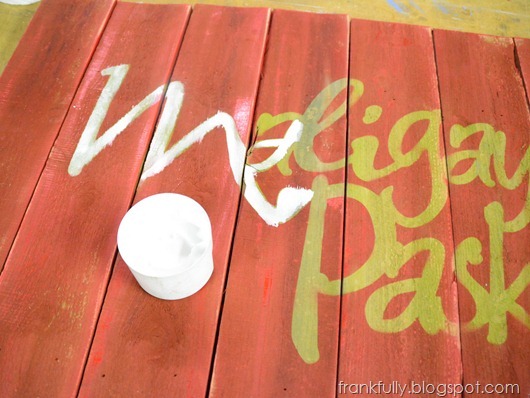
painting in the letters of the sign

For fun and added interest, I splattered a bit of white paint around, and spread some white paint on the edges with a  bunched up paper towel.
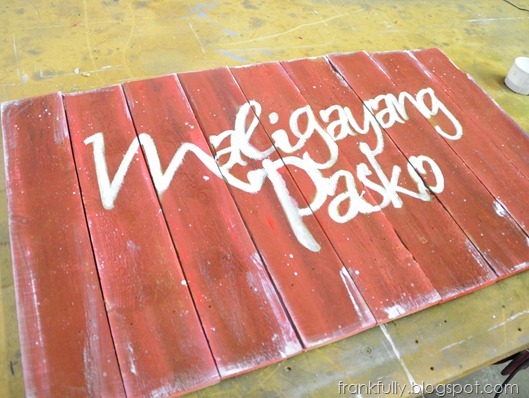
Maligayang Pasko

I was finally in love with the sign. I added to the weathered old look by running the sander with some old 100 grit paper lightly over the whole thing. Then I sprayed it all with some clear coat to seal everything in.  Doesn’t it look great?

Here it is again on the mantel!

DSC_0663-002

I made two signs, start to finish, in a day, and both were done completely with stuff I already had around the house. Woohoo for a completed and free project!

What do you think? Will you be trying a decorative sign made of old boards? :)

Monday, August 20, 2012

Janis’s Bunting Installed :)

Yay! The alphabet bunting that I was hoping to give Janis for her March baby shower has finally been delivered and installed in her nursery.

yay! the bunting is installed in Janis's nursery

I love how everything looks together! I love her espresso and white décor and how the bunting ties in perfectly with her awesome yellow lamp!

I will be posting more about the trials and tribulations of this huge project (and what took me so long!), but for now, I am so happy to stare at this great picture of everything put together. :)  I am so happy to have contributed more to Lincoln’s nursery.

I’ve mentioned this huge bunting project here and here.

Friday, July 13, 2012

A Home for my Boyfriend! (at a great price!)

I found a home for my boyfriend (that is, my camera)…and it’s a great deal now, so I had to share before I even got it.

It’s supposed to be a birthday present from Brandon, but totally I emailed him about this great price and told him to buy! buy! buy!

Here’s the camera bag I’m getting:

bbp dslr sling red 

It’s a BBP DSLR Sling bag…and right now on Amazon, it’s only $49.99!

The beige-zippered version is also available on Amazon…for $69.99. I thought that was a decent price till I saw the red one. Plus I love the red!

bbp dslr sling

I decided to like this bag because it’s a sling bag which seems like it’d be convenient on a day trip around a city (you wear it on your back, but it can easily swing to the front so you can access your gear), it’s super cool looking, especially compared to more ‘traditional’ camera bags, and most importantly, it has an iPad slot (or in my case, a netbook), so I can have a spot for my computer when I’m on-the-go.  I figure I might not carry the computer with me all day, but it’s nice to know it’s got a safe spot with my camera when I’m traveling.

I also looked at this site for lots of pictures and a review.

I’ll update you when I really have this bag and use it…to tell you if I end up loving it as much as I think I will. But I had to share today because it’s such a good deal and I want you to get one!! :) :) :)

Friday, March 9, 2012

Cole’s Bunting

I’m over at the Modern Seamstress today, posting about how I made Cole’s cute little name bunting!

Head over there and check it out!

DSC_0017

Tuesday, March 6, 2012

Baby Presents in Action

It was so fun meeting little Cole! What a cutie!

DSC_0282-002

All wrapped up in his personalized blanket :)

The bunting blends perfectly with his Classic Pooh themed nursery.

DSC_0196-002

And “Mr Sanders” is the perfect complement to his espresso crib and 100 Aker Wood map :)

DSC_0221-001

Here’s a shot of me giving the little guy a taste of what life will be like with me and my camera! :)

DSC_0310-002

What a great weekend with family and a new little baby!

Thursday, March 1, 2012

Things I Love Thursday: New Baby Presents!

Not new baby-presents, but new-baby presents! I’m so happy for some of my favorite cousins who’ve just welcomed their first baby into the family! A little boy they named Cole!

We’re hoping to head down to their house soon to meet the little guy, but in the meantime, here are some gifts I’ve made for him!

(I’ll get better pictures of everything once it’s all installed around the baby or in his room!) :)

His name on a bunting:

DSC_0034

A Winnie-the-Pooh blanket to go with their nursery theme:

DSC_0042-1

A “Mr Sanders” vinyl decal for above the nursery door: (This is one I really can’t wait to see installed!!)

DSC_0007

And when I saw this fabric, I couldn’t pass it up for first-time parents! Run the edges through the serger  and call them receiving blankets!

DSC_0001

Making things for new babies is so fun!!!

Related Posts Plugin for WordPress, Blogger...